Flex-a-Lite 52007 Camaro Radiator Kit Fits 1967-1969 First Generation Chevrolet Camaro User Manual
Page 2
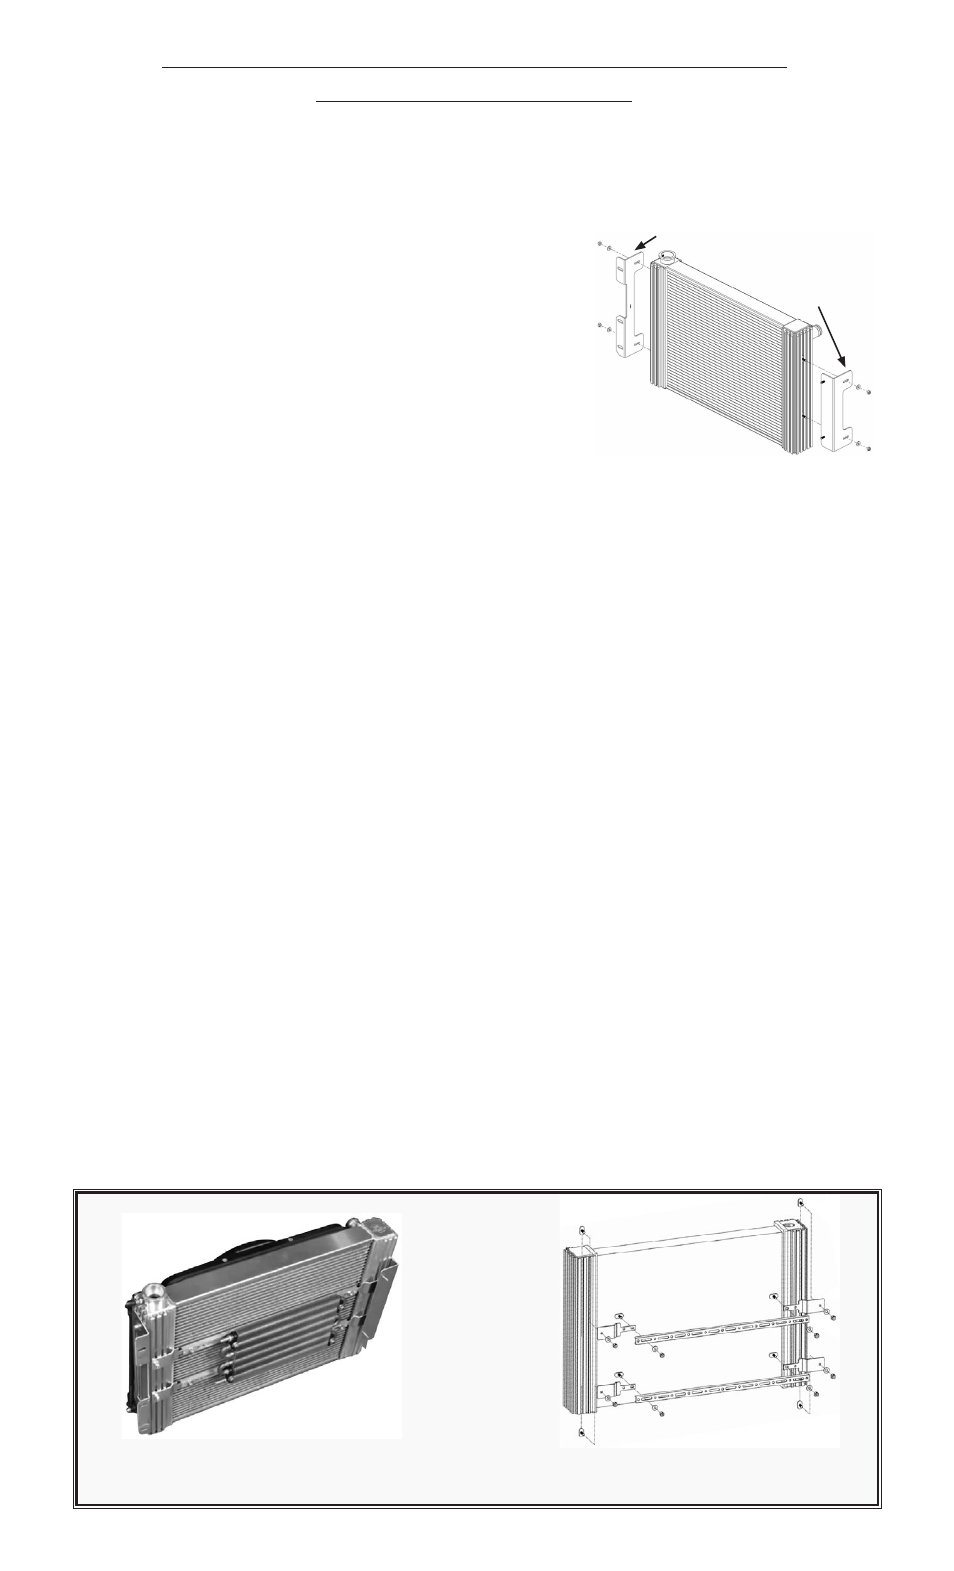
Utilizing the included T-nuts (4 ea.), washers (4 ea.), and Lock nuts (4 ea.), mount bracket #51871 to the
Driver’s side of the radiator; (studs should be pointing towards the front of the vehicle) and bracket #51872
to the Passenger’s side of the radiator. (the large cut out should
be toward battery)
see Detail 4
Once the brackets are attached, you will need to lower the ra-
diator into the engine compartment. It is easiest if you feed the
studs of Driver’s side bracket into the stock mounting points on
the front radiator support, then loosely secure with supplied 1”
fender washers and locknuts but do not tighten locknuts yet.
Using the stock bolts (3 ea.) you removed earlier during step
#11 of the “Removal” process, loosely secure the Passenger’s
side radiator bracket to the stock mounting points on the radiator
support.
Flex-a-Fit
®
radiator tanks are made for maximum adjustability.
Depending on space limitations within your engine compartment,
you will need to adjust bracket positioning by sliding the T-nuts
up / down or even select an alternate tank slot. Be sure all bracket mounting hardware has been sufficiently
tightened after proper positioning has been achieved.
Resecure the pulley to the water pump, using the four (4) bolts that held the fan to the water pump, then re-
install fan belt. If you’re replacing the radiator only, reattach the fan to water pump.
Note: Be sure to check
the clearance of these bolts on the backside of the pulley to the water pump. After tightened, there
should be no less than ¼” of clearance to the water pump. If they are too close, they may cause severe
damage to the water pump upon start-up. It may be necessary to replace these bolts with shorter ones.
Install the pipe-nipple for the overflow tube to the filler neck of the radiator. Route and trim the overflow hose
as needed. Note: Be sure that there is enough clearance of the hose to any moving engine components.
Connect the upper and lower radiator hoses to the radiator. Make sure they are properly clamped to the
inlet and outlet tubes. Note: BE SURE that all moving parts of the engine and electric fan are clear of each
other before proceeding!!
Fill radiator/ cooling system with vehicle manufacture recommended coolant. Remember to fill reservoir to
cold fill level if equiped.
Note: For automatic transmission equipped cars.
We chose not to install a transmission cooler within our radiator’s side tank. This maximizes the cooling efficiency
of both your engine and transmission. If you do have an automatic transmission, you will need to install an
aftermarket transmission cooler. Flex-a-lite makes a full line of transmission coolers along with customized
mounting options. The following FAL components are recommended to address your ’67 – 69” Camaro’s
transmission cooling needs.
FAL transmission cooler: pt. # 4116
FAL Accessory Bracket set: pt. #32122
FAL “GatorClips
®
” set: pt. #3909
For more mounting options, call Customer Assistance at: 1-877-767-0554 or FAX: (253) 922-0226.
1.
2.
3.
4.
5.
6.
7.
8.
•
•
•
Detail 4
Bracket #51871
Bracket #51872
Attach the
brackets as
shown above
#52187 with recomended
transmission cooler and
mounting hardware
Exploded view of Accessory
Bracket set: pt. # 32122
Rev. 02-09-11 99187 Page 2 of 4
Installation of Radiator and Fan Combo #52187
or Radiator only #52007