Flex-a-Lite 580 with out controls CJ Electric Fan Fits 1973-1986 6 & 8 cyl. User Manual
Installation instructions
Part #575 with controls
Part #580 with out controls
CJ Electric Fan
Custom Fits 1973-1986 6 & 8 cyl.
Installation Instructions
10-06-08 99751
Page 1 of 3
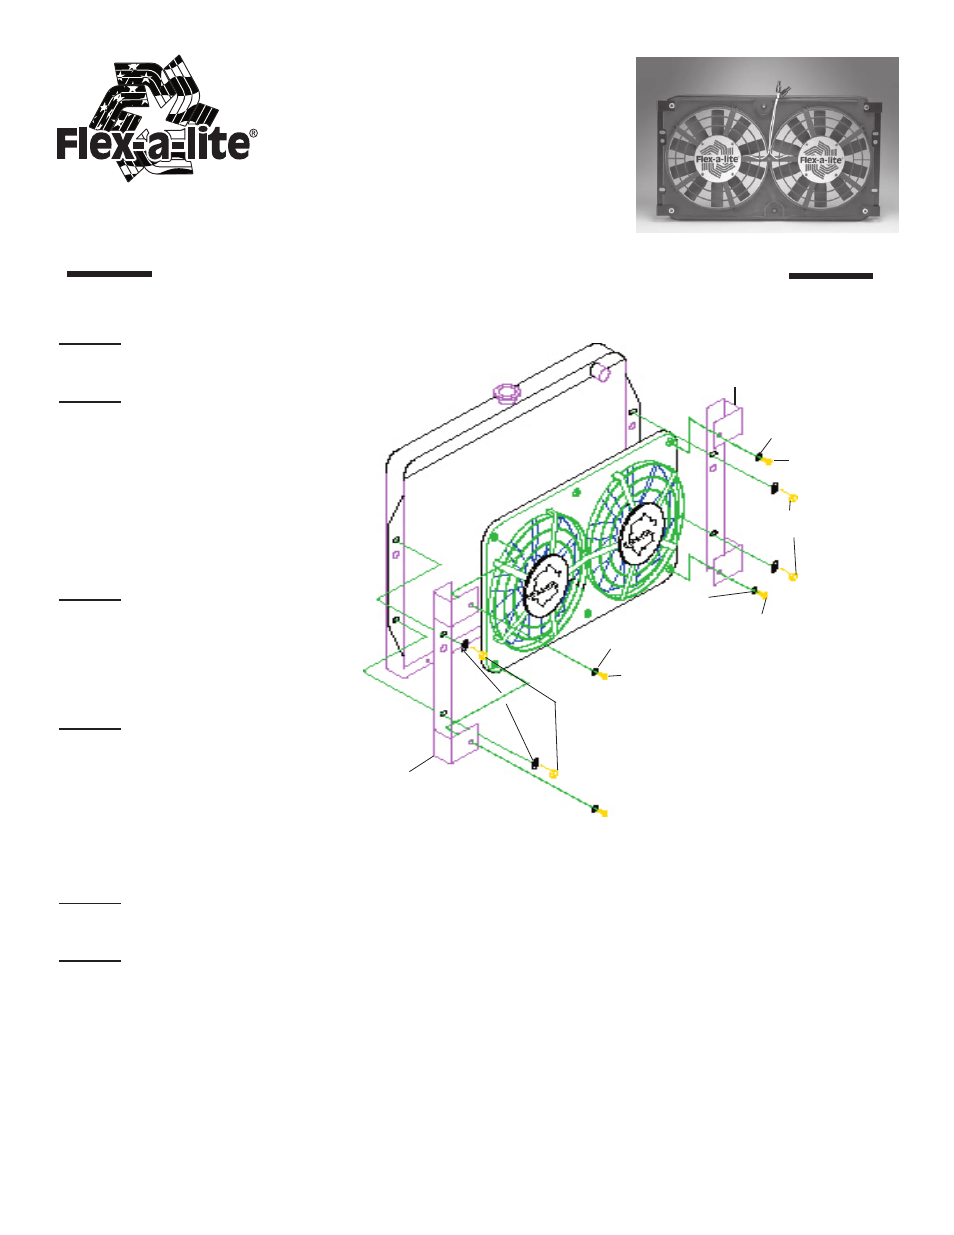
D
IAGRAM
A
Washer
Screw
Mounting Bolt
Radiator Channel
Mounting Bracket
Mounting Bracket
Mounting Bolt
Washer
Washer
Washer
Screw
Screw
Screw
(S
EE
D
IAGRAM
A)
Step 1: Remove the existing fan and
clutch assembly.
Step 2: Replace the bolts that mount-
ed the fan assembly to the pulley.
When reinstalling the bolts it may
be necessary to use washers to
‘shim’ out the bolt for clearance on
the back of the water pump drive.
Be sure to tighten these pulley
bolts.
Step 3: Remove the stock radiator
shroud assembly, be sure to save
the mounting bolts. These bolts
will be used to mount your new
Flex-a-lite fan.
Step 4: Attach the mounting brack-
ets to the Flex-a-lite fan shroud
with screws and washers pro-
vided. The end of the mounting
bracket with two holes should
be at the top of the shroud. (See
Diagram A)
Step 5: Lower the fan/bracket assembly into the engine bay, and attach to radiator using the
original shroud bolts.
Step 6: Check for clearance between the fan and any moving components within the engine
bay and make sure the fan blades turn freely and do not contact the radiator.
M
ANUAL
FAN
DISCONNECT
:
To turn off your fan before a water crossing or other reason, place a Flex-a-lite #31148 Manual Switch
between the ‘+’ terminal and the 12V source. This switch will turn the thermostat control to the fan off,
when the switch is off to prevent the fan from running automatically.
Make sure that you do not have a manual switch wired to the ‘M’ terminal and that the AC is off
or manual switch is turned off.