Flex-a-Lite 680 without controls Tacoma/4 Runner Electric Fan Fits 1995-2001 Tacoma & 1996-2001 4 Runner User Manual
Installation instructions
Part #675 with controls
Part #680 without controls
Tacoma/4 Runner
Electric Fan
Custom Fits 1995-2001 Tacoma & 1996-2001 4 Runner
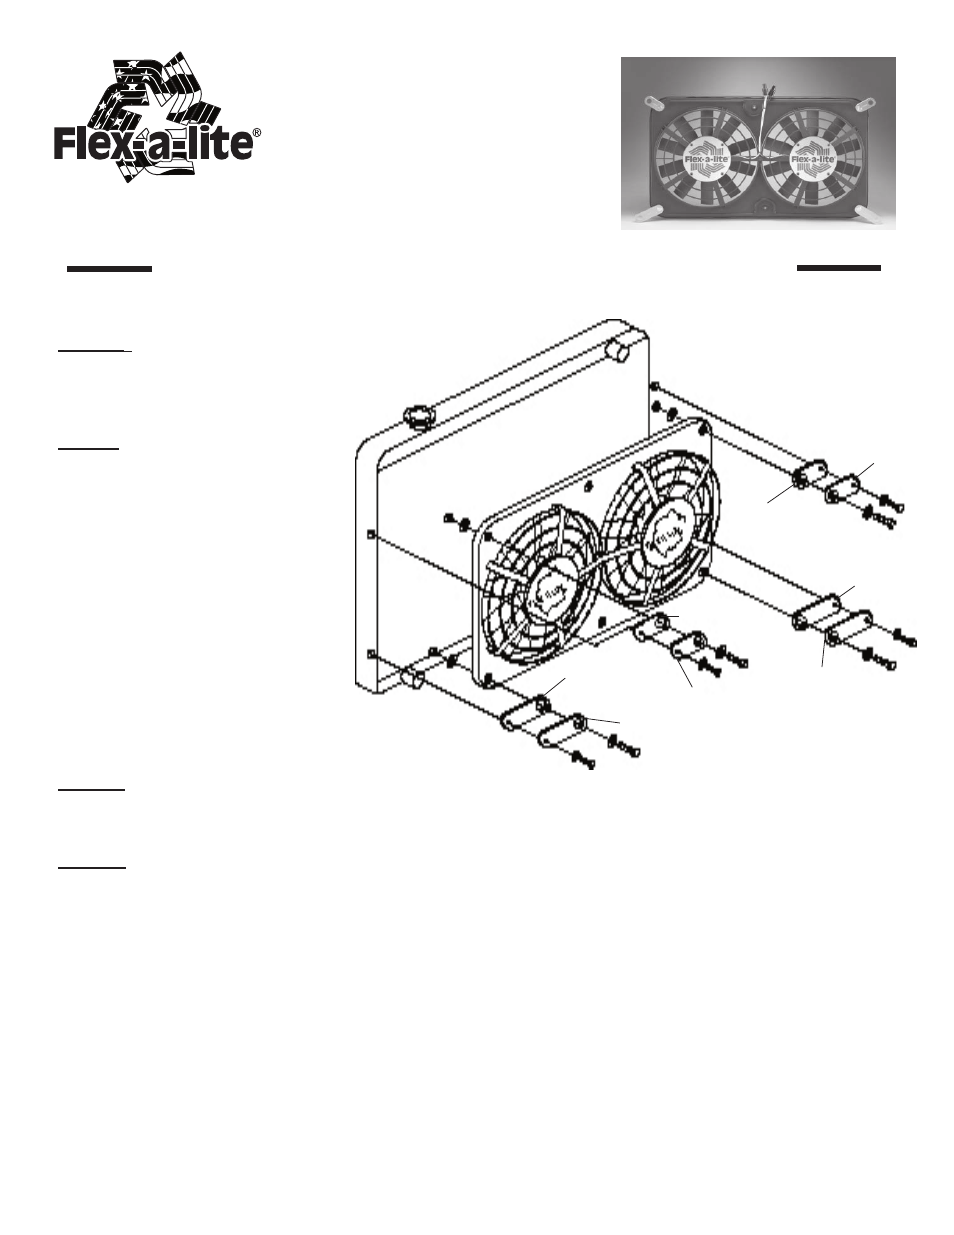
L
ONG
B
RACKET
L
ARGE
H
OLE
L
ONG
B
RACKET
S
MALL
H
OLE
L
ONG
B
RACKET
L
ARGE
H
OLE
L
ONG
B
RACKET
S
MALL
H
OLE
S
HORT
B
RACKET
S
MALL
H
OLE
S
HORT
B
RACKET
L
ARGE
H
OLE
S
HORT
B
RACKET
S
MALL
H
OLE
S
HORT
B
RACKET
L
ARGE
H
OLE
RADIA
TOR
DIAGRAM A
Installation Instructions
Do not use any other manual switch than Flex-a-lite # 31148. Damage to your electrical system may occur when
using switches other than Flex-a-lite #31148.
Manual fan disconnect: If you would like to be able to turn off your fan before a water crossing or
other reason, you can place a Flex-a-lite #31148 Manual Switch between the ‘+’ terminal and the 12V
source. This will switch the thermostat control to the fan off, when the switch is off. Which will prevent
the fan from running automatically. (You must make sure that you do not have a manual switch to the
‘M’ terminal or that your A/C is on). Or if so the manual switch is turned off.
10-06-08 99675
Page 1 of 3
Step 1: Remove the stock fan
shroud and clutch fan assembly.
Use existing bolts to secure the
pulley.
Step 2: Locate the brackets, four
long brackets and four short
brackets. The brackets have dif-
ferent size holes. Stack a short
bracket/ small hole, on top of a
short bracket/large hole. These
two brackets will then make up
the bracket at the top left corner
of the shroud. Mount this to the
shroud using ¼"x20 bolt and
washer with a nyloc nut pro-
vided. Tighten the bolt so that
the brackets can be rotated but
can not move up and down. A
similar bracket will go on the top
right hand side of the shroud.
Step 3: Using the long brackets, make up brackets
for the lower left and right hand side of the shroud.
Mount the brackets to the shroud with provided bolt/washer and nut.
Step 4: Locate the four 6mm bolts in the kit, these will be used to mount the fan to the radiator. The
brackets mount to the old shroud mounting points on the sides of the radiator. If possible, have some-
one hold the fan while you start the mounting bolts at the corners of the fan. Do not tighten down the
bolts until you have all four corners started. Then slowly tighten a little at each corner.
Before wiring the fans up check to see that the fan blades spin freely with out contacting the
radiator or other objects.