Flex-a-Lite 56484 Camaro Radiator and Fan Combo Fits 1982-1992 User Manual
Installation instructions
Camaro Radiator and Fan Combo #56484
Fits 1982-1992
INSTALLATION INSTRUCTIONS
REMOVAL OF EXISTING FAN AND SHROUD ASSEMBLY: NOTE:Your vehicle components may very
1. Make sure the engine is cool!
2. Disconnect negative (-) battery cable from battery.
3. Remove “Z” shaped air ducting between air filter canister and flexible air duct. Note: If your vehicle
comes equipped with a strait forward or other air ducting configuration, remove it. (see detail 1a)
4. Remove remaining flexible air duct attached to intake manifold. Remove intergraded tube leading to
passenger side valve cover. (see detail 1a)
5. Remove air ducting support bracket from top radiator bracket, and remove or detach Air Conditioning
(A/C) lines from shroud.
6. Pull A/C lines away from top of radiator and hold in place over motor; this gets the hoses out of the way
for better access. Tip: Try using long zip ties to secure loose objects in place as needed.
7. Remove electric fan or clutch fan at this time
8. Release wire loom from mounts on lower metal support bracket (supporting bottom radiator hose). Pull
bottom radiator hose out of bracket. (see detail 2)
9. Remove the bolts holding together the following items:
a. Power steering cooling lines.
b. Lower frame cross member.
c. Plastic bottom fan bracket. Note: You later will be reusing metal support bracket, plastic bottom
fan bracket and bolts during new radiator/ electric fan installation. (see detail 7)
14. Remove radiator cap and drain radiator; drain valve on passenger side at bottom.
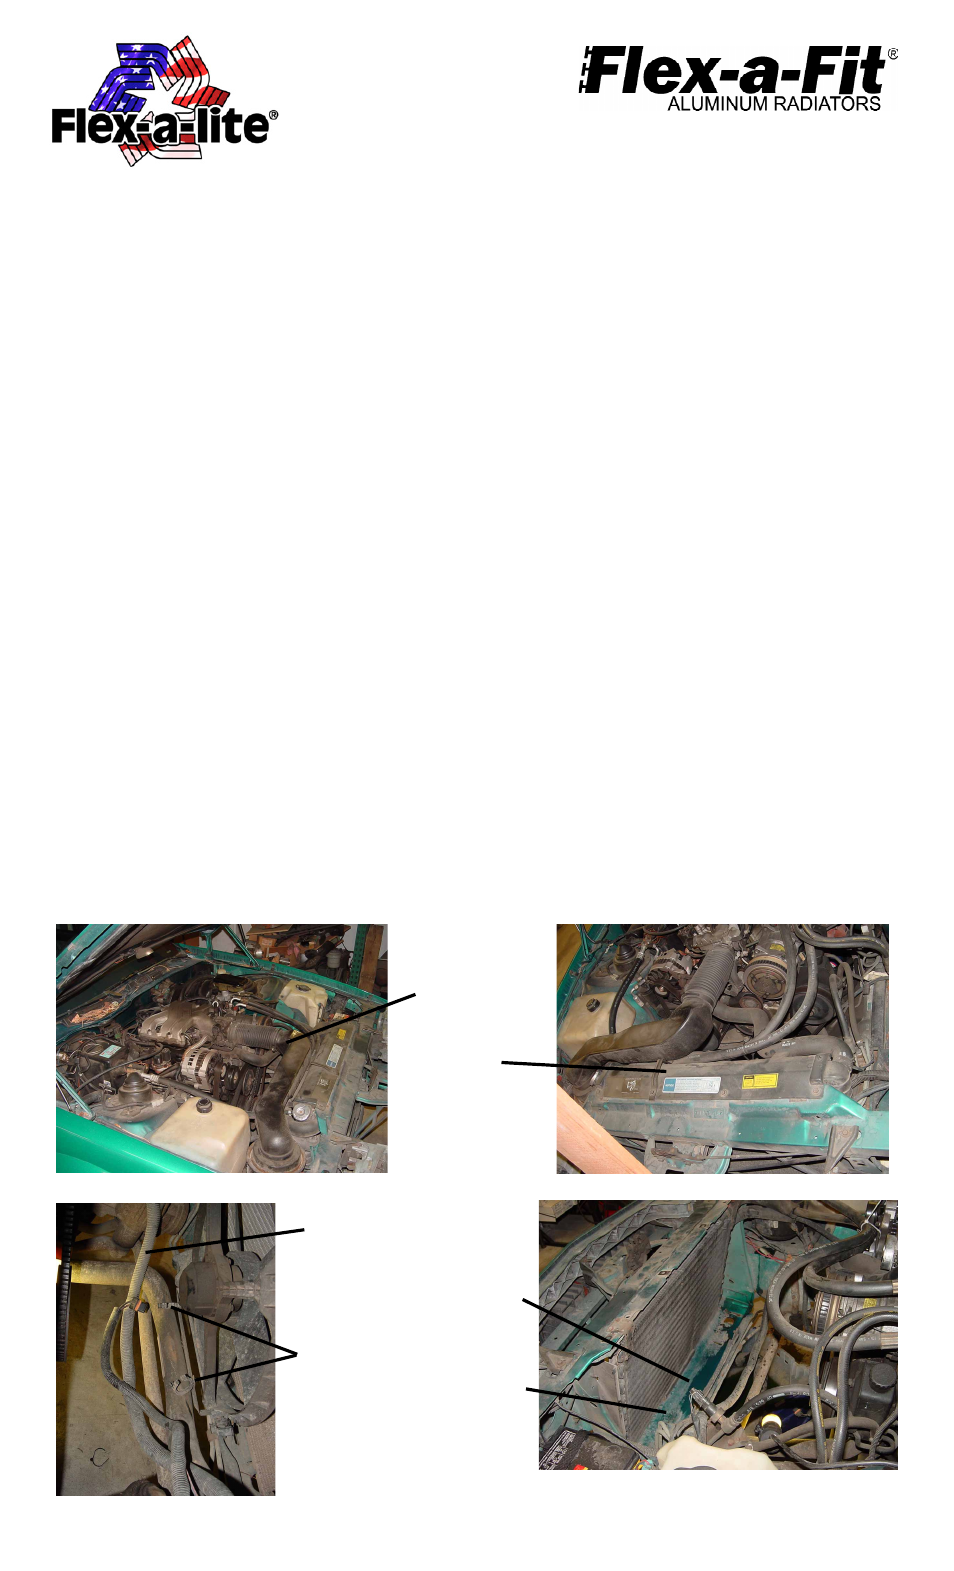
Flexible air duct
(Detail 1a)
Top radiator bracket
(Detail 1b)
Rev. 09-14-09
#99484 Page 1 of 5
(Detail 2)
Wire loom
mounts
Wire loom
15. Disconnect the following:
a. Overflow hose leading to coolant reservoir.
b. Bottom radiator hose from radiator and let remaining coolant drain.
c. Top radiator hose from radiator.
16. Remove the bolts (4) securing top radiator bracket to top cross member and top of radiator. Note: Save
the bolts to be reused later. (see detail 1b on page 1)
17. Pull the original radiator up & out from the engine compartment then set it aside. (see detail 3)
18. Clean out any debris (leaves, bugs, dirt, coolant) from bottom cross member where original radiator use
to rest.
(Detail 3)
Showing lower
cross member w/
radiator removed
Clean debris
from this space