BMR Suspension TAS002 User Manual
Page 6
6
(CONTINUED)
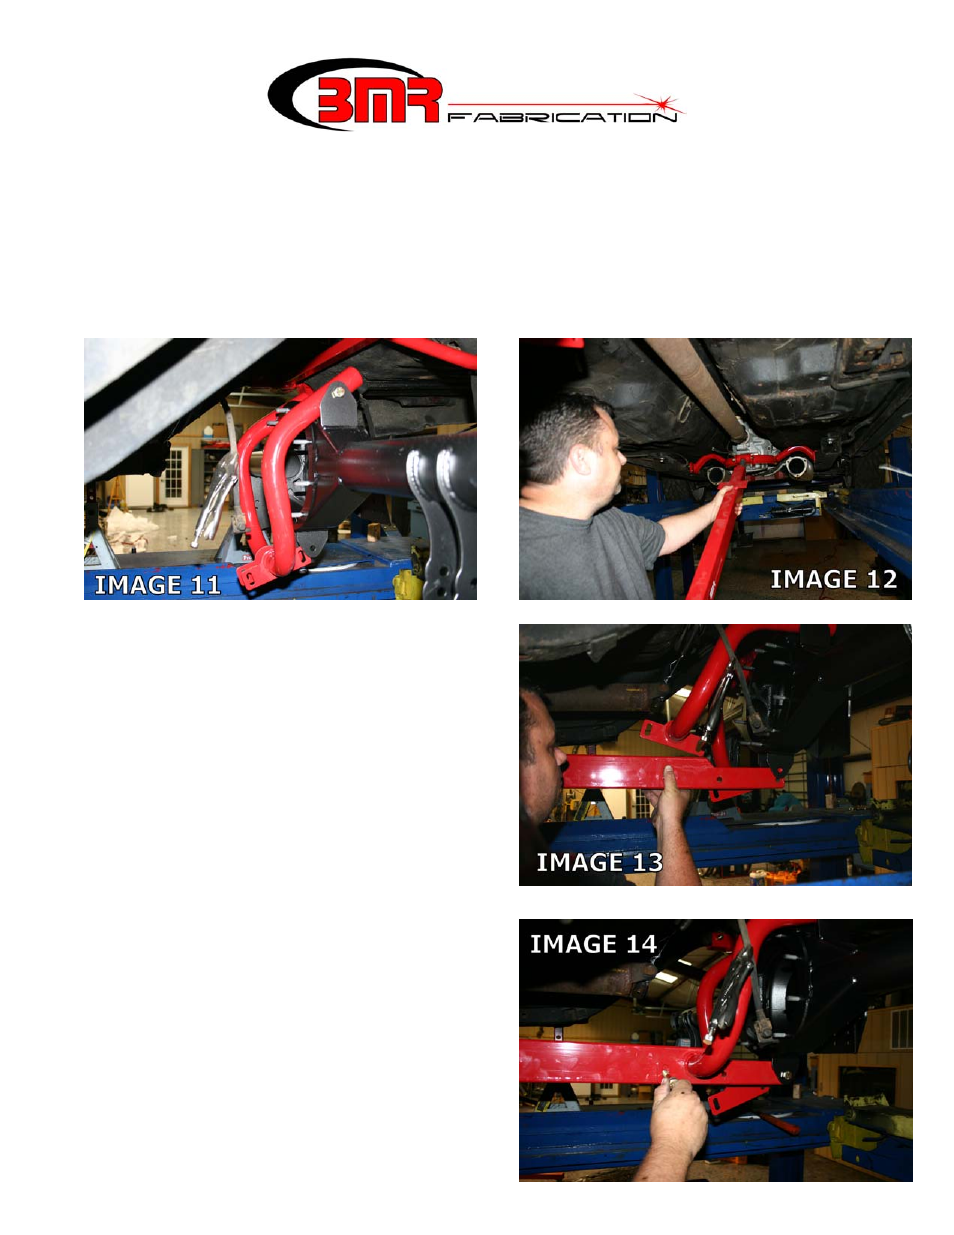
32. Install the Upper Torque Arm braces onto the BMR 9” axle housing as shown in Image
11. This requires two ½ x 3.75” bolts, nuts and stainless washers. Place the washer
under the nut side and leave the nuts finger tight.
33. Position the front of the torque arm into the mount on the BMR transmission cross-
member and insert the provided ½” x 4” bolt. Thread a stainless washer and nut onto the
exposed threads and tighten to 80 ft/lbs. (Image 12)
34.
35.
36.
37.
38.
39.
40.
41.
42.
34. Lift the rear of the torque arm and connect it
to the lower mount of the BMR 9” axle
housing using one of the provided ½” x
3.25” bolts, nuts, & stainless washer. Leave
bolts finger tight. (Image 13)
35. Position the upper torque arm mounts onto
the torque arm and line up the mounting
holes as in Image 13 above. Insert the two
provided ½” x 3.25” bolts, nuts, and (4)
large diameter washers, positioning one
washer on each side. The two mounting
plates should “sandwich” the torque arm
between them. Leave all bolts finger tight.
(Image 14)