Setting up the hp ps1810-24g switch (optional), Mounting the switch with the server, Connecting the server to the switch – HP ProLiant DL320e Gen8 v2-Server User Manual
Page 30
Setup 30
Setting up the HP PS1810-24G Switch (optional)
If you intend to use the server with the companion HP PS1810-24G Switch, follow the procedures in this
section.
For more information on switch-related settings and operational procedures, see the documentation for your
switch model on the HP website
Mounting the switch with the server
Mount the switch in a rack, on a wall, or on top of or under a horizontal surface. For detailed instructions, see
the HP PS1810-24G Switch Quick Setup Guide.
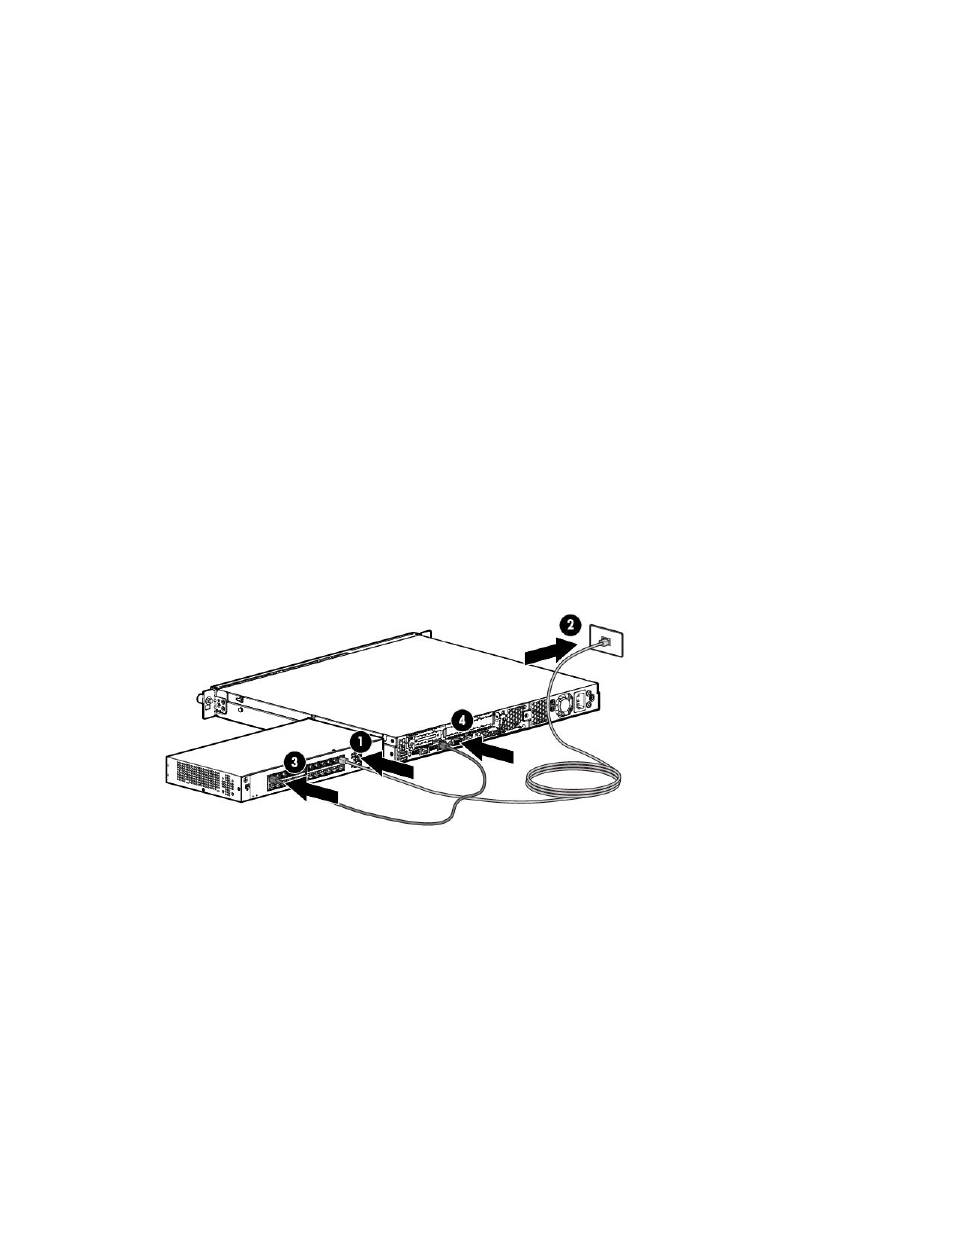
Connecting the server to the switch
You can connect the server to the switch through the following methods:
•
A simple Ethernet connection with no iLO functionality
•
An Ethernet connection with iLO functionality, using the dedicated iLO 4 connector
•
An Ethernet connection with iLO functionality, using the shared iLO 4 connector
To establish a simple Ethernet connection:
1.
Connect an Ethernet cable to the switch, and then connect the cable to a network jack.
2.
Connect an Ethernet cable to the server NIC connector 1 or 2.
3.
Connect the cable to any switch network port.
To establish an Ethernet connection with iLO functionality by using the dedicated iLO connector:
1.
Connect an Ethernet cable to the switch, and then connect the cable to a network jack.