Removable drives, Replacing a removable drive, Overview – HP StorageWorks DLT VS80 Tape Drive User Manual
Page 13: Removing a drive, Replacing a drive
removable drives
hp learning products
may have a later version
data protection
the front and rear
panel lights
replacing a removable drive
contents of this section
overview
HP Surestore DLT VS80 removable drives can be removed and replaced without
powering down the tape array
and without interrupting operations to the other
drives in the array, providing they are not on the same SCSI bus.
If all drives in the tape array are powered up when the system is turned on, the
host will be aware of those drives. You can remove any of those drives and
replace it with another drive.
If a drive is not powered up or you place a drive in an empty slot after the system
has been powered up, the system will have to be reset before the host will
recognize the drive.
Removable drives allow modules to be replaced while powered up as long as no
data is being transmitted from the system to the module or to any other module
daisy-chained on the same SCSI bus (off-line hot-swap). The SCSI IDs are
controlled by the tape array, not by the drives themselves, so if you remove a
drive and replace it with another the ID will not change.
If your system is running HPUX, you should be aware of the following when
removing a drive:
●
In Berkeley mode, the tape position will remain unchanged by a device
close operation
●
In AT&T mode, a device close operation will cause the tape to be
repositioned just after the next tape filemark (the start of the next file).
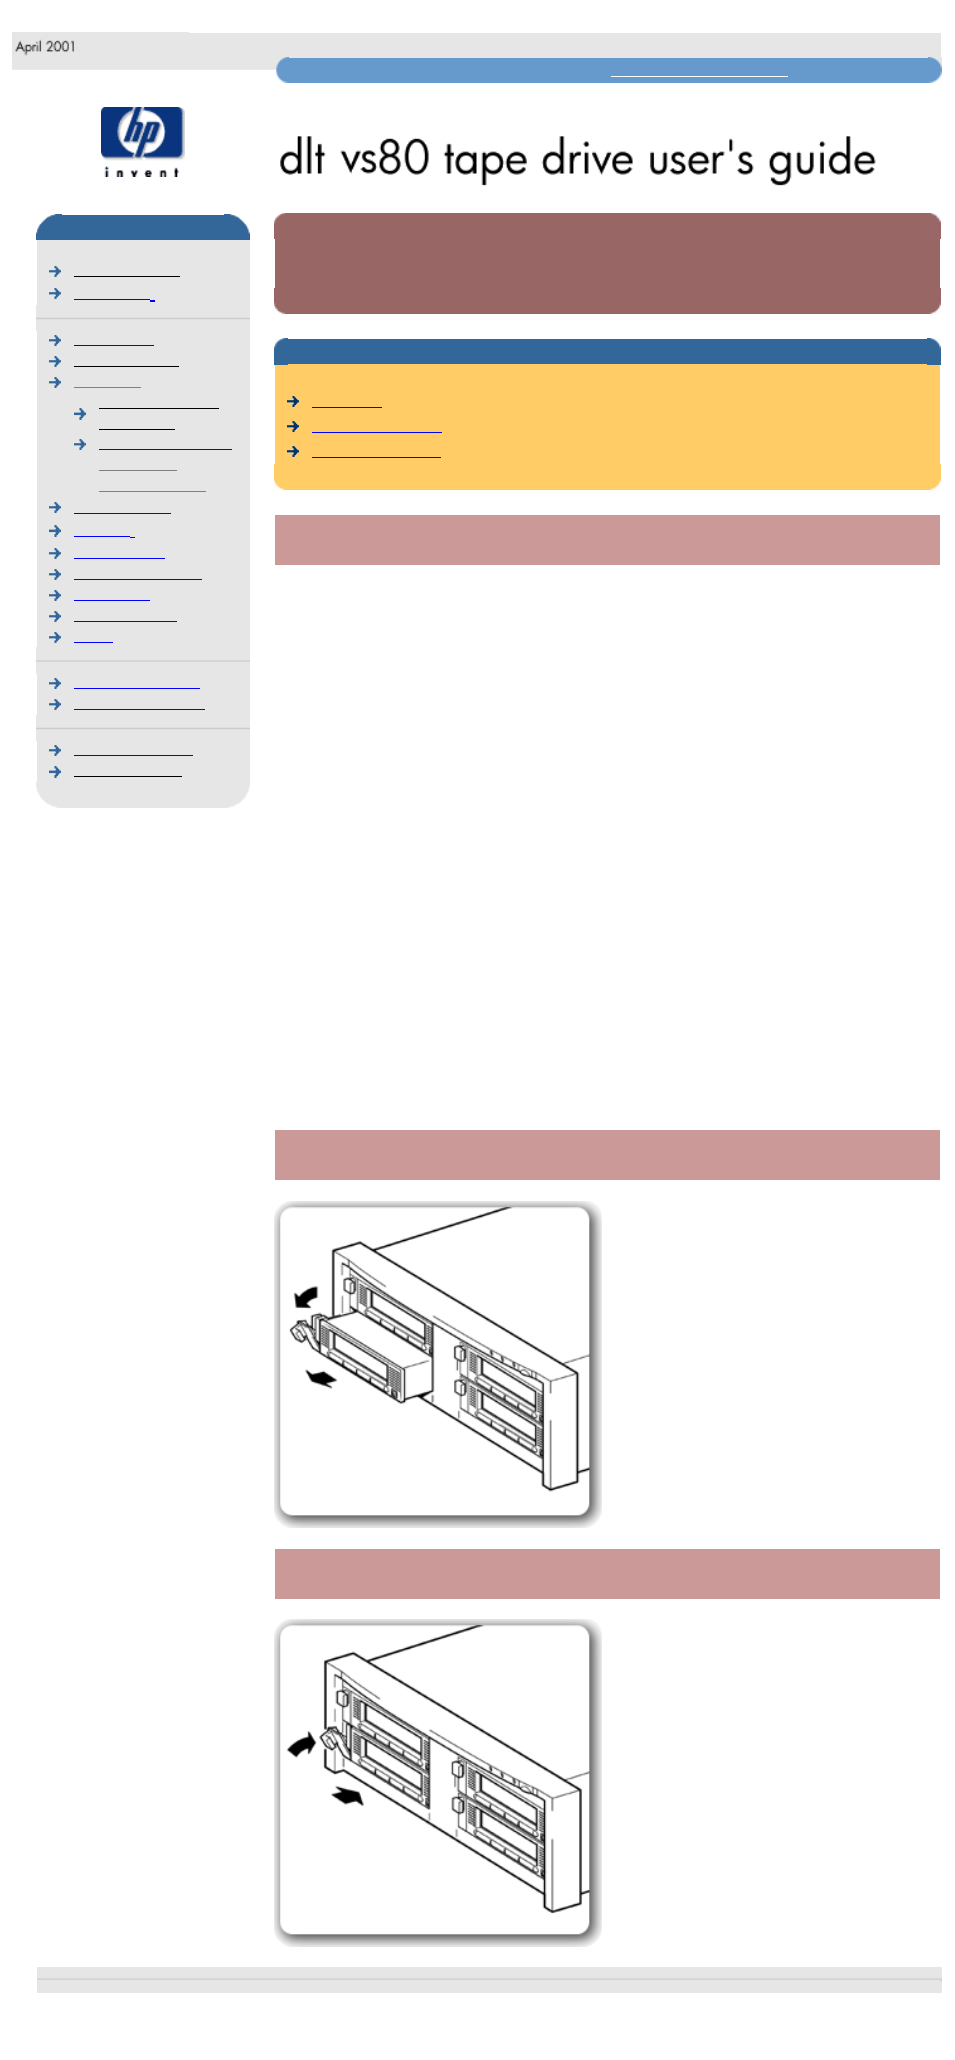
removing a drive
1. Pull the extraction lever of the drive
that you want to replace so that it is in
the out position.
2. Using the extraction lever, pull the
drive carefully and firmly out of the tape
array.
replacing a drive
1. Ensure that the extractor lever on the
drive is in the out position, as shown in
the picture.
2. Lift the drive carefully.
3. Align the rear of the drive with the
guides on the side of the HP Surestore
Tape Array 5300.
4. Slide the drive along the guides until
the connectors on the back mate with
the connectors at the back of the
enclosure.
5. Push the extractor lever in until it locks
the drive in position.
© 2001, Hewlett-Packard Company
file:///C|/Documents%20and%20Settings/topher.COL-SPRINGS/Desktop/dltvs80%20manual/document/dltvs80/user/reseller/eng/remdrv.htm [11/29/2001 8:33:54 AM]