Replace the front panel – HP Scanjet Enterprise 7500 Flatbed Scanner User Manual
Page 35
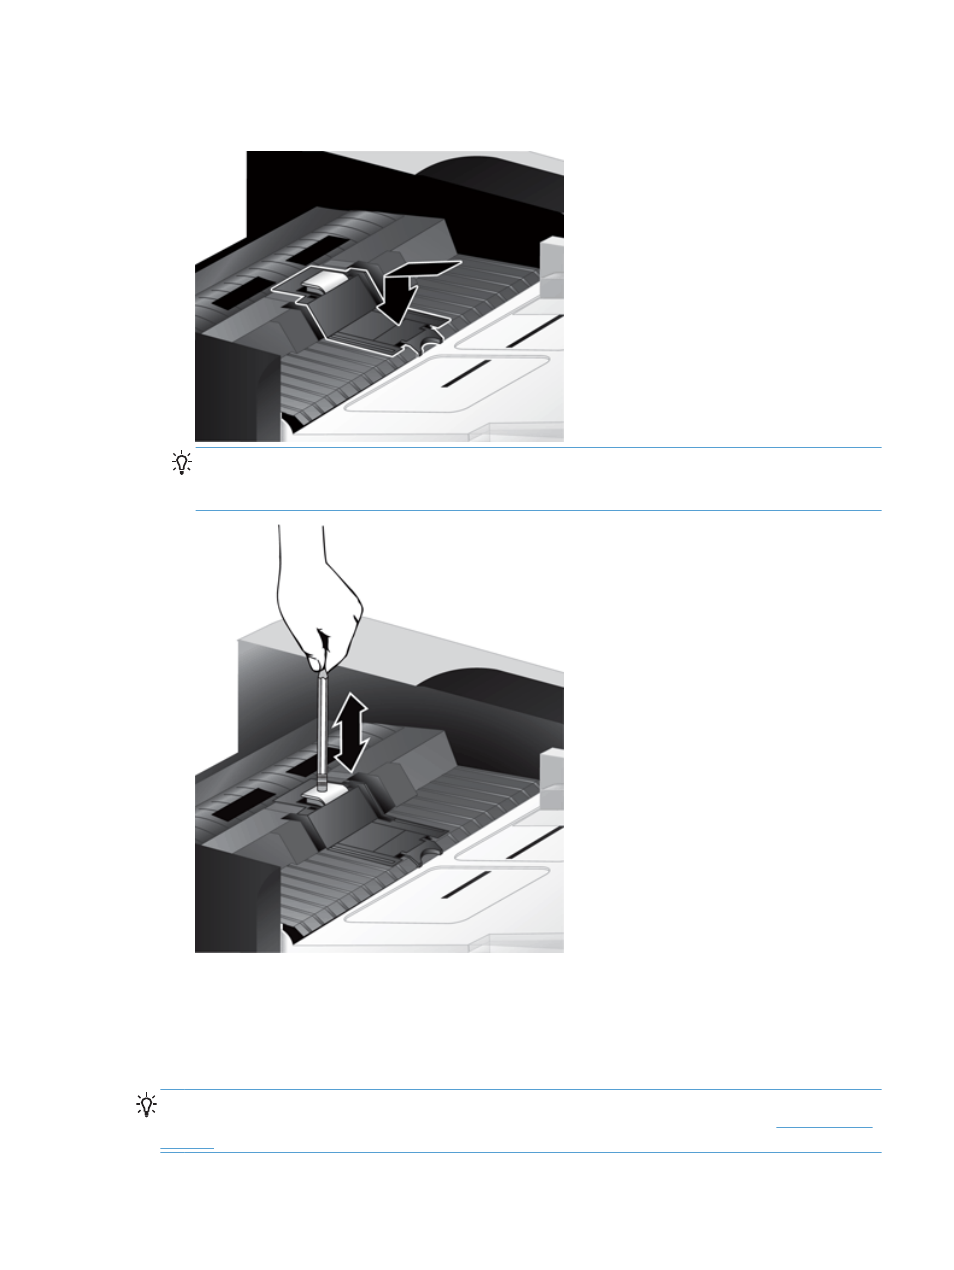
6.
Press down on the front portion of the separation pad component until you hear an audible click,
indicating that the pad is seated firmly.
TIP:
Taking care not to touch the pad with bare fingers, press down on the pad and then
release, ensuring that the pad springs back up. This indicates that the spring below the pad is
positioned correctly.
7.
Close the ADF hatch, reconnect the USB cable and power supply to the scanner, and then turn
on the scanner.
Replace the front panel
TIP:
The scanner software CD which came with your product includes an animation which guides
you through removing and replacing the front panel. This animation is also available
.
ENWW
Replace the front panel
29
This manual is related to the following products: