Moving a point – Brother Innov-is V5 User Manual
Page 175
ENTERING STITCH DATA
MY C
U
ST
O
M
ST
IT
C
H
Sewing S-107
S
4
f
Use
to move
to the second point
and press
.
g
Repeat the steps above for each point that
you have drawn on the grid sheet until the
stitch design is drawn on the screen as a
continuous line.
*
Press
to delete a selected point entered.
*
Press
to sew a test-run of the stitch.
*
Press
to return to the original screen.
*
Press
to view an image of the stitch.
■ Moving a Point
a
Press
or
to move
to the point
that you want to move.
*
To move
to the first point, press
.
*
To move
to the last point, press
.
*
You can also move
by using the touch pen.
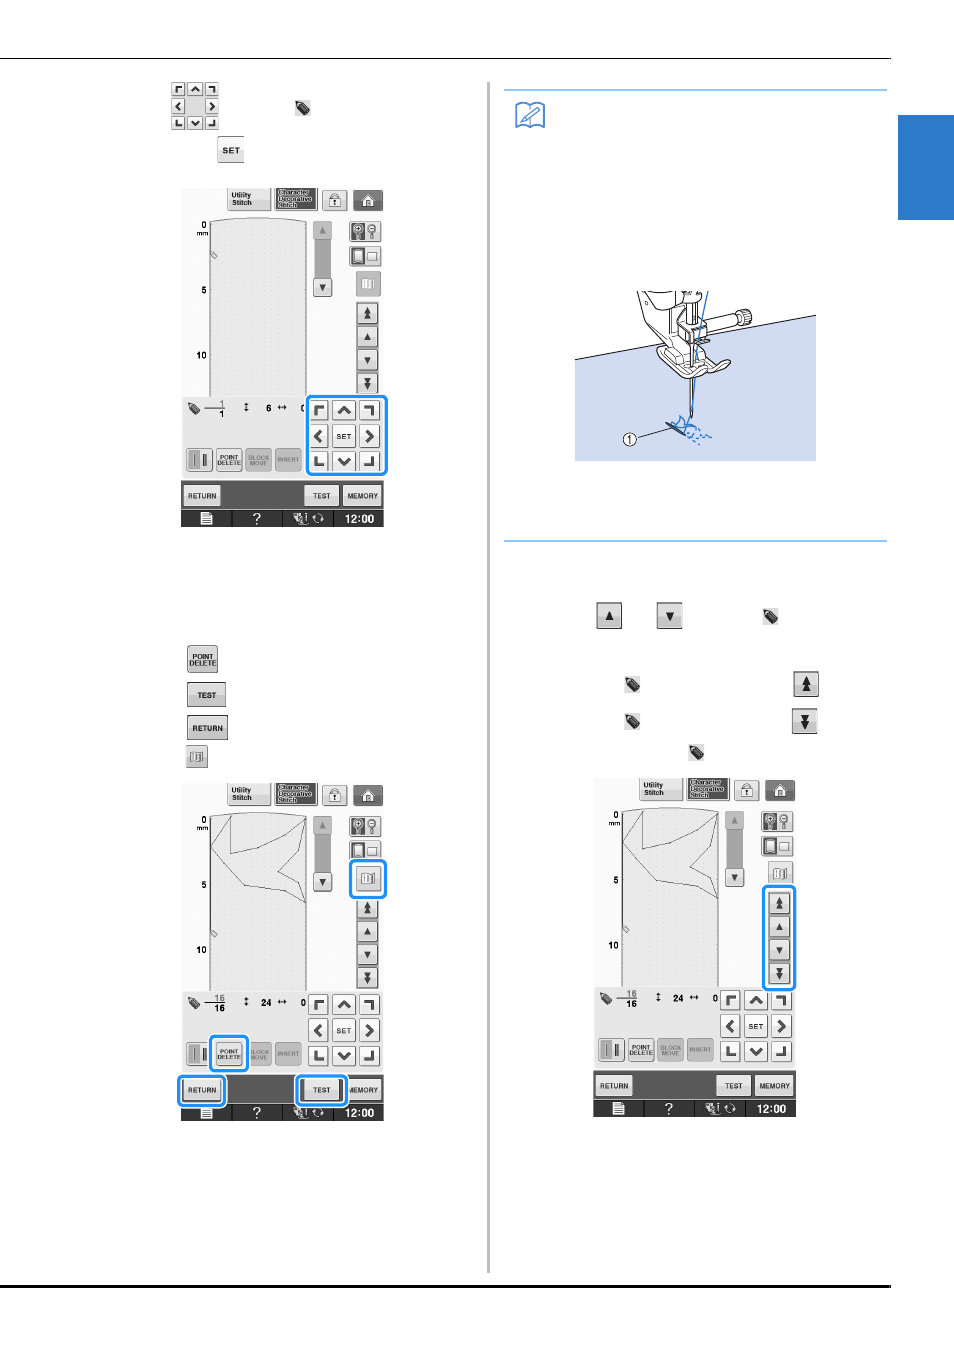
Memo
• If you have entered points that are too close
together, the fabric may not feed properly.
Edit the stitch data to leave a larger space
between points.
• If the stitch design is to be repeated and
linked, make sure that linking stitches are
added so that the stitch designs will not
overlap.
a Linking stitches
• You can touch on the grid sheet to set the
point, or you can also use a USB mouse.