Caution, En - 26, By pressing mode/peak select cal – HT instruments М75 User Manual
Page 28: Press go to start the calibration procedure

M72 - M73 - M74 - M75
EN - 26
1. By pressing MODE/PEAK select CAL
2. Any addition or replacement of cables, extensions and croco clips nullify the previous
calibration and make necessary a new calibration before performing further
measurements. Therefore the instrument must be calibrated in the same conditions at
which it will operate during measurements
3. Short-circuit the cable ends with each other as shown in Fig. 10 making sure that the
metallic parts of test probes and crocodiles are in good touch
4. Press GO to start the calibration procedure
CAUTION
The message “Measuring” on the display means that the instrument is
measuring. During this phase never disconnect test leads.
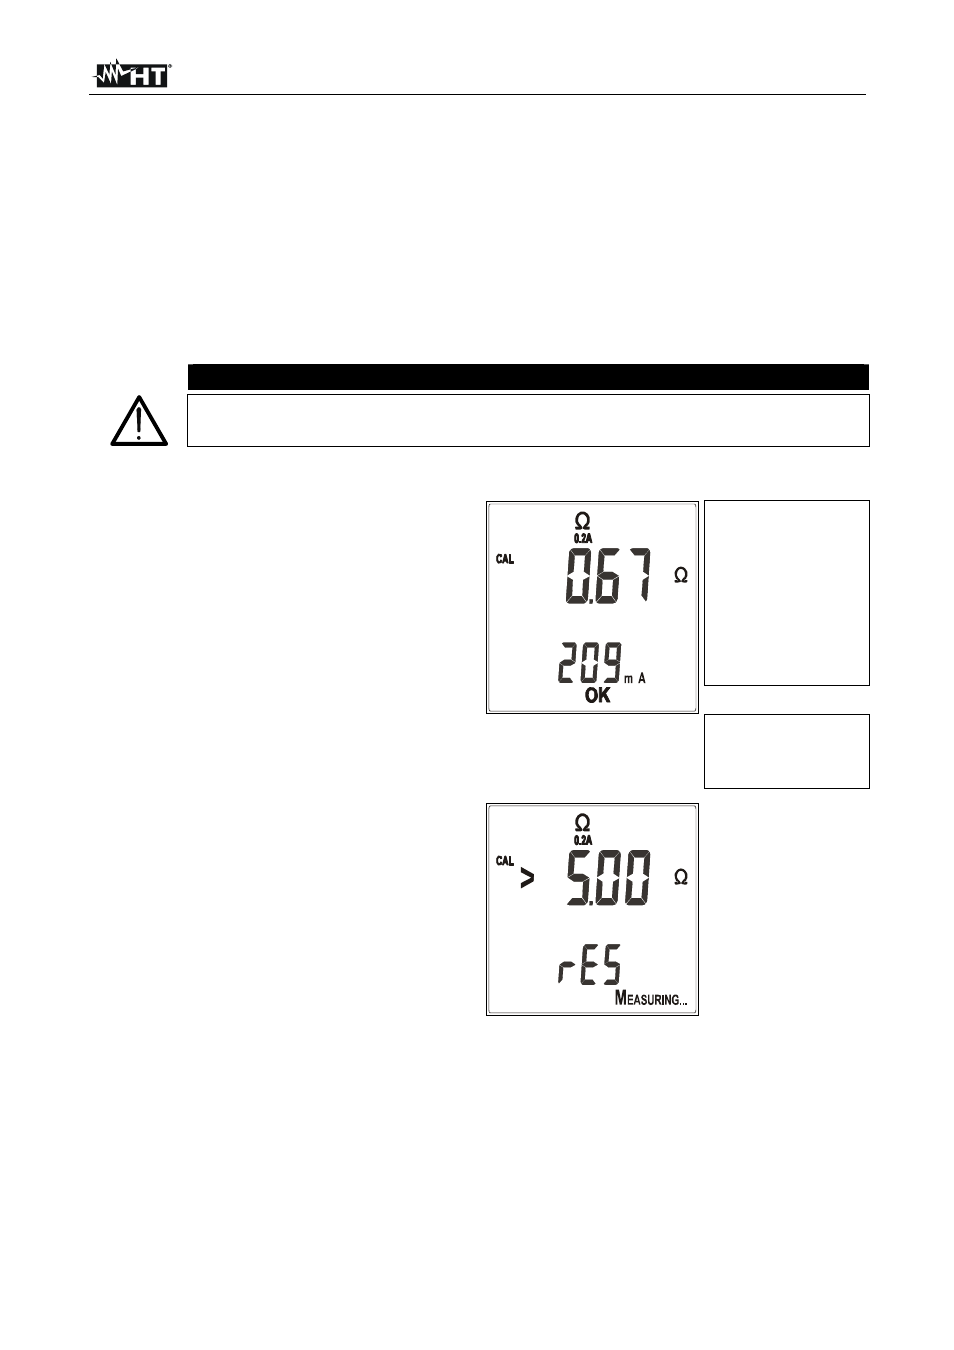
5. The instrument performs the calibration of cables with resistance lower than 5
6. At the end of the test the measured
value is stored by the instrument and
used as OFFSET, which means it’s
deducted from all continuity tests
performed) for all further measurements
until a new calibration is made.
The instrument emits a double sound to
signal the positive outcome of the
calibration procedure and displays a
screen similar to this for 2 seconds.
Then, the default screen corresponding
to the
0.2A test is displayed
CAL message:
it means that the
instrument has been
calibrated. This
symbol remains
displayed during any
further measurement
even in case the
instrument is turned
off and on
Current supplied by
the instrument during
calibration procedure
7. If the value measured during the
calibration phase is higher than 5
the
instrument interruptus the calibration,
removes the offset value previously
stored and does not display the CAL
symbol until the next positive calibration.
The instrument emits a prolonged sound
to signal the negative outcome of the
calibration and displays a screen similar
to this for 2 seconds. Then, the default
screen related to the
0.2A test is
displayed. This method can be used to
nullify the last calibration performed
