Modem settings – Fire-Lite PS-Tools 5UD/10UD User Manual
Page 68
PS-Tools User Guide
5/10 Zone Panel
PS-Tools 07/2010
59
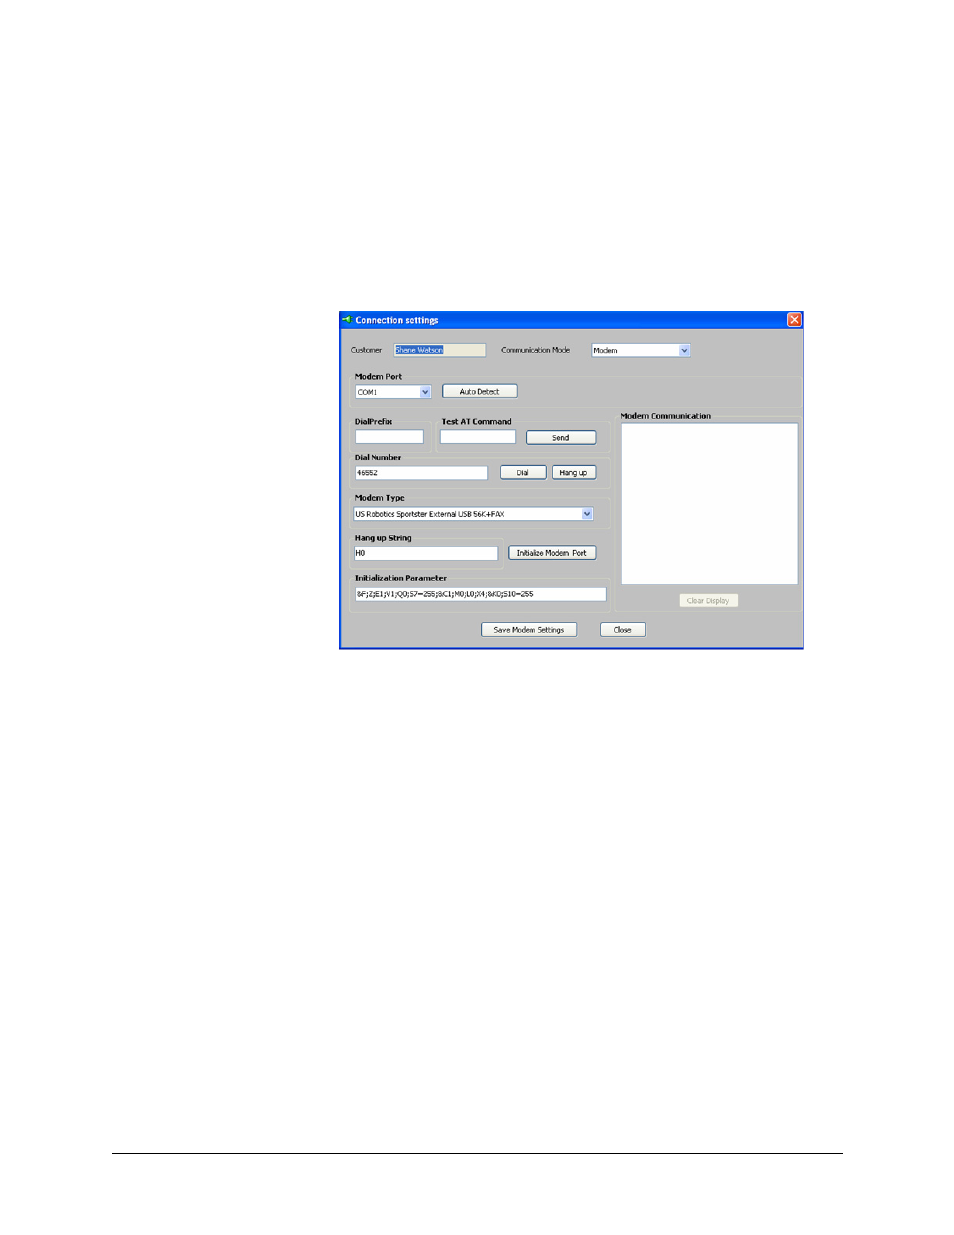
Modem Settings
To view the modem settings
1.
Using the Find option, select the customer for whom the connection settings needs to be
viewed.
2.
Click Upload/Download > Connection Settings in the initial customer screen in PS-Tools.
The Connection Settings dialog box appears.
3.
In Communication Mode, select Modem. The information to view/modify the modem
settings appears in the Connection Settings dialog box.
4.
In Modem Port, select the port to connect the computer to the modem.
5.
Click AutoDetect to detect any modem, attached to the system. The details of the attached
modem (if any) are displayed in Modem Communication.
6.
Click Clear Display to clear the displayed data if there are multiple lines of data to scroll
through in Modem Communication.
7.
Enter the DialPrefix, which is a number added before the Dial Number.
8.
Enter a test string in Test AT Command, and then click Send to check the modem
connection.
9.
Enter the Dial Number, and then click Dial to connect to the fire panel.
10. Click Hangup to end the connection.
11. Select the Modem Type from the list. Based on the selected modem type, the Initialization
Parameter is displayed.
12. Enter the Hangup String.
13. Click Initialize Modem Port to initialize the port.
14. Click Save Modem Settings to save the settings.
15. Click Close to close the Connection Settings dialog box.