Installation instructions, Maintenance – Edwards Signaling Genesis Ceiling Strobe User Manual
Page 2
P/N: 3100612 REV: 3.0
29APR05
Installation Sheet
2 / 2
Genesis Ceiling Strobe
Installation Instructions
Warning: To reduce the risk of shock, disconnect all power
and allow 10 minutes for stored energy to dissipate before
handling.
Caution: Electrical supervision requires the wire run to be
broken at each terminal. Do not loop the signaling circuit field
wires around the terminals.
To install the strobe:
1. Remove the cover by depressing the tab on the side of the
unit with a small screwdriver. Turn the cover
counterclockwise to release.
2. If temporal strobe (private mode) operation is desired, cut
jumper JP1. See Figure 2.
3. Connect the strobe terminals to the signal circuit field
wiring. You must observe polarity for the unit to function
properly. See Figure 3.
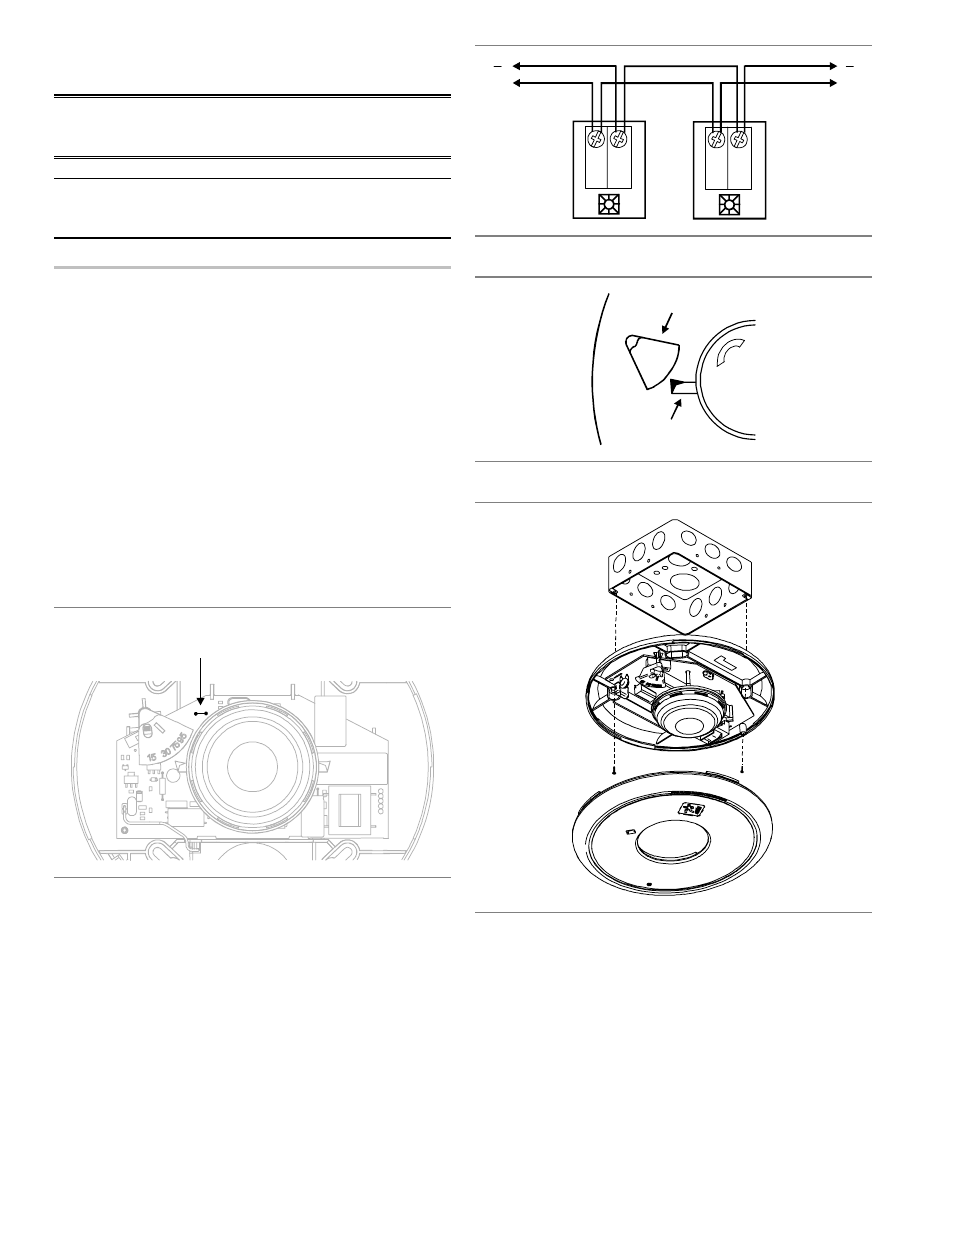
4. Slide the candela switch to the desired candela output (15,
30, 75, or 95 cd) by aligning it with the indicator below the
switch. See Figure 4.
5. Mount the unit onto a compatible electrical box. See
Figure 5.
6. Replace the cover by positioning the alignment arrows
together and rotating the cover clockwise.
7. Test the unit for proper operation.
To change the
from 1 fps (public
mode) to temporal (private mode) cut jumper JP1
strobe signal output
JP1
Figure 2: Strobe setting
Note: If the strobe is set to temporal (private mode), this
device is no longer UL 1971 listed and FM Approved but is UL
1638 listed.
S+
S+
S-
S-
To next
device or
end of line
device
+
+
To listed
fire alarm
control
panel
Figure 3: Wiring diagram
95
75
15
30
Candela switch
Indicator
Figure 4: Candela switch
Figure 5: Mounting diagram
Maintenance
This unit is not serviceable or repairable. Should the unit fail to
operate, contact the supplier for replacement.
Perform a visual inspection and an operational test twice a
year or as directed by the local authority having jurisdiction.