LumaSense Technologies M67 User Manual
Page 40
M67, M67S Manual
39
1. Mount the INFRADUCER on a tripod or bracket to ensure proper alignment. (Aiming by hand during the steps below will
alter results).
2. Allow instrument to stabilize for at least 1 hour. DO NOT HANDLE at any time during warm-up and calibration.
3. Set emissivity to 99%.
4. Aim the instrument at a target 2 times larger than minimum target size required and of known temperature that is near the
beginning of the instrument's range. The target emissivity should be nearly 1.0 (use flat black paint on target if necessary).
The instrument should read target temperature.
5. Aim the instrument at a target larger than minimum target size that is of known temperature that is at least above 60% of
instrument span (Example: range of instrument = 0 - 500°F, 60% of range = 300°F). This target should be between 300°F
and 500°F (and have emissivity near 1.0). (/XPD6HQVH has economical calibration sources available. Please contact your
LumaSense representative of the factory for details). DO NOT ADJUST ANYTHING YET.
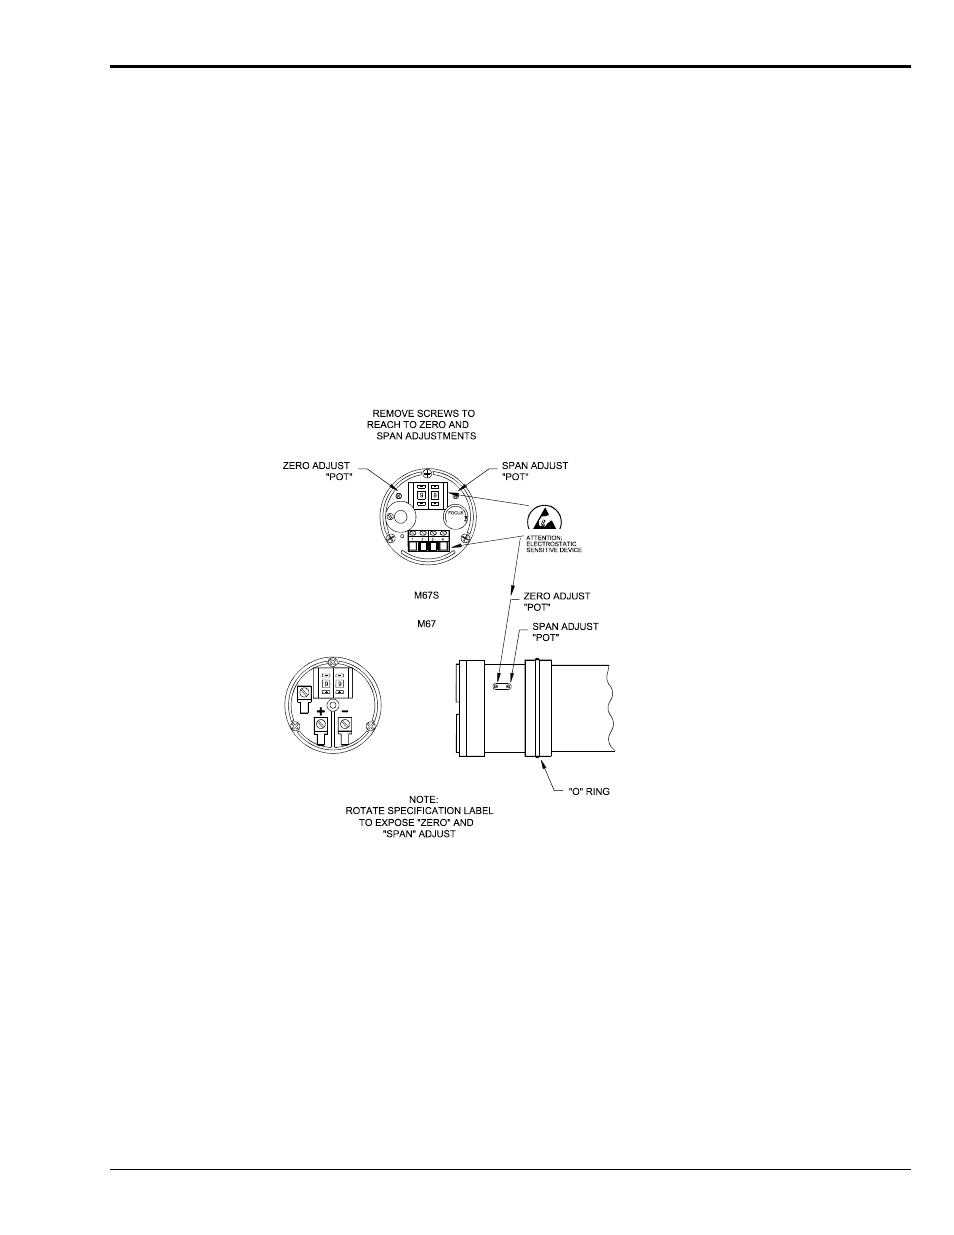
6. The INFRADUCER calibration potentiometers are under the specification label. The label is a movable band that can be
aligned with the calibration openings for access. Figure 8,1 shows location of the Zero and Span potentiometers.
7. If calibration is incorrect, repeat Step 4 and adjust the ZERO potentiometer for the mA equivalent to target temperature.
8. Repeat Step 5 and adjust the SPAN potentiometer for the hotter target.
9. Repeat Steps 7 and 8 until no further adjustments are necessary.
Figure 25 - Location Of Zero And Span Potentiometer.