Installation, Connecting gooseneck and con- sumables, Magnum® pro thru the arm robotic torch – Lincoln Electric IM10071 MAGNUM PRO THRU THE ARM ROBOTIC TORCH User Manual
Page 13: Figure b.5
B-2
INSTALLATION
MAGNUM® PRO THRU THE ARM ROBOTIC TORCH
B-2
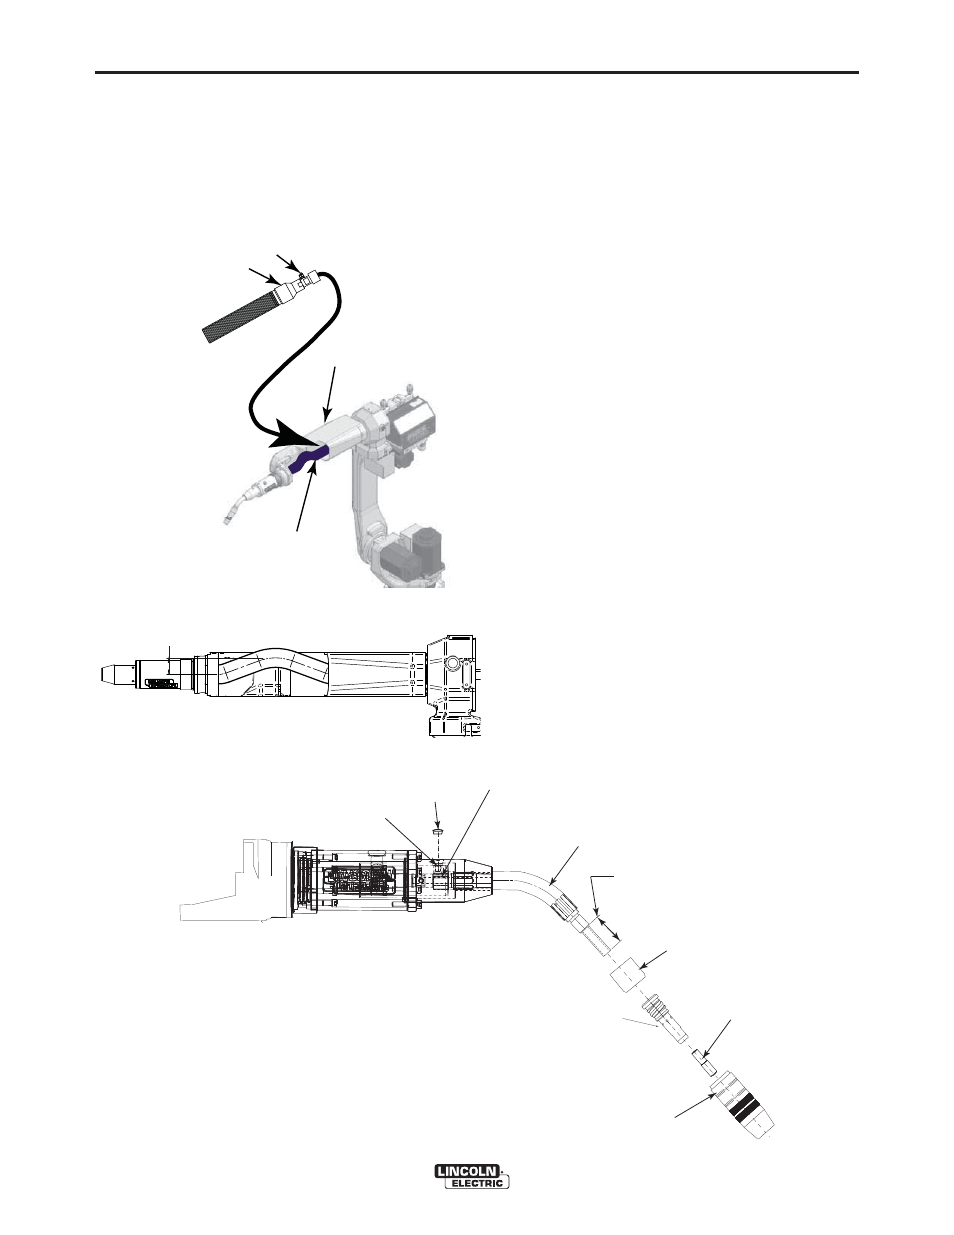
4. Insert Feeder Connector thru Robot Arm cavity and
into wire feeder and secure. Make sure that the
cable is not twisted when installed. Connect gas
hose to gas fitting on feeder connector. (See Figure
B.4) Adjust feeder location until approximately 1-
1/2 inch cable rise as shown in robot front view
below.
FIGURE B.4
CONNECTING GOOSENECK AND CON-
SUMABLES
(See Figure B.5)
Remove plug cover from nose cone. Loosen set
screw. Insert gooseneck into nose cone (spot-face
facing up) and secure with set screw. Replace plug
cover. Trim Magnum liner to 5/8”(16.0mm) stick out
from end of gooseneck. Attach desired Magnum Pro
consumables to gooseneck.
SET SCREW
SET SCREW
PLUG COVER
PLUG COVER
SPOT FACE
SPOT FACE
ON GOOSENECK
ON GOOSENECK
GUN TUBE (GOOSENECK)
GUN TUBE (GOOSENECK)
GAS DIFFUSER
GAS DIFFUSER
TIP
TIP
GAS NOZZLE
GAS NOZZLE
INSULATOR
INSULATOR
LINER TRIM
LINER TRIM
LENGTH
LENGTH
5/8" (16.0 mm)
5/8" (16.0 mm)
FIGURE B.5
INSERT FEEDER
CONNECTOR END HERE.
MAKE SURE THE CABLE
IS NOT TWISTED.
ROBOT ARM
FEEDER CONNECTOR END
GAS FITTING
1-1/2 IN.
PROVIDE CABLE RISE (ROBOT FRONT VIEW)