WEATHER GUARD 1450 User Manual
Page 7
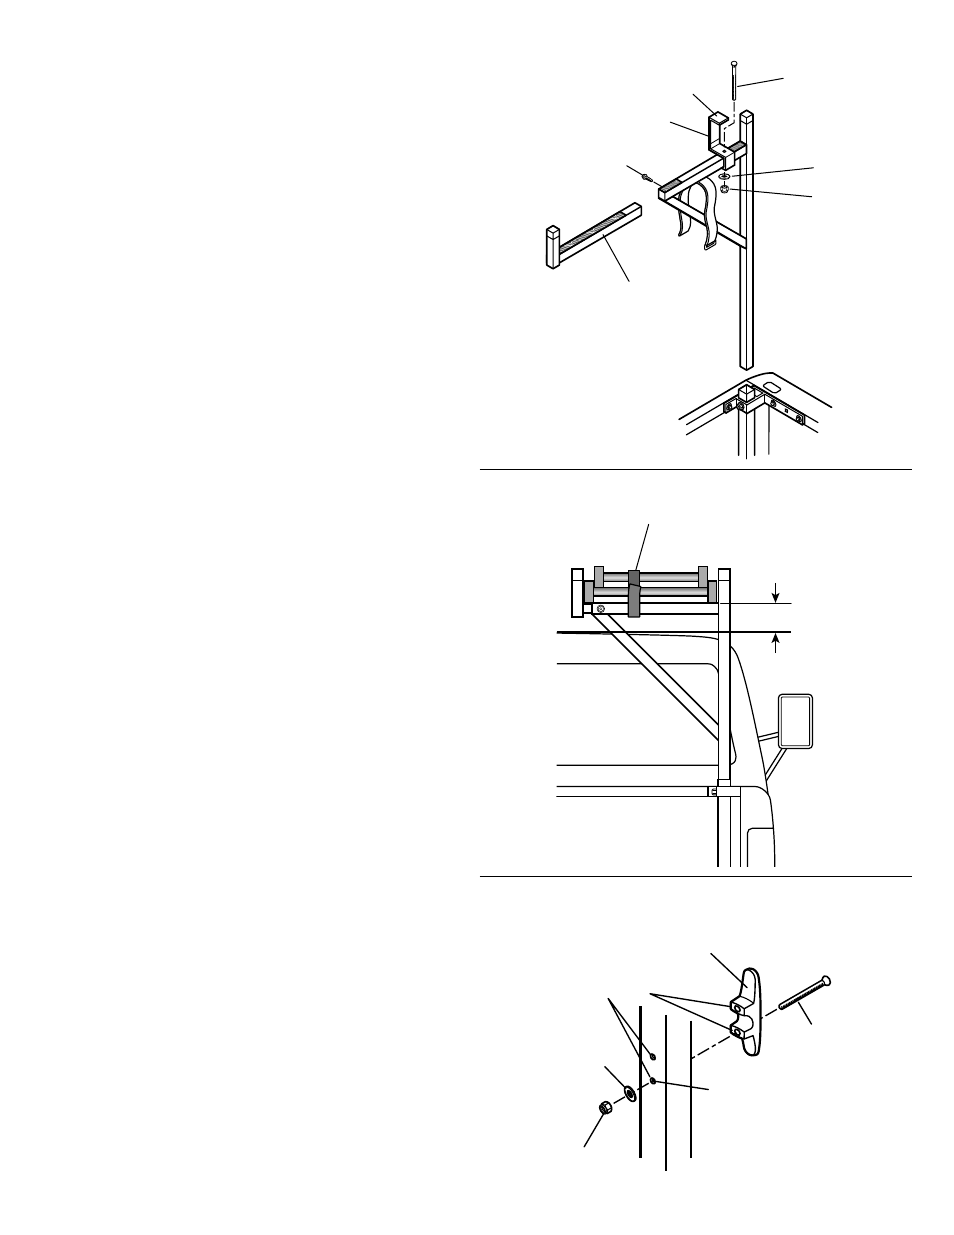
Rope Cleat
Two Rope Cleats to be mounted where desired.
#10-24 x 2-3/4”
Machine Screw
(2 places)
#10-24 Flat Washer
(2 places)
7/32” Hole
(2 places
#10-24 Nylon Lock Nut
(2 places)
Apply sealant around
holes before assembling
1450,#4.eps
Model 147885 - Install the Ladder
Stop on the Extension
Ladder Stop
3/8-16 x 3/4" Thread Cutting Screw
(locks the extension to the leg)
3/8-16 x 3-13/4" Carriage Bolt
Adjust Extension to prevent
side motion of the ladder
3/8" Flat Washer
3/8-16 Nylon Lock Nut
Figure 3
7
Figure 5
STEP 3. INSTALLING THE FRONT UPRIGHT
3a. Take one upright and insert into the front leg
socket assembly. Tighten the 3/8 - 16 x 1"
thread cutting screw installed in step 1f. in the
front mounting bracket.
3b. Take one extension and insert it into the upright
as seen in Figure 3. After tighten at the desired
location, seal the joint between the two tubes
with the provided silicone sealant.
3c. Take the ladder stop, one 3/8 - 16 x 3/4" carriage
bolt, one 3/8" flat washer and one 3/8 - 16 nylon
lock nut and install onto the upright as seen in
Figure 3.
3d. Take the one strap and install it onto the bracket
as seen in Figure 3.
STEP 4. INSTALLING THE REAR UPRIGHT
4a. Take the remaining upright and insert into the
rear leg socket assembly. Tighten the 3/8 - 16 x
1" thread cutting screw installed in step 2f. in the
rear mounting bracket.
4b. Take the remaining extension and insert it into
the upright as seen in Figure 3. After tighten at
the desired location, seal the joint between the
two tubes with the provided silicone sealant.
4c. Take the remaining ladder strap and install it
onto the bracket as seen in Figure 3.
STEP 5. INSTALLATION OF ROPE CLEATS
The two rope cleats are to be mounted where desired.
See figure 5 for installation procedure.
STEP 6. SECURING A LADDER TO THE RACK
6a. Carefully place a ladder on the rack, and check
door entry and head clearance. If clearance is
ample, and if desired, the uprights may be short-
ened as long as a minimum of 2" above the cab
roof is maintained, see Figure 4. Remove and
cut the uprights if desired. Note that you need
to cut from the bottom of the upright. Double-
check the measurement before cutting.
6b. Secure ladder with the provided ladder straps
when transporting. Secure or remove ladder
straps when not being used.
Figure 4
1450,#5.eps
2“ Min.
Secure ladder with hook and loop
straps when transporting. Secure or
remove straps when not being used.