Warner Electric Compressor Clutch Replacement Procedure User Manual
Page 5
5
Warner Electric • 800-825-9050
P-1401 • 819-0316
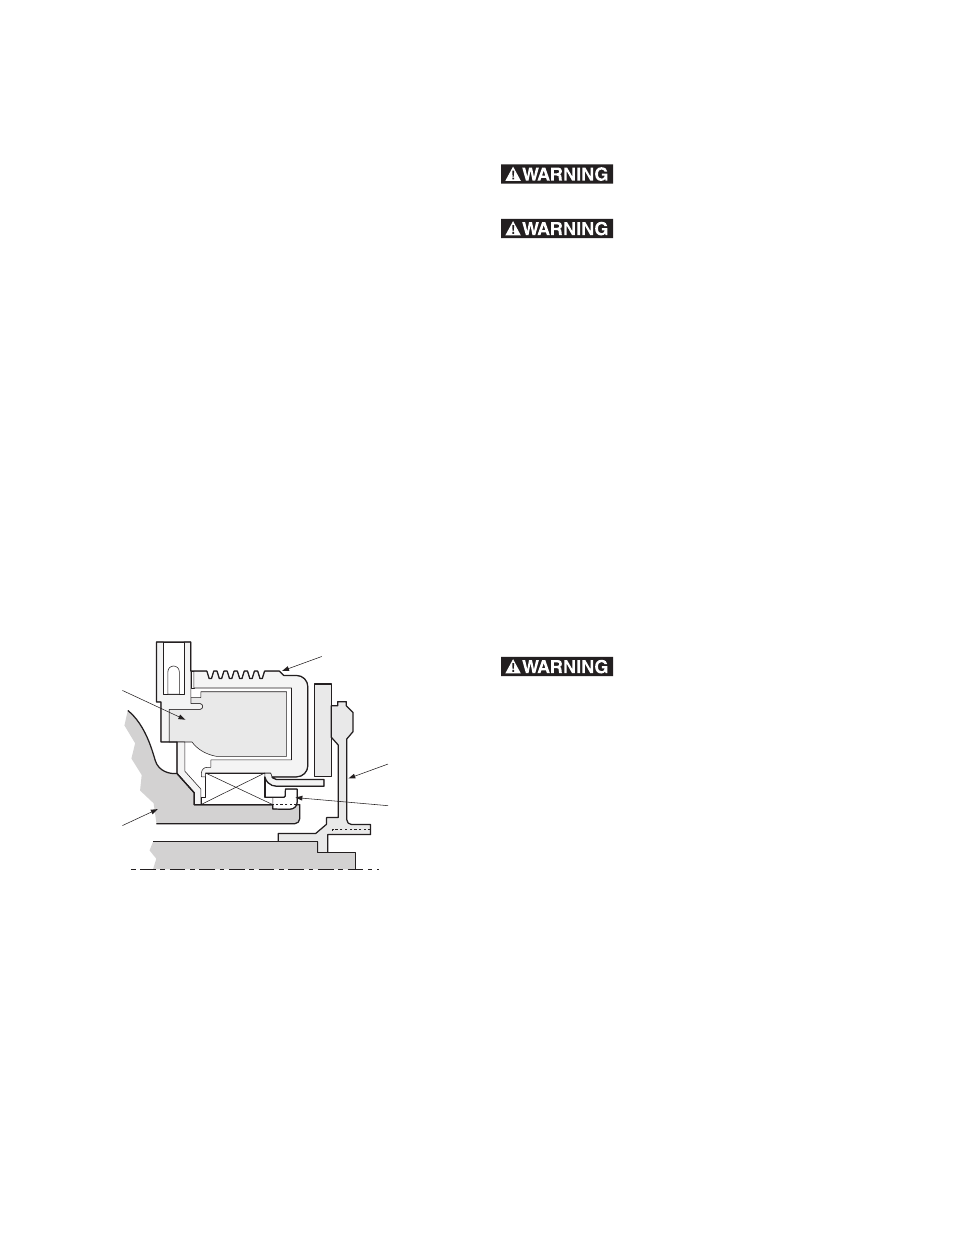
Rotor/Pulley
Retaining Nut
Hub/Armature
Assembly
Rotor/Pulley
Assembly
Field Coil
Assembly
Compressor
HR980
Figure 6
Step 3: Installing the Rotor/Pulley
Assembly (4) (All Compressors except
HR980)
Do not mar the rotor/pulley
and hub/armature friction surfaces.
Prevent any oil or grease from
contaminating the friction surfaces.
A. Install the rotor/pulley assembly (4) onto the
compressor (1). If the rotor/pulley does not
slide on easily check the compressor nose for
nicks or burrs and remove. If the rotor/pulley
still does not slide on easily, rock the
rotor/pulley back and forth by hand until it
slides completely onto the compressor (1).
B. Make sure there is no interference between
the field coil (2) or lead wires and the rotating
rotor/pulley (4).
C. Install the rotor/pulley snap ring (5). With a
snap ring pliers, spread the snap ring and
insert it into the groove on the compressor
nose. (See Figure 2) To assure assembly
retention, the snap ring bevel must face away
from the compressor. (See Figures 3 and 4)
The snap ring pliers must not
contact the bearing seal or a seal failure may
result.
D. Verify that the snap ring (5) is fully seated
in the groove around its circumference to
assure assembly retention. (See Figure 4)
Step 2B: Installing the Field Coil (2)
and Rotor/Pulley Assembly (4) (HR980
Compressor only)
A. Align square holes in the back plate of the
coil assembly (2) with lugs on the compressor
(1) housing.
B. With the field coil (2) in position, slide the
rotor/pulley (4) onto the compressor until it
butts against the field coil (2). (See Figure 6)
If the the rotor/pulley does not slide on easily,
check the mounting surface on the
compressor nose for nicks or burrs and
remove them. If the rotor/pulley still does not
slide on easily, rock the rotor/pulley back and
forth by hand until it slides completely onto
the compressor.
C. Install the rotor/pulley retainer nut (6) with
flange notches facing AWAY from the
rotor/pulley assembly. Tighten the retainer nut
to 65 to 75 lb.ft. torque.
D. Make electrical connection.
E. Proceed to Step 4.