Rack mounting kit installation installation – Anritsu 681XXC User Manual
Page 30
Step 4
Remove the inner slide assemblies from
the outer slide assemblies.
Step 5
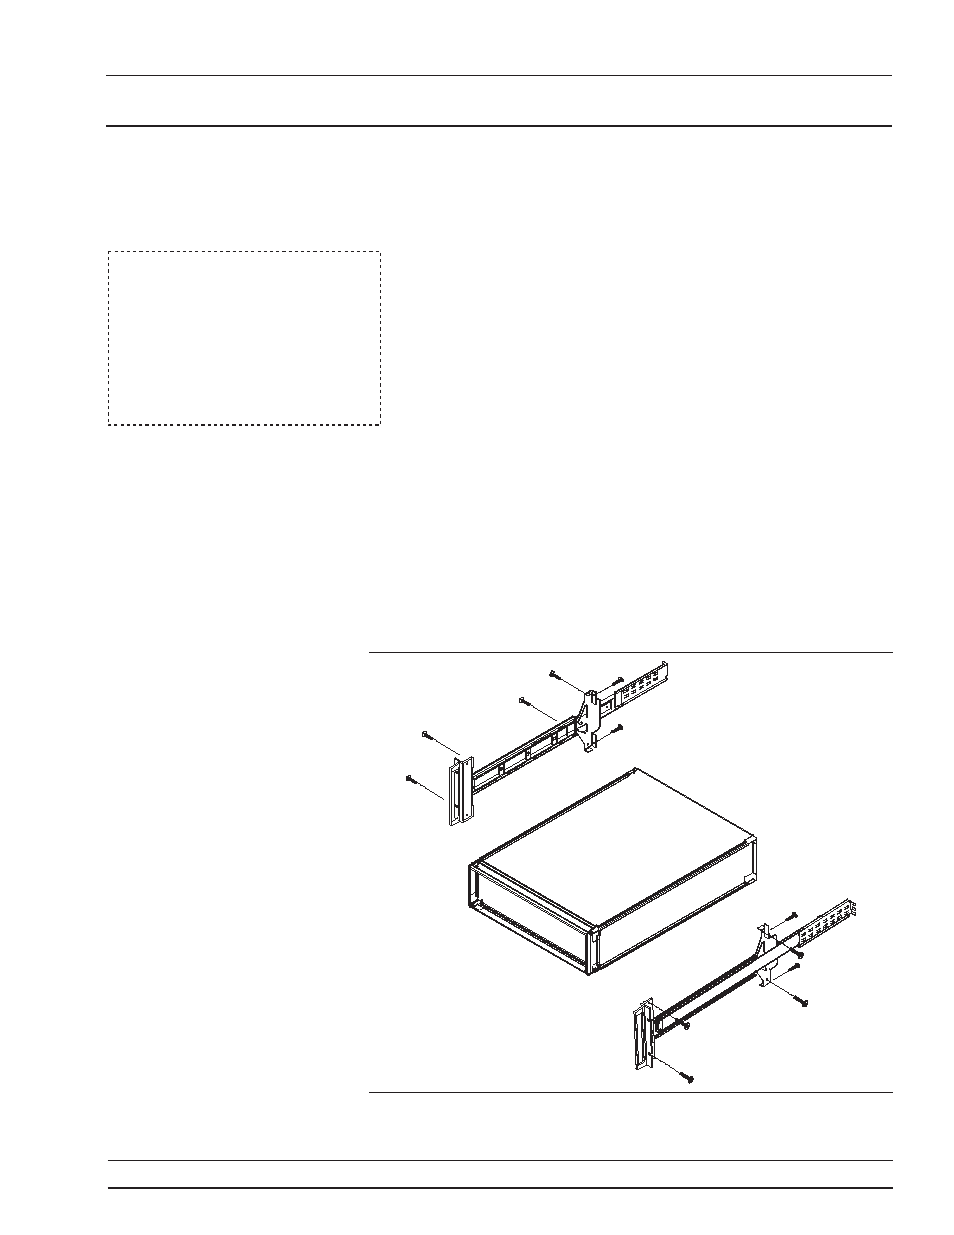
Place the left side inner slide assembly
onto the instrument case with the handle
towards the front of the instrument (Fig-
ure 2-3).
Step 6
Insert two green-headed screws through
the holes in the slide assembly behind the
handle and into the metric tapped holes
in the side of the instrument.
Step 7
Insert two green-headed screws through
the holes near the rear of the slide assem-
bly and into the metric tapped holes in
the side of the instrument.
Step 8
Insert the two SAE threaded screws (re-
moved from the feet) through the 90
° tabs
on the rear of the slide assembly and into
the rear panel of the instrument.
Step 9
Using the Phillips screwdriver, tighten all
screws holding the left side slide assem-
bly to the instrument chassis.
681XXC OM
2-11
RACK MOUNTING KIT
INSTALLATION
INSTALLATION
NOTE
The screws with green heads have
metric threads. When it becomes
necessary to replace any of these
screws, always use the exact re-
placement green-headed screws
(Anritsu P/N 2000-560) to avoid
damage to the instrument.
Figure 2-3.
Rack Mounting Hardware Installation