Icspa6-b3n1h (m) b3h (m), Z1-axis cables x-axis, y1-axis cables, Drawing no – IAI America NS User Manual
Page 12: Z1-axis cables, X-axis, y1-axis, z1-axis cables
Tie-mount KR5G5
(by HellermannTyton)
+ hexagonal socket head button bolt
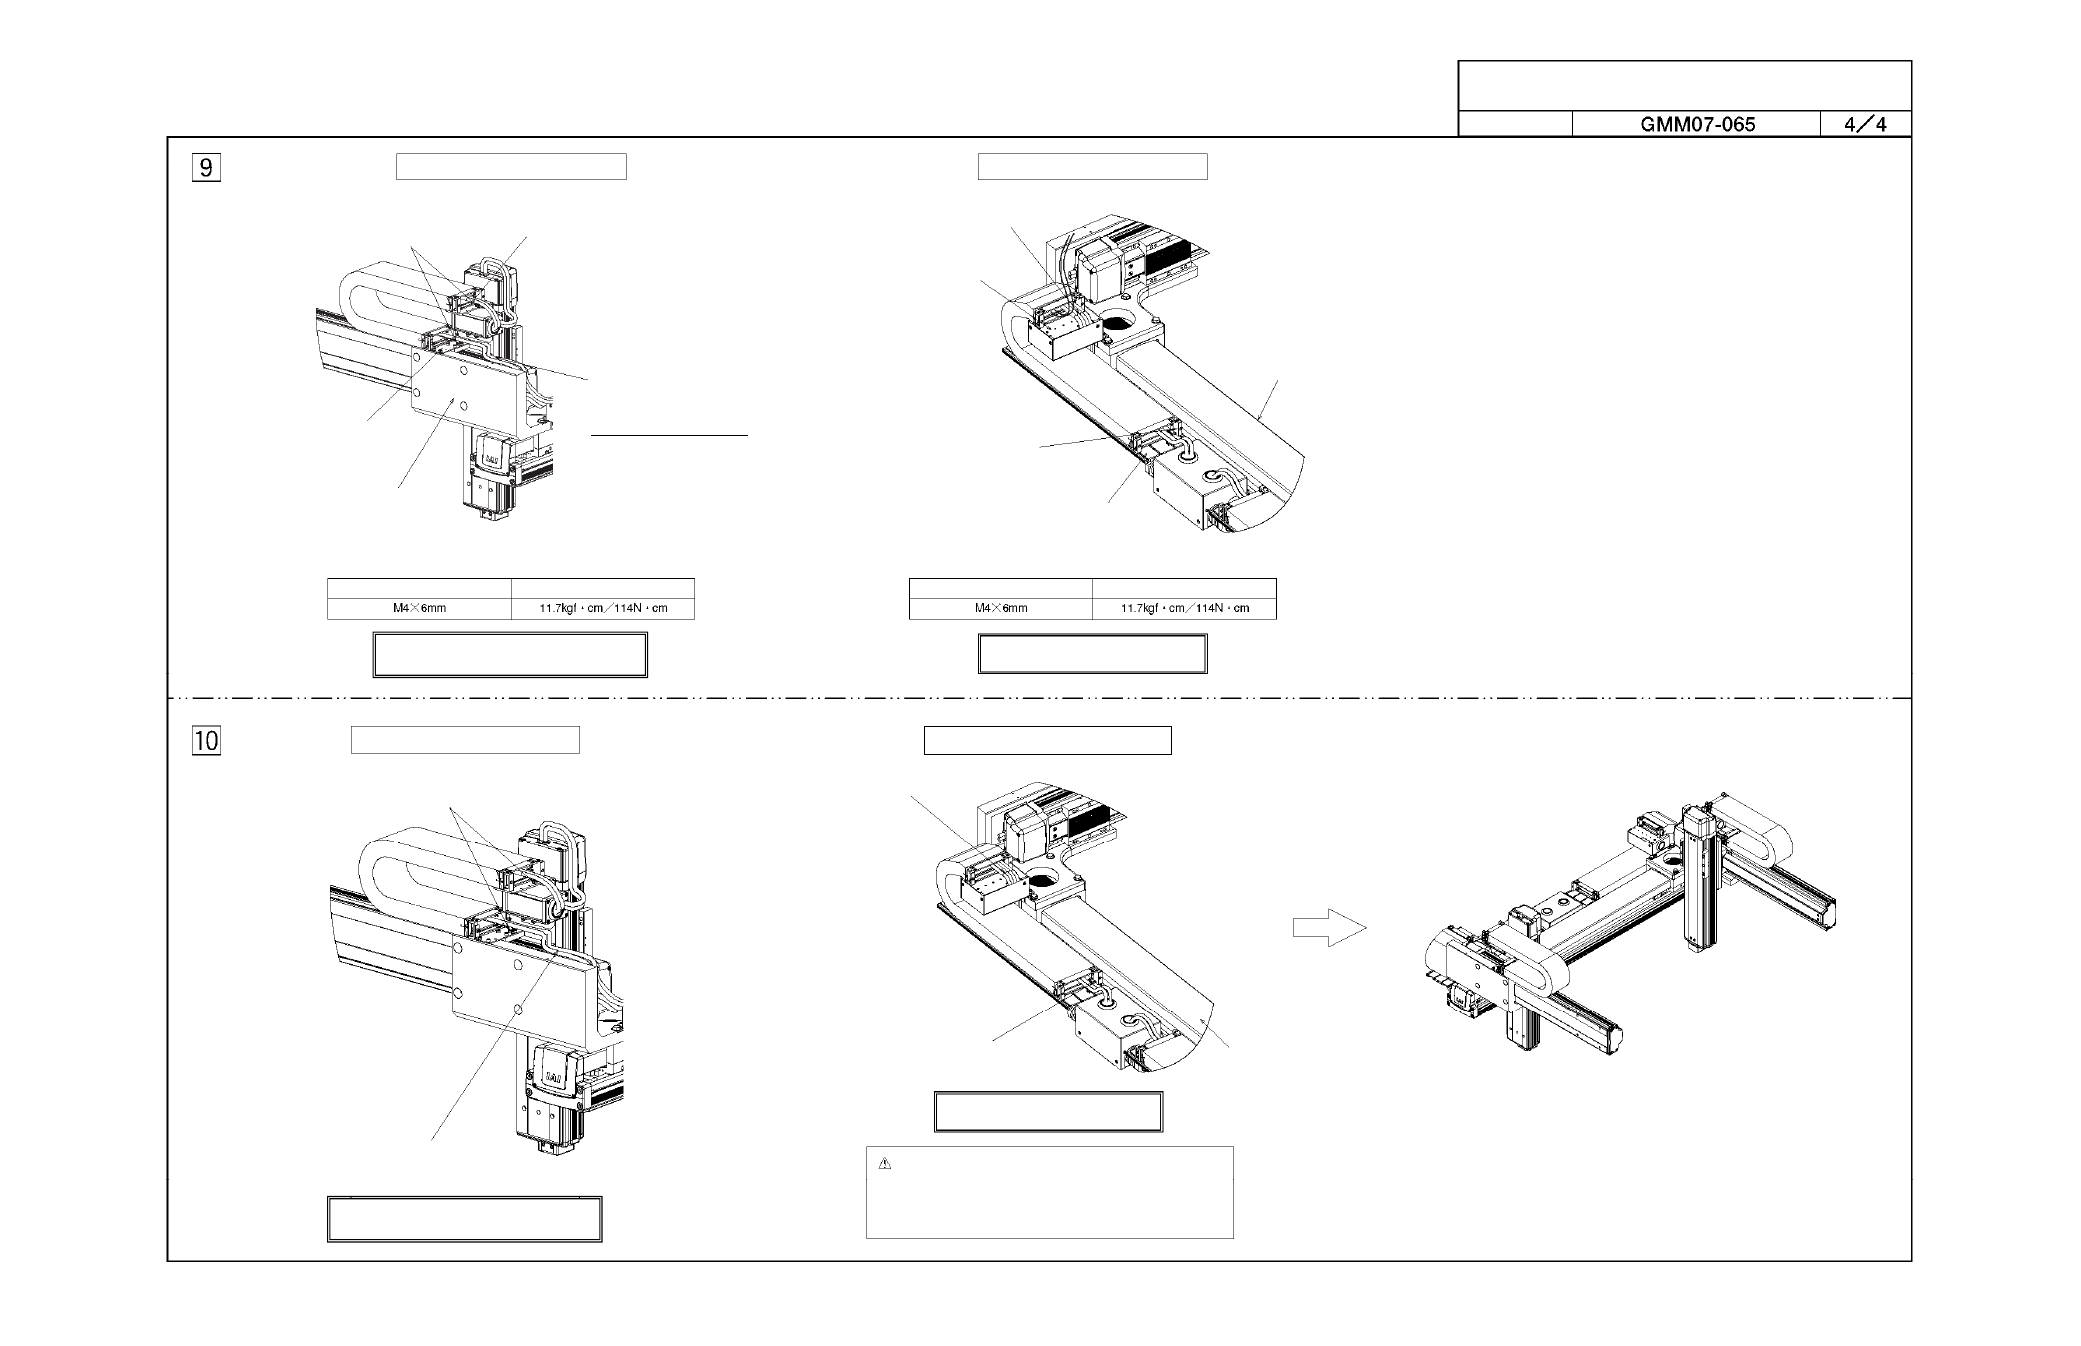
M4x6 (1 set)
Install in the T slot of the Y-axis.
[Installation of tie-mount in track mounting bracket 2 [15]]
[Installation of tie-mount on track support bracket [14]]
[Installation of tie-mount in T slot of Y1-axis: ISPA]
Z1-axis cables
X-axis, Y1-axis cables
Tie-mount KR5G5 (by HellermannTyton)
+ hexagonal socket head button bolt M4x6 (2 sets)
[15] Track mounting bracket 2
[14] Track support
bracket
[1] XY bracket
Hexagonal socket head button bolt
Tightening torque
X-axis Nut-rotation Type Cartesian Robot – High-precision 6-axis Specification,
Z Base Mount
ICSPA6-B3N1H (M) B3H (M)
Drawing No.
* The direction is different on the Z2-axis side.
Assemble the parts by referring to the Z1-axis side.
Tie-mount KR5G5 (by HellermannTyton)
+ hexagonal socket head bolt M4x6 (1 set)
[3] Track mounting bracket
X-axis: NS
Tie-mount KR5G5 (by HellermannTyton)
+ hexagonal socket head bolt M4x6
+ hexagonal nut (1 set)
[4] Guide rail
[Installation of tie-mount on track mounting bracket [3]]
[Installation of tie-mount in T slot of guide rail [4]]
Hexagonal socket head button bolt
Tightening torque
* Assemble the Y2-axis side by referring
to the Y1-axis side.
Z1-axis cables
* The direction is different on the Z2-axis side.
Assemble the parts by referring to the Z1-axis side.
Secure the cables using wraps.
Secure the cables using wraps.
X-axis, Y1-axis, Z1-axis cables
Secure the cables using wraps.
Secure the cables using wraps.
X-axis: NS
* Assemble the Y2-axis side by referring
to the Y1-axis side.
Caution: Secure the wires to prevent the cables and connectors
from contacting each axis when the axis is moved over its
entire stroke.
When manually moving the actuator with brake, connect
the controller, supply the power, and then release the brake
release switch (by turning the switch to the RLS side).