Ransburg, Voltage master 2 - installation – Ransburg Voltage Master 2 78789_LEPS5001 User Manual
Page 26
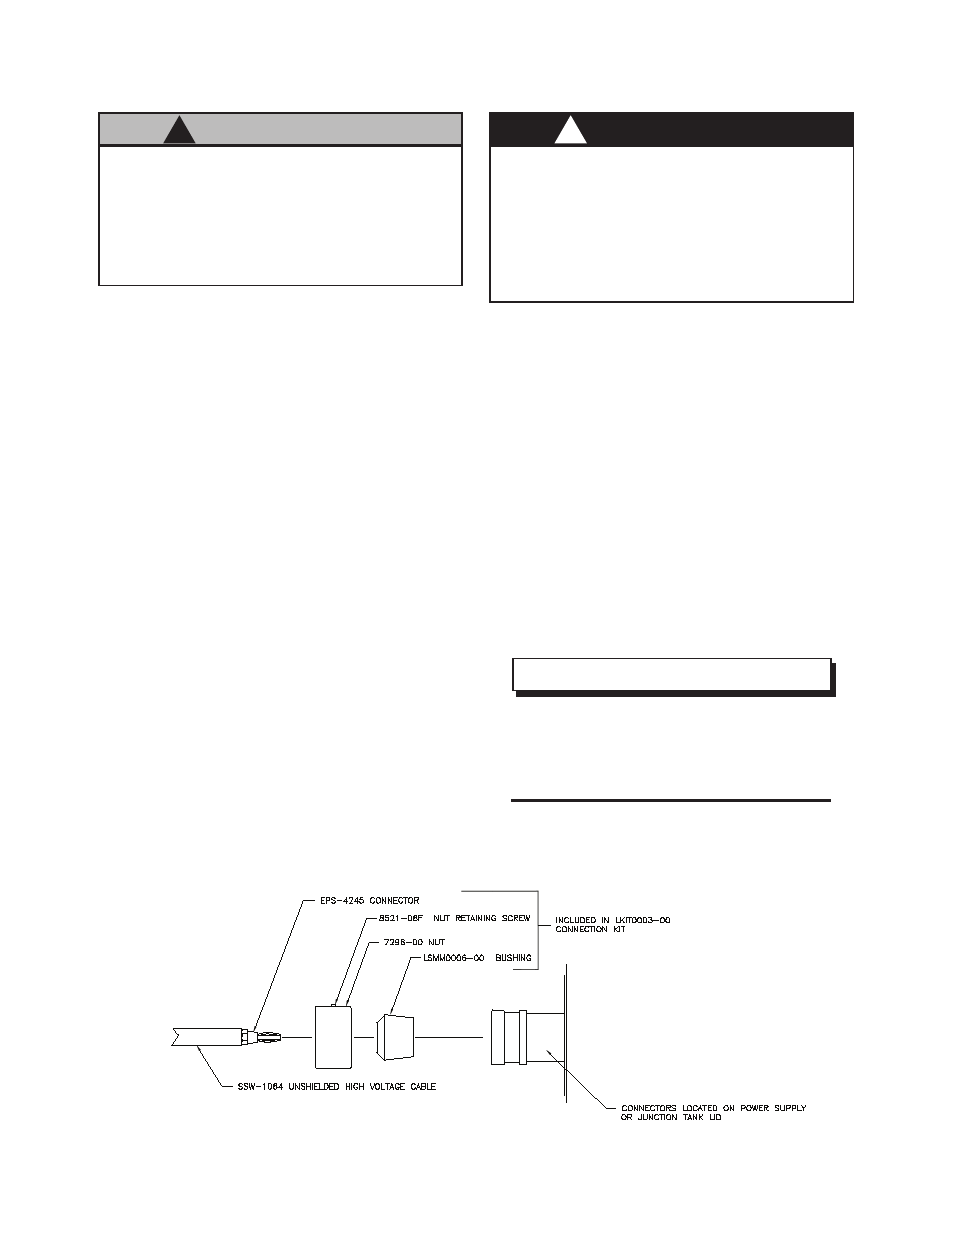
connector (included with the power supply or as
part of the LKIT0003 Connection Kit) onto the cable
end which will be inserted into the power supply.
Be careful to keep the connector centered in the
middle of the cable as it is installed. Thread the
cable end through the metal nut and then through
the rubber bushing. Insert the cable fully into a
high voltage output of the power supply and then
tighten the nut until the cable is secure. Tighten
the nut retaining screw with very light force (see
Figure 8).
>
If a high voltage junction tank is used in
the system, refer to the appropriate service
manual for cable terminations and installa-
tion requirements.
NOTE
6. If an insulating sheathing is used around the
cable, it
MUST be of a non-absorbent material,
such as polyethelyne, and should be routed to
prevent contact with, or entrapment of, solvents
or cleaning solutions. The cable should
NOT be
sheathed from its last point of physical support
after it enters the spray area, to the applicator!
7. If a cable must be routed through a metal
(or conductive) surface, cut an opening with a
minimum radius of five inches and mount a non-
conductive bulkhead therein. Route the cable
through the center of the bulkhead and secure it
with a suitable, nonconductive strain relief. (The
opening may be any configuration as long as there
is at least five inches from the nearest conductor.)
8. Make cable runs as short as possible by mount-
ing the power supply as close to the spray device(s)
as codes and the physical envionment allow.
Important: For initial installation, add approxi-
mately 1/2 to 1 ounce of dielectric oil in each high
voltage tube. Use only the oil as supplied with the
power supply, part number 70863-00. Reference
the "Maintenance" section for more details.
>
Do NOT make the approach to the ap-
plicator at or below floor level. Route high
voltage cables from overhead down to the
applicator. Routing the cables up and out
of the way will result in less exposure to
dirt and traffic.
C A U T I O N
!
>
Whenever removing high voltage
cable(s) from equipment, ground the plug
end of the cable(s) by contacting the
plug to electrical ground. Do not touch
the plug until it has been grounded. This
will eliminate the possibility of residual
charge, causing electrical shock.
W A R N I N G
!
Figure 8: High Voltage Connections
Voltage Master 2 - Installation
22
Ransburg
CP-02-02.6