Ransburg, Rea automatic applicators - maintenance – Ransburg REA Automatic Applicators 77359, 76110, 77140 User Manual
Page 42
6. Insert the bushing nut into the rear of the body.
Using the 20049-00 Spanner Wrench securely
tighten the bushing nut into the body.
7. Pull the needle shaft back into an actuated
position. Screw the trigger adjustment nut onto
the needle shaft until there are no more threads.
8. Screw the extension rod on the needle shaft
until the hex of the extension rod is flush against
the hex of the trigger adjustment screw. (Using
T-Shaped Gauge on 19749-00, adjust to the
11/16-inch maximum dimension shown in Figure
10.)
9. Using two (2) 3/8” wrenches, tighten the two
(2) hexes against each other to prevent movement
of the parts.
10. Lubricate the piston assembly with LSCH0009-
00 dielectric grease.
11. Insert the piston assembly into the rear of the
body, through the bushing nut.
12. Slide the gasket onto the barrel assembly.
13. Place the barrel assembly onto the front of
the body. Making sure that the extension rod slides
STRAIGHT through the body.
14. Tighten the retaining ring to the body using the
19749-00 Spanner Wrench.
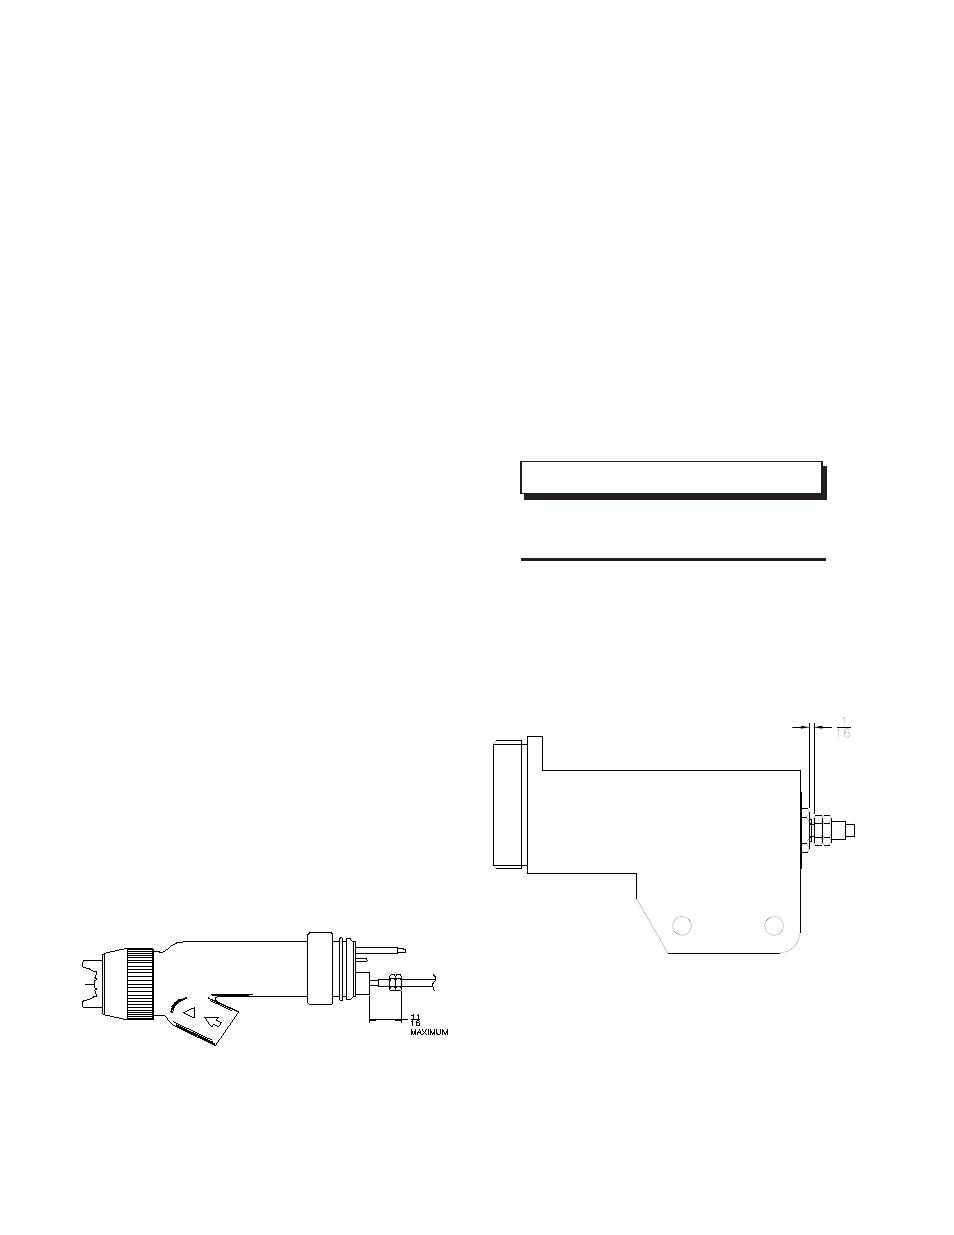
17. Push the extension rod fully forward to seat
the electrode into the fluid nozzle.
18. Screw onto the extension rod jam nut and the
air valve adjusting nut.
19. Position the jam nut 1/16-inch from the end of
the piston assembly.
20. Tighten the nuts against each other to prevent
movement (see Figure 11).
21. If the extension rod rotates while you are tight-
ening the nuts, hold it using an adjustable wrench
on the flats.
Figure 10: Rod and Trigger Adjustment Nuts
(Do not exceed the 11/16 maximum dimension
shown in this figure)
NOTE
> The hex nut and air valve adjust nut
control your air before fluid adjustment.
22. Install the two (2) springs.
23. Install the rear piston housing.
Figure 11: Air Before Fluid Adaptor
(Piston Housing not shown for clarity)
Ransburg
REA Automatic Applicators - Maintenance
38
AA-99-02.5