Ransburg – Ransburg REA Automatic Applicators 77359, 76110, 77140 User Manual
Page 21
> The atomization and fan air line should
always lead the trigger signal when the
applicator is on, and lag the trigger signal
when the applicator is off. Failure to follow
this procedure will cause applicator spits.
NOTE
To Install the REA 9000W or
REA 900A
1. Mount the applicator to the reciprocator bar.
It is recommended to use a keyed bar with 1/4”
Woodruff key. The applicator may be mounted
on bars from the size .98-inch diam. (25 mm) to
1.00-inch diam. (27 mm). Tighten the five (5)
mounting screws securely.
2. Run 1/4-inch ODT air line to the trigger line
fitting.
>
ALL fittings used must be noncon-
ductive. The use of electrical conductive
fitting may cause injury or fire.
W A R N I N G
!
3. Run 3/8-inch ODT or 1/2-inch ODT fluid line to
the applicator.
4. Connect atomization air and fan air lines. De-
pending upon atomization technology used, size
the line accordingly.
5. Install 1/4” ODT air line to shroud or probe
purge air. Set pressure between 5-10 psig.
6. Install 1/4-inch ODT air line for dump actuation.
7. Install 3/8-inch ODT
fluid line to dump out.
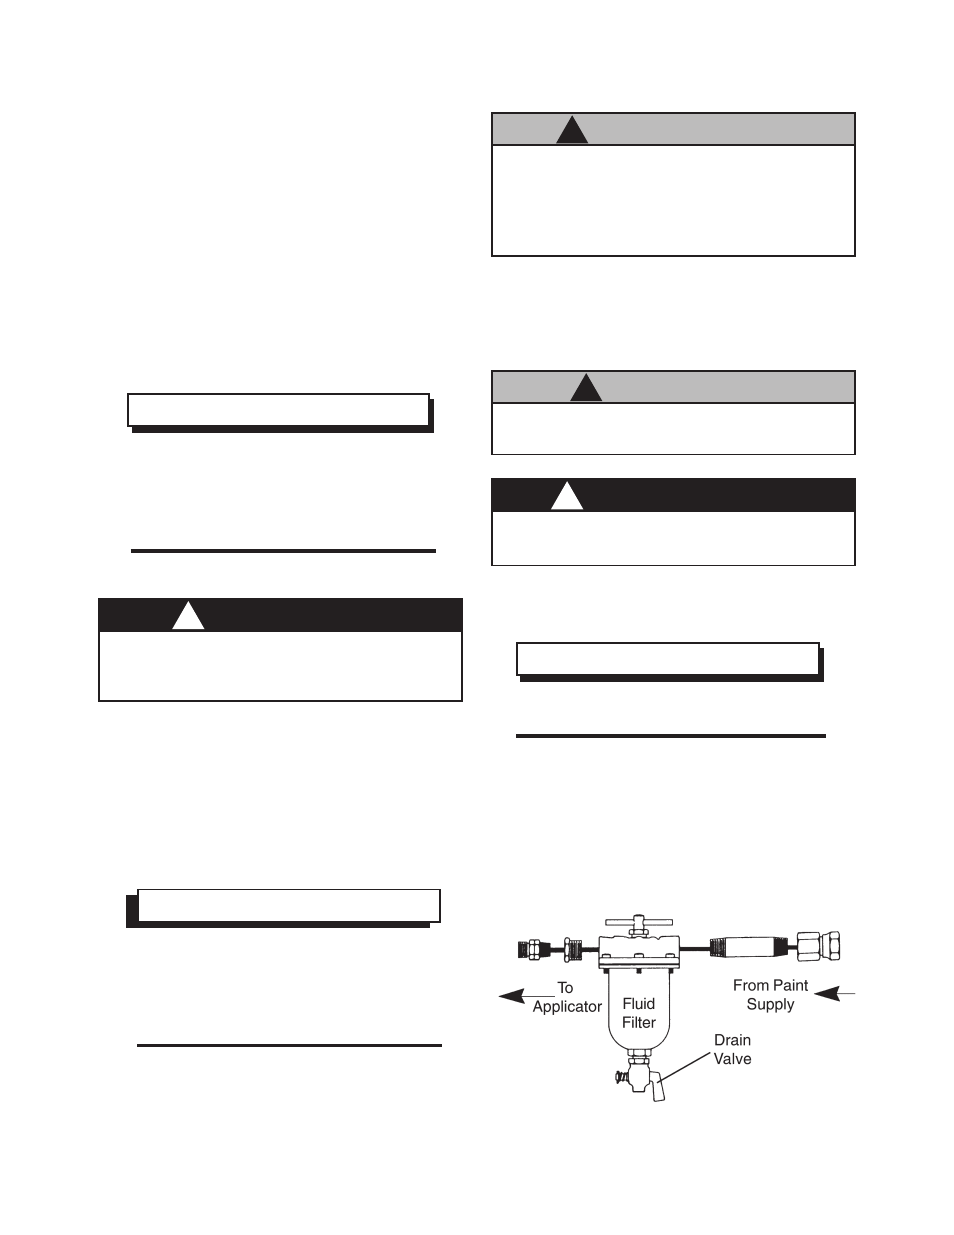
Figure 5: Typical Fluid Filter Installation
Filters
> Failure to use dump line will degrade col-
or change time and applicator performance.
C A U T I O N
!
>
For optimum finish quality use clean,
dry filtered air.
NOTE
>
Whenever the applicator is in the dump
or flush mode, the electrostatics must be off.
W A R N I N G
!
1. Install a fluid filter on the output of fluid supply,
as shown in Figure 5.
2. Detail depends on whether pressure tank,
pump unit, recirculating system, etc., is used. The
filter must be installed vertically with drain valve
down and arrow pointing in direction of flow.
> Failure to connect the shroud purge air line
on the REA 900A Gun can allow excessive
corona to build up within the shroud and cause
premature failure of the barrel and transformer
assemblies.
C A U T I O N
!
>
All fittings may be replaced with
alternate fittings, depending on your
installation. (See “Specifications”
previously discussed in the “Introduc-
tion” section, for female thread size.
NOTE
Ransburg
REA Automatic Applicators - Installation
17
AA-99-02.5