Universal recessed and surface mount led exit sign, Surface ceiling & wall mounting, Surface end mount – Emergi-Lite Total Edge Series User Manual
Page 3: Surface end mount assembly
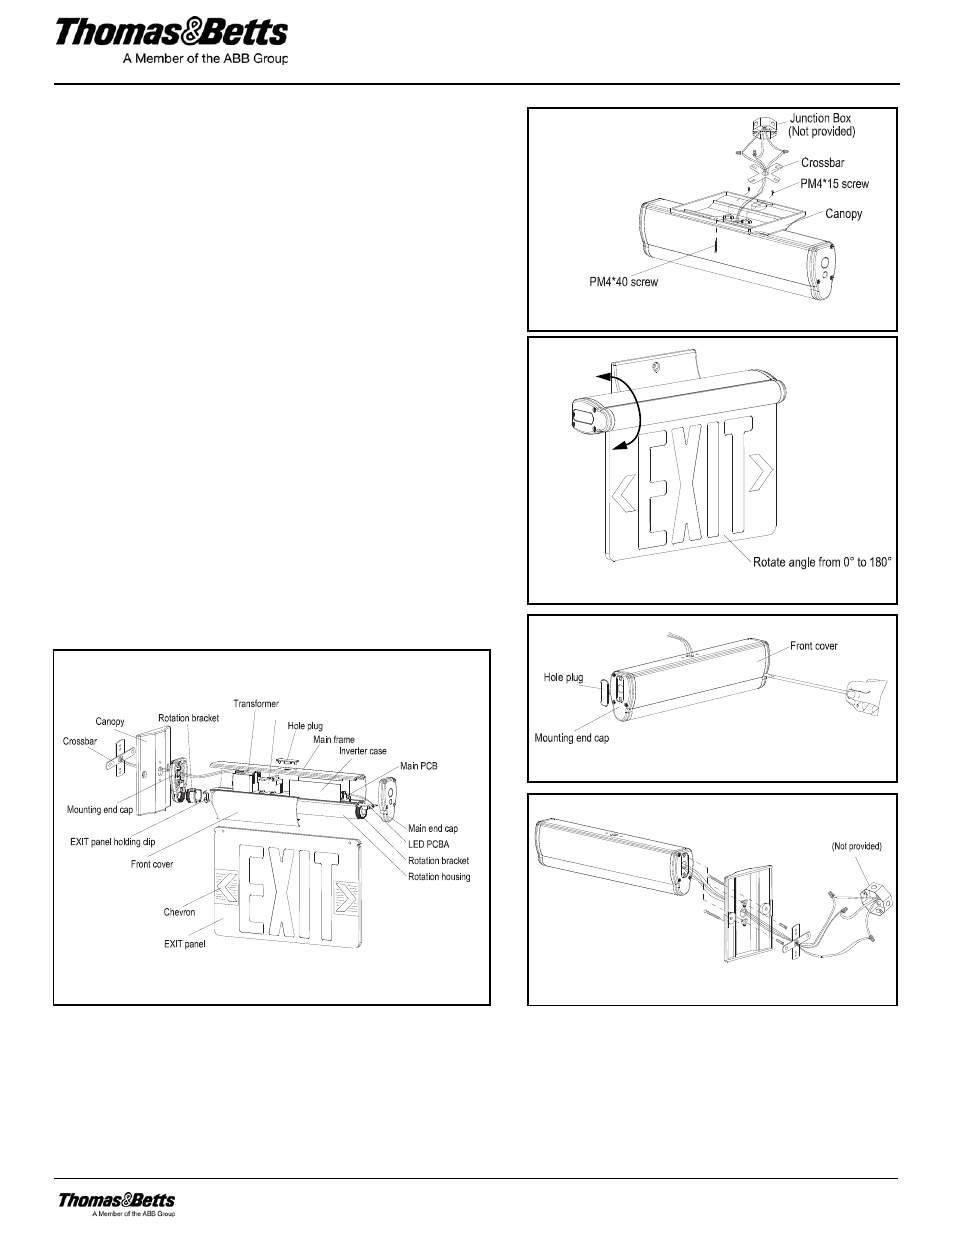
Universal Recessed and Surface Mount LED EXIT Sign
Tel: (888) 552-6467 Fax: (800) 316-4515 www.tnb.com
11/13 750.1666 Rev. E
3/4
Surface Ceiling & Wall mounting
1. Attach the crossbar to the junction box with screws (not provided).
2. Feed AC supply wires through canopy center hole.
3. Assemble canopy onto main body assembly with 2 screws PM4"15
(supplied) and make the proper wire connections. (See #11 fig.5 of
the Recessed Ceiling Mount).
4. Use 2 screws PM4-40 (supplied) to tighten canopy to the crossbar
(see figure 10).
5. Insert EXIT panel into main body assembly gently. If EXIT panel is for
a single face, make sure EXIT letter direction is correct (see figure 7).
6. Determine chevron placement: (see figure 8)
a. If a chevron is needed leave the chevron on and remove only the
film instruction.
b. If no chevron is needed remove the chevron and film instructions
together.
7. This unit can be mounted on any flat surface. The Exit panel can be
rotated in any angle from 0° to 180° (see figure 11).
Surface End Mount
1. Attach crossbar to junction box with screws (not provided).
2. Remove the front cover gently by prying it open with a screwdriver
then remove the hole plug from the slots or mounting end cap.
3. Pull out all AC supply wires and feed wires through the center hole of
mounting end cap and then canopy.
4. Refer to steps 3,4,5 and 6 in surface ceiling & wall mounting above for
surface end mounting.
5. This unit can be mounted on any flat surface. The EXIT panel can be
rotated in any angle from 0° to 180° (see figure 11).
Surface End Mount Assembly
Figure 10
Figure 11
Surface mount shown
Figure 12
Figure 13
Battery
Figure 14