Emergi-Lite Revelation Remote Fixture Series User Manual
Important safeguards, Read and follow all safety instructions, Save these
Emergi-Lite
Tel: (888) 552-6467 ext. 547 or 255
Fax: (888) 867-1565
www.emergi-lite.com
Retract-Lite: DC-Remote Lighting Fixture
1/3
08/07 750.1297 Rev. A
Retract-Lite: DC-Remote Lighting Fixture
IMPORTANT SAFEGUARDS
When using electrical equipment, basic safety precautions should
always be followed including the following:
READ AND FOLLOW ALL SAFETY
INSTRUCTIONS
1. Do not use outdoors.
2. Do not let power supply cords touch hot surfaces.
3. Do not mount near gas or electric heaters.
4. Equipment should be mounted in locations and at heights where it
will not readily be subjected to tampering by unauthorized personnel.
5. The use of accessory equipment not recommended by the manufac-
turer may cause an unsafe condition.
6. Do not use this equipment for other than intended use.
7. All servicing should be performed by qualified service personnel.
SAVE THESE
INSTRUCTIONS
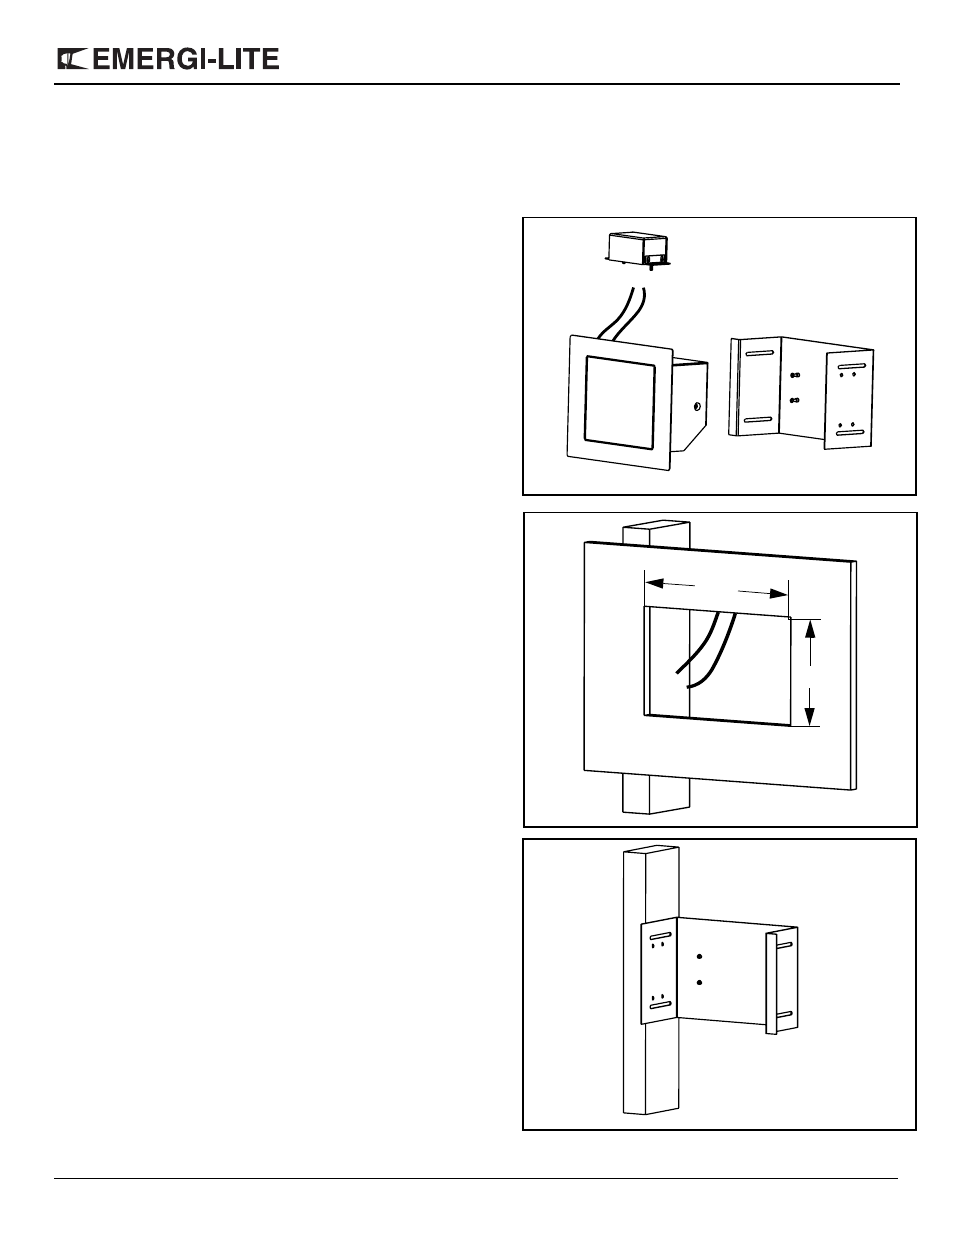
Installation Instructions (Figure 1)
The DC-remote fixture comes with :
= U-shape metal bracket, for rigid mount on wall studs and ceiling
beams covered by drywall.
= Junction box for the DC wire connection.
Both these components can be installed (retrofit) after the drywall put in.
For installation, the cable form the DC remote battery unit must be
passed near a wall stud or ceiling beam. at the installation point, the dry-
wall must be marked with an opening hole of 2 to 3 inch diameter near
that stud or beam.
“U” Bracket Installation in the Wall or Ceiling (Figure 2a,b,c)
1. Open a rectanguler hole (8-1/4 inch by 5-3/4 inch) next to the wall
stud or ceiling beam. The hole must have the short opening along the
stud. Use the “U” bracket to mark the dimensions on the drywall.
2. Pass the electrical cable out through the hole.
3. Slide the “U” bracket in the hole: enter the flange side first then push
the other side to the stud.
4. Fix the “U” bracket on the stud or beam with appropriate fasteners
(not supplied).
Figure 1
Figure 2a
Figure 2b
8-1/4”
5-3/4”