PASCO ES-9060 Charge, Equipotential and Field Mapper User Manual
Page 8
®
Model No. ES-9060
Charge, Equipotential, and Field Mapper
7
The line will be air dry in 3-5 minutes at room temperature. However,
the medium won’t reach maximum conductivity until after 20 minutes
drying time.
e) A plastic template is included
with the PASCO Field Mapper
for drawing circles (See Figure
4). Place the template on the
conductive paper and draw the
circles with the conductive ink
pen. (If desired, you may first
draw the circle template with a
soft lead pencil and trace over the
pencil line with the ink.)
3. Mount the conductive paper on the corkboard using one of the
metal push pins in each corner.
Part II: Connecting the Electrodes to a Power Supply and
Checking their Potential
1. Using the supplied connecting wires, connect the electrodes to a
battery, DC power supply, or any other potential source in the 5 to 20
VDC range (See Figure 5). The potential source should be capable of
supplying 25 mA. (If possible, the potential should be equal to the full
scale reading of the electronic voltmeter used in the experiment.)
2. Place the terminal of a connecting wire over the electrode, then
stick a metal push pin through its terminal and the electrode into the
Figure 4: Drawing over the
template
M
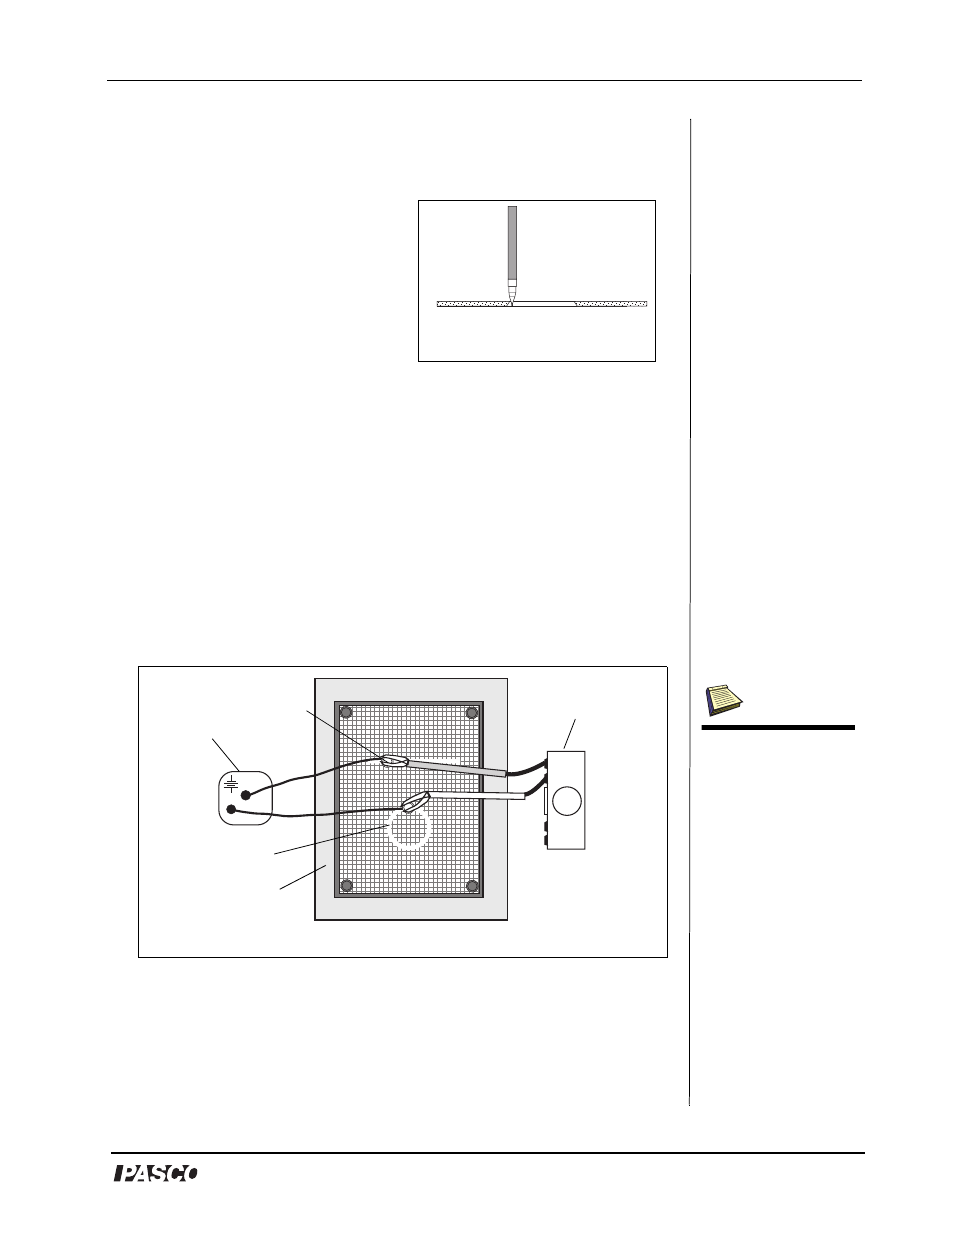
Figure 5: Connecting Electrodes to a Power Supply and Voltmeter
DC Power
Supply
Voltmeter
corkboard
electrode
push pin
Note: The Voltmeter used
must meet the following
specifications: a) be at
least 10 M or higher
and b) have a range
which is equal to or
higher than the potential
used across the elec-
trodes. Any commercial
voltmeter, either analog
or digital, is adequate.
The PASCO ES-9078
Electrometer or the SE-
9589 Digital Multimeter
are recommended.
Ω