Introduction, Predictions, Set-up – PASCO ME-6807A Human Arm Model User Manual
Page 17
®
17
Experiment 5: Biceps Force versus Shoulder Angle,
Constant Elbow Angle
Introduction
Hold a mass in your hand with your elbow at 90° so that your upper arm hangs verti-
cally and your forearm is horizontal. While keeping your elbow bent at 90°, lift the
mass by rotating your entire arm forward about your shoulder.
Predictions
1.
As you lift the mass, does your biceps force increase or decrease?
2.
Sketch your prediction of the biceps force versus shoulder angle graph.
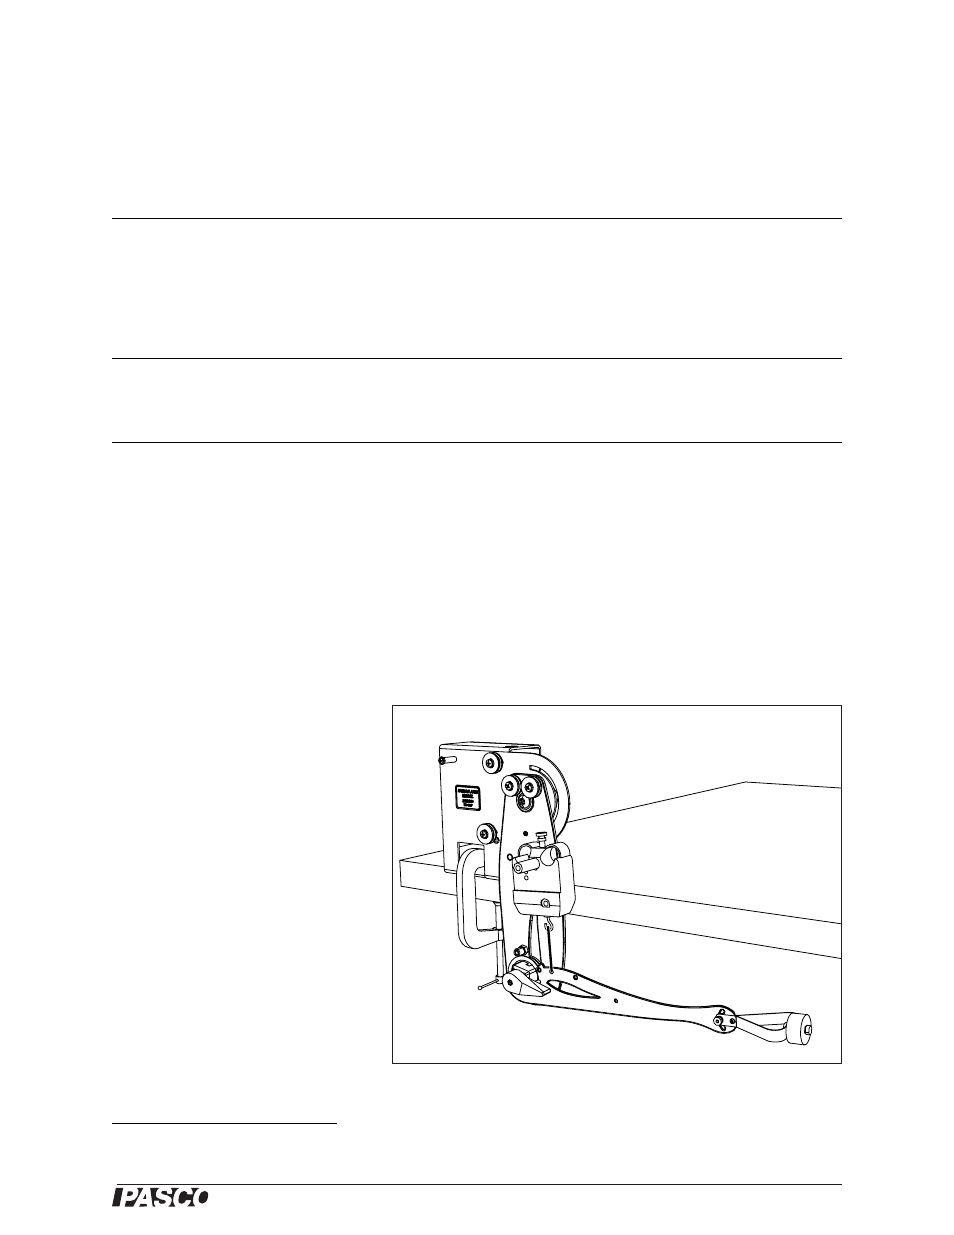
Set-up
1.
Install the 100 g mass on the
model’s hand.
2.
Clamp the arm model vertically as
illustrated.
3.
Use a sensor stud to attach the
force sensor to the upper arm in
the biceps position as illustrated.
1
4.
Attach a short cord between the
forearm and the force sensor as
illustrated. Adjust the length of
the cord (or the clamped position
of the force sensor) so that the
elbow is bent at 90°.
5.
Connect the arm model to the
angle sensor. Connect the angle sensor and force sensor to your interface.
Required Parts of Human Arm Model
Arm
Cord (1 piece)
100 g mass
Sensor-mounting stud
Other Required Equipment
Angle Sensor
PS-2139
Force Sensor
PS-2104
or PS-2189
C-clamp
SE-7286 (6-pack)
1
Older versions of the Human Arm Model do not include holes for attaching a sensor stud to the upper
arm. If you have an older version, use a C-clamp to attach the force sensor