Procedure – PASCO OS-8459 Beginning Optics System User Manual
Page 36
®
B e g i n n i n g O p t i c s S y s t e m
E x p e r i m e n t 1 2 : M i c r o s c o p e
36
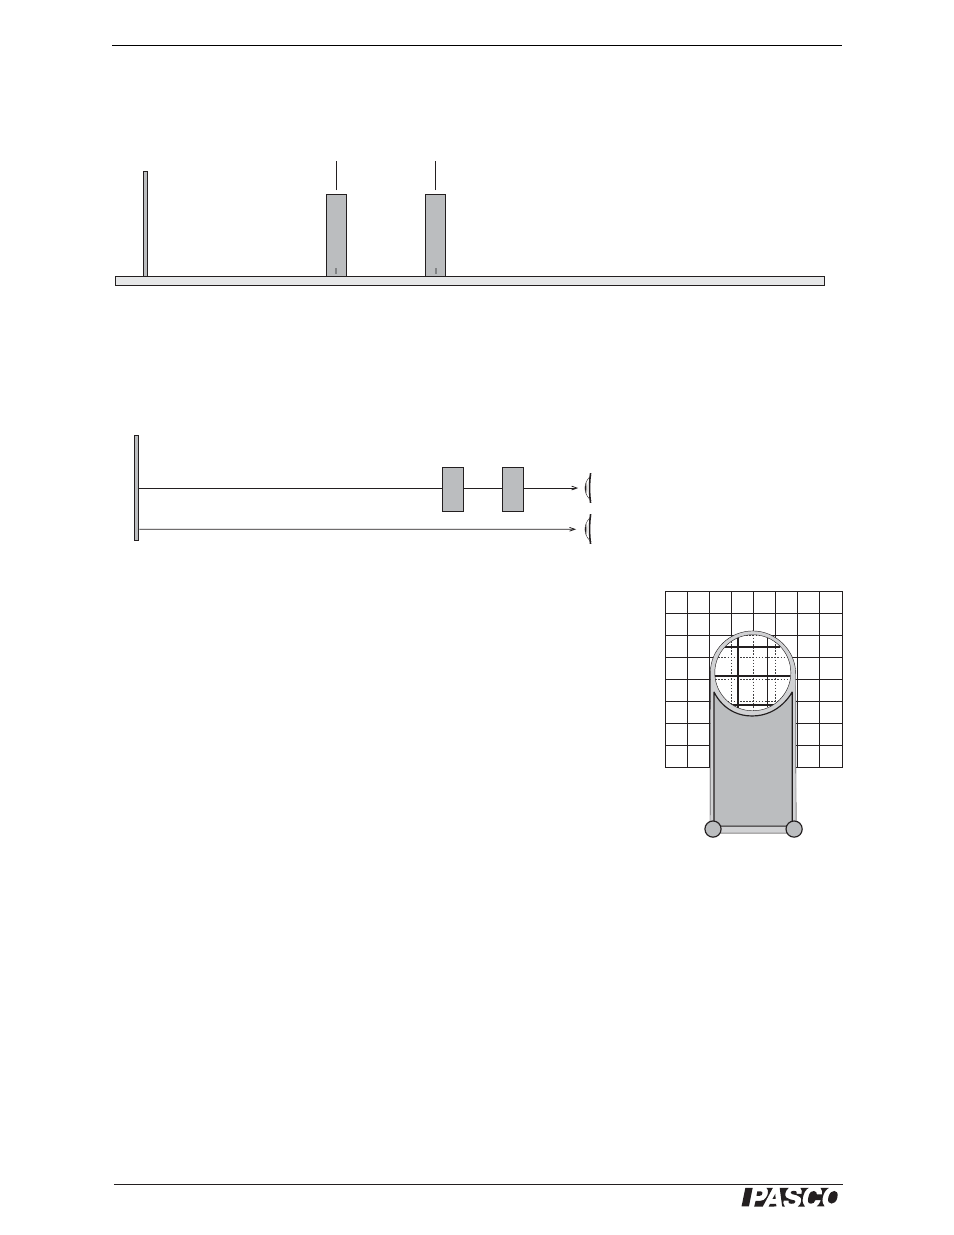
middle of the optics bench and place the screen near the end of the bench (see
Figure 12.2).
Figure 12.2
Procedure
1.
Put your eye close to the eyepiece lens and look through both lenses at the grid
pattern on the screen. Move the objective lens to bring the image into focus.
Figure 12.3
2.
In this step, you will adjust your microscope to make the image occur in the
same place as the object. To do this, you will look at both image and object at
the same time and judge their relative positions by moving your head side to
side. If the image and object are not in the same place, then they will appear
to move relative to each other. This effect is known as parallax.
Open both eyes. Look with one eye through the lenses at the image and with
the other eye past the lenses at the object (see Figure 12.3). The lines of the
image (solid lines shown in Figure 12.4) will be superimposed on the lines of
the object (shown as dotted lines in Figure 12.4). Move your head left and
right or up and down by about a centimeter. As you move your head, the lines
of the image may move relative to the lines of the object due to the parallax.
Adjust the eyepiece lens to eliminate parallax. Do not move the objective
lens. When there is no parallax, the lines in the center of the lens appear to be
stuck to the object lines.
Note: Even when there is no parallax, the lines may appear to move near the edges of the lens
because of lens aberrations. Concentrate on the part of the image seen through the centers of
the lenses. Be sure that the eye looking at the object (the left eye in Figure 12.3) is looking directly
at the object and not through the objective lens.
3.
Record the positions of the lenses and the object in Table 12.1.
4.
Estimate the magnification of your microscope by counting the number of object
squares that lie along one side of one image square. To do this, you must view the
image through the microscope with one eye while looking directly at the object
with the other eye. Remember that magnification is negative for an inverted
image. Record the observed magnification in Table 12.1.
Screen
+100 mm
objective lens
+200 mm
eyepiece lens
Left eye
Right eye
Screen
Objective
lens
Eyepiece
lens
Lens Holder
Figure 12.4