PASCO CI-6538 Rotary Motion Sensor User Manual
Page 29
Rotary Motion Sensor
Model No. CI-6538
28
®
Setup:
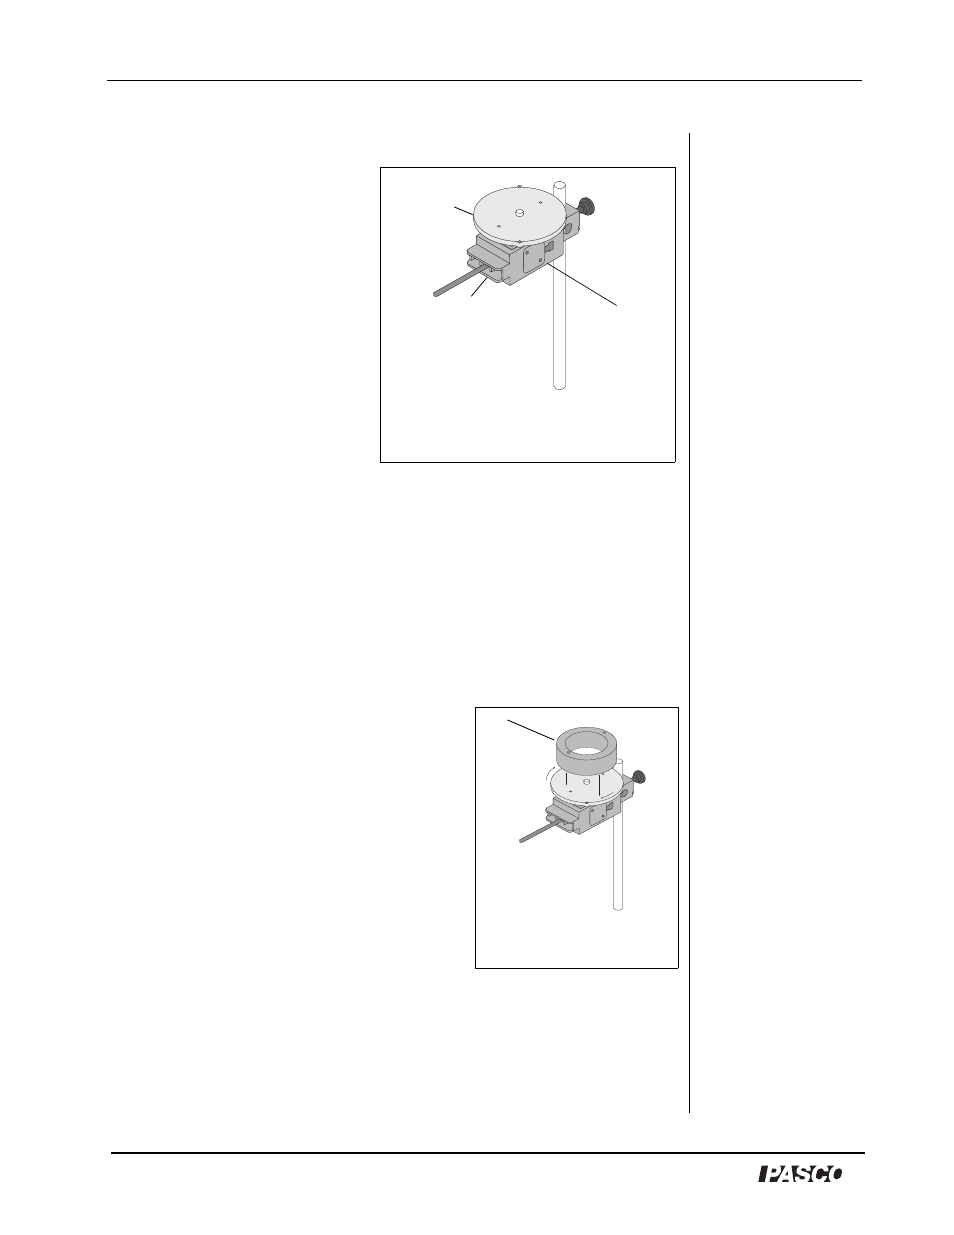
1.
Mount the RMS to a support
rod and connect it to a
computer. Place the disk
directly on the pulley as
shown in Figure 3.1.
2.
Open DataStudio.
3.
In the Experiment Setup
window, click and drag a
Rotary Motion sensor icon to
the first of the two
consecutive digital ports that
the RMS is plugged into on
the interface.
4.
In the Sensors list of the Experiment Setup window, double click the
Rotary Motion Sensor icon to activate the Sensor Properties dialog box.
5.
In the Measurement tab of the Sensor Properties dialog, select “Angular
Velocity (rad/s)”; click OK.
6.
In the Rotary Motion Sensor tab of the Sensor Properties dialog, select
360 divisions/rotation.
Procedure:
1.
Hold the ring with the pins up just above the
center of the disk. Give the disk a spin using
your hand and click the Start button. After
about 25 data points have been taken, drop
the ring onto the spinning disk. See Figure
3.2.
2.
Click on the Stop button to end the data
collection.
3.
Click on the Smart Tool and move the cursor
to the data point immediately before the
collision. Record the Angular Velocity at
this point in Table 3.1. Move the cursor
to
the data point immediately after the
collision. Record the Angular Velocity at this point in Table 3.1.
4.
Weigh the disk and ring and measure the radii. Record these values in
Table 3.1.
Figure 3.1: Setup for Dropping
Ring Onto Disk
disk
RMS with
3-step Pulley
support
rod
Figure 3.2: Drop Ring
on Disk
ring