Pod extension kit installation – Liquid Controls POD User Manual
Page 9
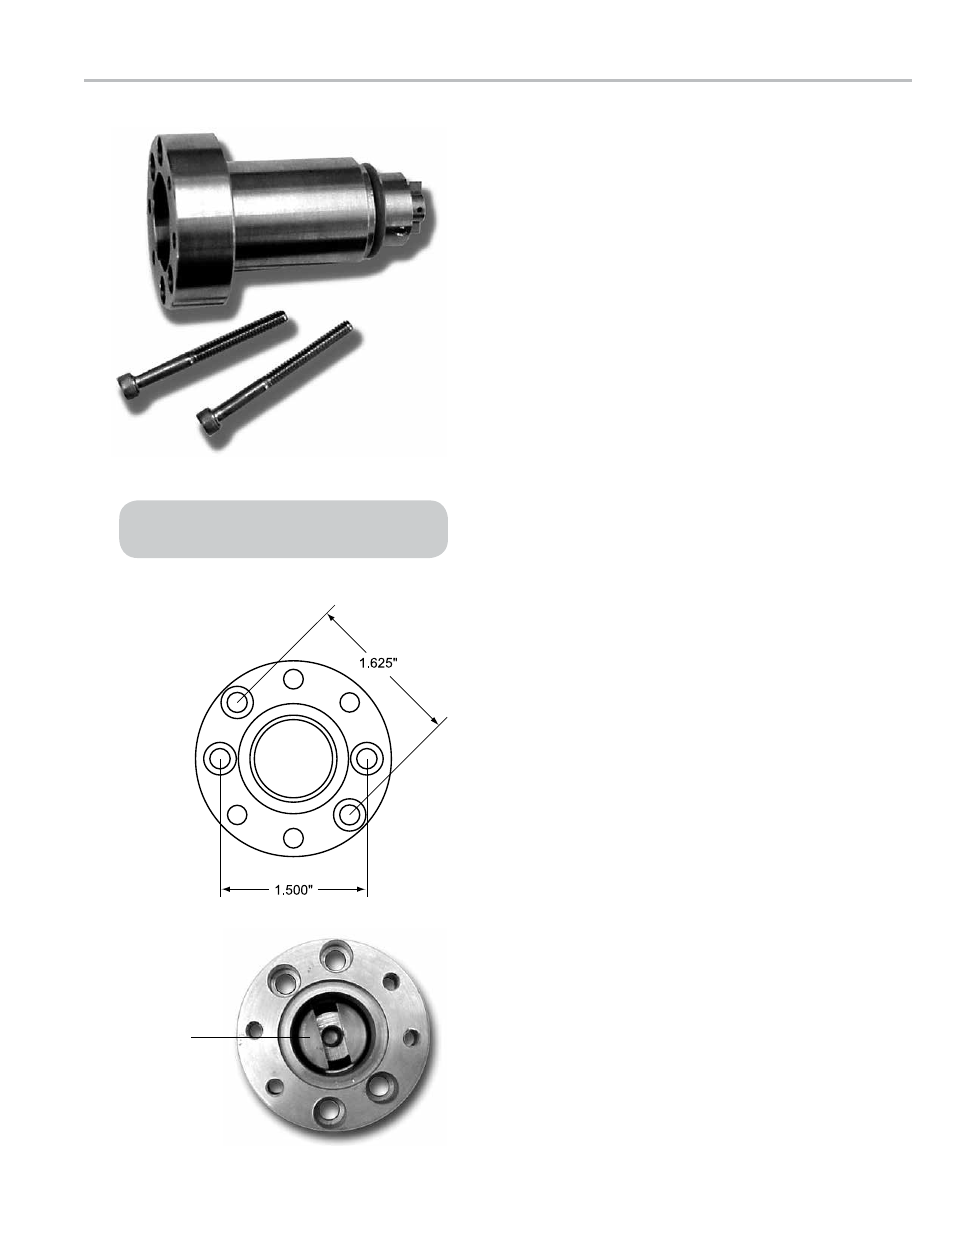
Pod extensIon kIt InstallatIon
Pod
Extension
Driver
Regardless of the POD Extension being used, the
POD Pulser must be a FORK drive pulser.
POD Extension Kit Installation
The POD Extension is used when the meter has an
integral counter adapter bracket or for high temperature
applications. The POD Extension is used to extend the
connection away from the meter.
There are four POD Extension models available.
49754 POD1 or POD5
Fork Drive with Buna-N O-Ring
49756 POD2
Fork Drive with Teflon O-Ring
49757 POD1 or POD5
Blade Drive with Buna-N O-Ring
49759 POD2
Blade Drive with Teflon O-Ring
Once the existing hardware has been removed as
described on Page 4, the POD Extension can be
installed.
To install the POD Extension:
1. Verify that the proper POD Extension Model was obtained
by comparing the driver tang on the POD Extension to
the driver tang on the packing gland that was removed
in Step 5 of Removing Existing Hardware on Page 4.
There are two types of Packing Gland/POD Extension
driver tangs: blade type and fork type. Blade type
packing glands must be replaced with blade type POD
Extensions. Fork type packing glands must be replaced
with fork type POD Extensions.
2. Install the POD Extension using the two screws provided.
There are two sets of holes in the POD Extension for
these screws; one set is 1⅝" apart and the other is 1½"
apart. Line up the holes with the meter to determine
which set to use. Tighten the screws and torque them to
21-25 inch-pounds.
3. Once the POD Extension is in place, the POD may be
installed onto the POD Extension. Align the POD Fork
Tang with the internal POD Extension Driver. Use the two
screws provided to mount the POD to the POD Extension
using two of the tapped holes in the POD Extension.
Using a ⁷⁄₃₂" box end wrench, tighten the screws and
torque them to 21-25 inch-pounds.
9