Pod installation, Installing the pod – Liquid Controls POD User Manual
Page 8
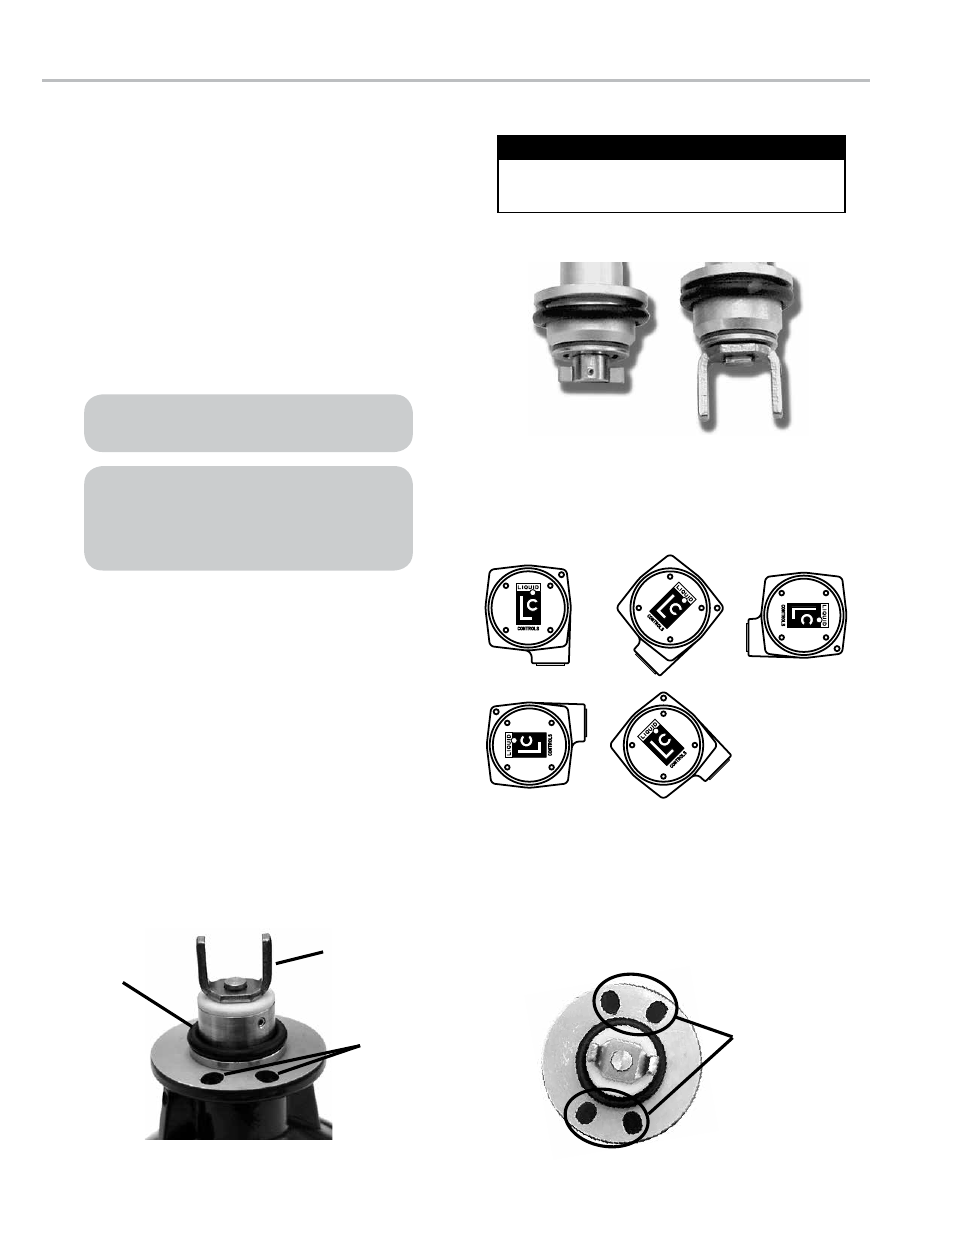
Pod InstallatIon
Installing the POD
To install the POD onto a flowmeter:
1. Verify that the proper POD Model was obtained by
comparing the driver tang on the POD to the driver tang
on the packing gland that was removed in Step 5 of
Removing Existing Hardware on Page 4. There are two
types of packing gland/POD driver tangs: blade type and
fork type. Blade type packing glands must be replaced
with blade type PODs. Fork type packing glands must be
replaced with fork type PODs.
2. Determine the desired orientation of the conduit hub.
The hub can be positioned in one of eight possible
orientations as shown in the figure to the right.
3. Position the O-Ring over the bottom of the POD as
shown to the right.
4. Align the fork style or blade style driver with the drive
mechanism in the meter and guide the POD into the
opening in the meter cover. When properly aligned, the
POD will go in until its mounting flange abuts the meter
cover.
5. Rotate the POD to the desired orientation and thread in
the mounting screws until they are snug. Using a ⁷⁄₃₂" box
end wrench, tighten the screws and torque them to 21-25
inch-pounds.
When using a cable gland to seal the wire
entrance, any of the eight orientations can be used.
However, when using conduit, the hub should
face down so moisture that may accumulate in the
conduit will drain away from the POD electronics.
Meters with only two packing gland mounting
screws are limited to four orientations.
O-Ring
Mounting
Holes
Fork Style Tang
If a POD Extension Kit is required, it must be installed
prior to installation of the POD. See Page 9.
POD Extension Kits
Mounting Holes
Blade Style Tang (Left) and Fork Style Tang (Right)
Recommended POD Conduit Hub Orientations
8