Removing the non-corroded rotor gears, Removing the bearing plates and rotors – Liquid Controls MA4 Meter User Manual
Page 20
20
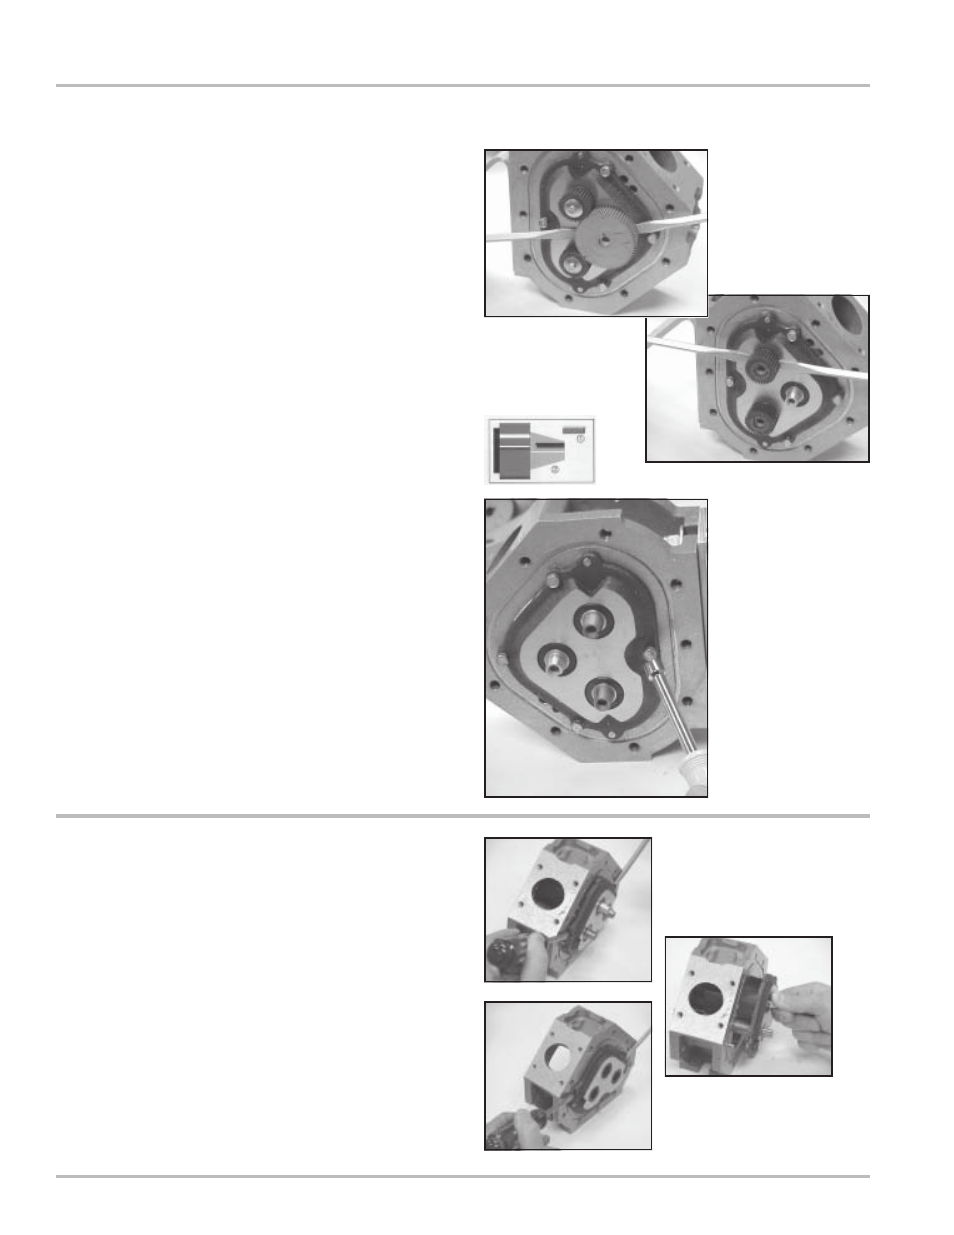
Removing the Non-Corroded Rotor Gears
7.
If the Gears show signs of corrosion, use the
alternative method describe on Page 21, “Removing
Corroded Rotor Gears”. Insert two standard
screwdrivers behind the blocking rotor gear. Gently
pry the gear off its rotor tapered end. If the gear does
not pry off easily, or feels stuck, use the alternative
method described on Page 21, “Removing Corroded
Rotor Gears”.
8.
Use the same method to remove the left and the right
rotor gears. Remember, if the gear does not pry off
easily or feels stuck, use the alternative method
described on Page 21, “Removing Corroded Rotor
Gears”.
9.
As each gear comes off the rotor, remove the key (1)
from the rotor keyway (2). Save the key to use when
reassembling the meter.
10. Use the bearing plate wrench to remove the bolts
that hold the front bearing plate to the meter housing.
On the back of the meter housing, remove the bolts
that hold the rear bearing plate to the housing. Go to
Step 1, “Removing the Bearing Plates and Rotors”.
Removing the Bearing Plates and
Rotors
1.
Insert a screwdriver into each of the two notches near
the dowel pins. Be careful not to mar any of the
surfaces. Gently pry the front bearing plate off the
dowel pins.
2.
Remove the front bearing plate and rotor assembly
by pulling a rotor straight out from the housing. Be
careful not to mar any of the surfaces.
3.
Remove the remaining bearing plate from the other
side by inserting a screwdriver into each of the two
notches near the dowel pins. Be careful not to mar
any surfaces. Gently pry the rear bearing plate off
the dowel pins.