Vapor eliminator & strainer maintenance, Disassembling and assembling – Liquid Controls MA4 Meter User Manual
Page 15
15
Vapor Eliminator & Strainer Maintenance
Servicing of the vapor eliminator and strainer involves
occasional cleaning of the strainer, or, when required,
replacing a float or sticking valve.
!
!
!
!
! WARNING
All internal pressures must be relieved before
disassembly or inspection of the strainer, air eliminator,
any valves in the system, the packing gland, and the
front or rear covers. See “Relieving Internal Pressure”
(Page 10).
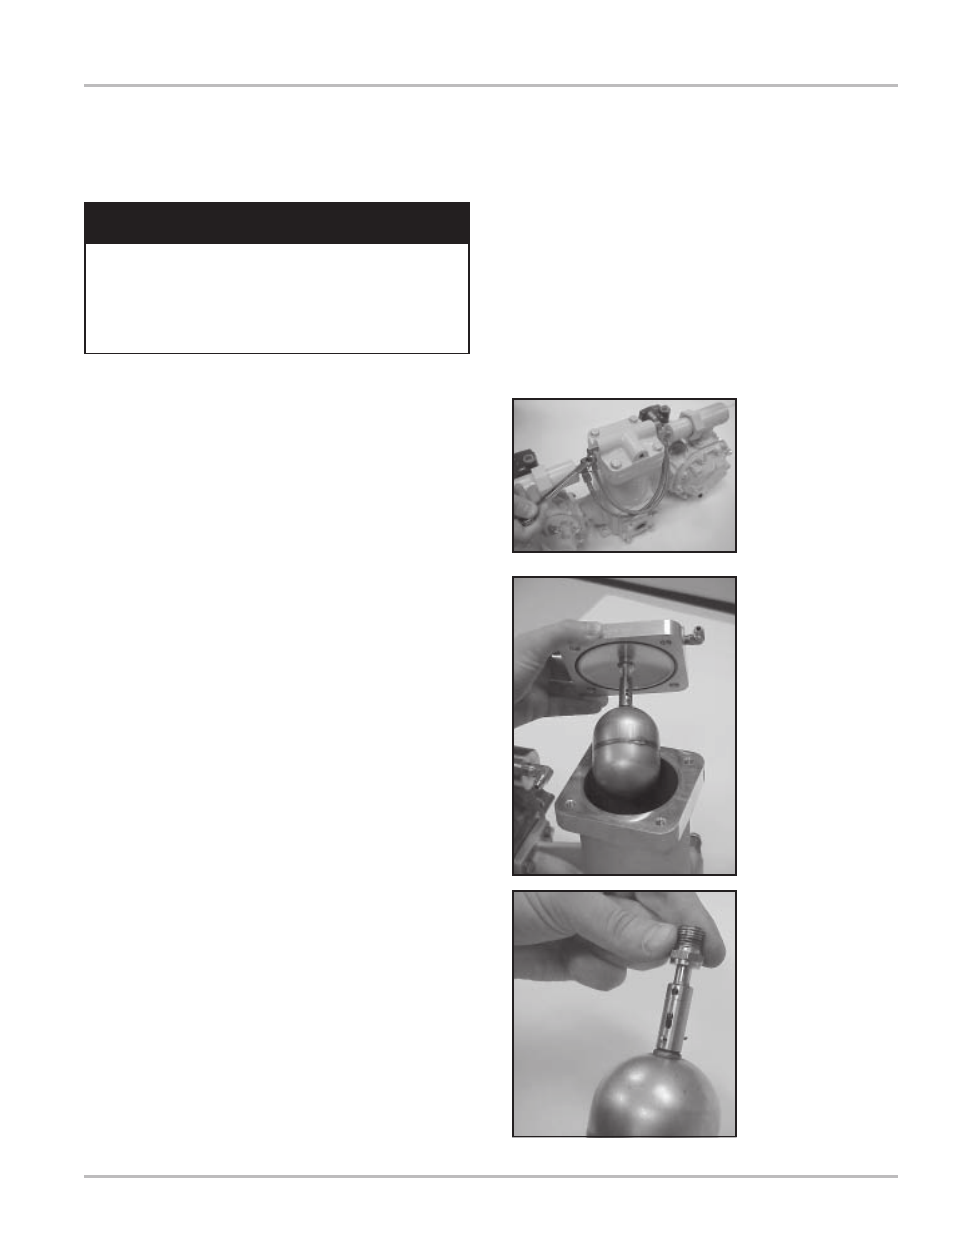
Disassembling and Assembling
1.
Disconnect the tubing between the differential valve
and vapor eliminator cover. For the dual meter
system, this may require removal of two segments
of tubing.
2.
Remove the four screws on the Vapor Eliminator
cover. Lift the cover to inspect the internal float
assembly. Be careful not to damage the O-Ring seal.
3.
If the float is crushed or damaged, remove cotter pin
and replace float.
4.
Carefully inspect the sleeve valve for any resistance
to smooth movement of the sleeve on the stem.
Inspect all holes in the sleeve and the stem for foreign
material, which could cause sticking of the valve
and obstruct the flow through the valve. With the float
removed, the sleeve must move on the stem by its
own weight. If defective, replace sleeve and stem
assembly. Note: The vent hole is larger than the
cotter pin hole used to attach the sleeve to the float.
If replacing the sleeve, ensure that the sleeve is in
the correct orientation with the larger hole on top.