Installing the rack – Controlled Products Systems Group 109837 User Manual
Page 10
10
FAAC MODEL 844 Slide Gate Operator
15 ¾
- Measurements in Inches
2 ½
2
4 ⅜ (Z16)
4 ¾ (Z20)
⅝ to 1 ¼
- Measurements in Inches
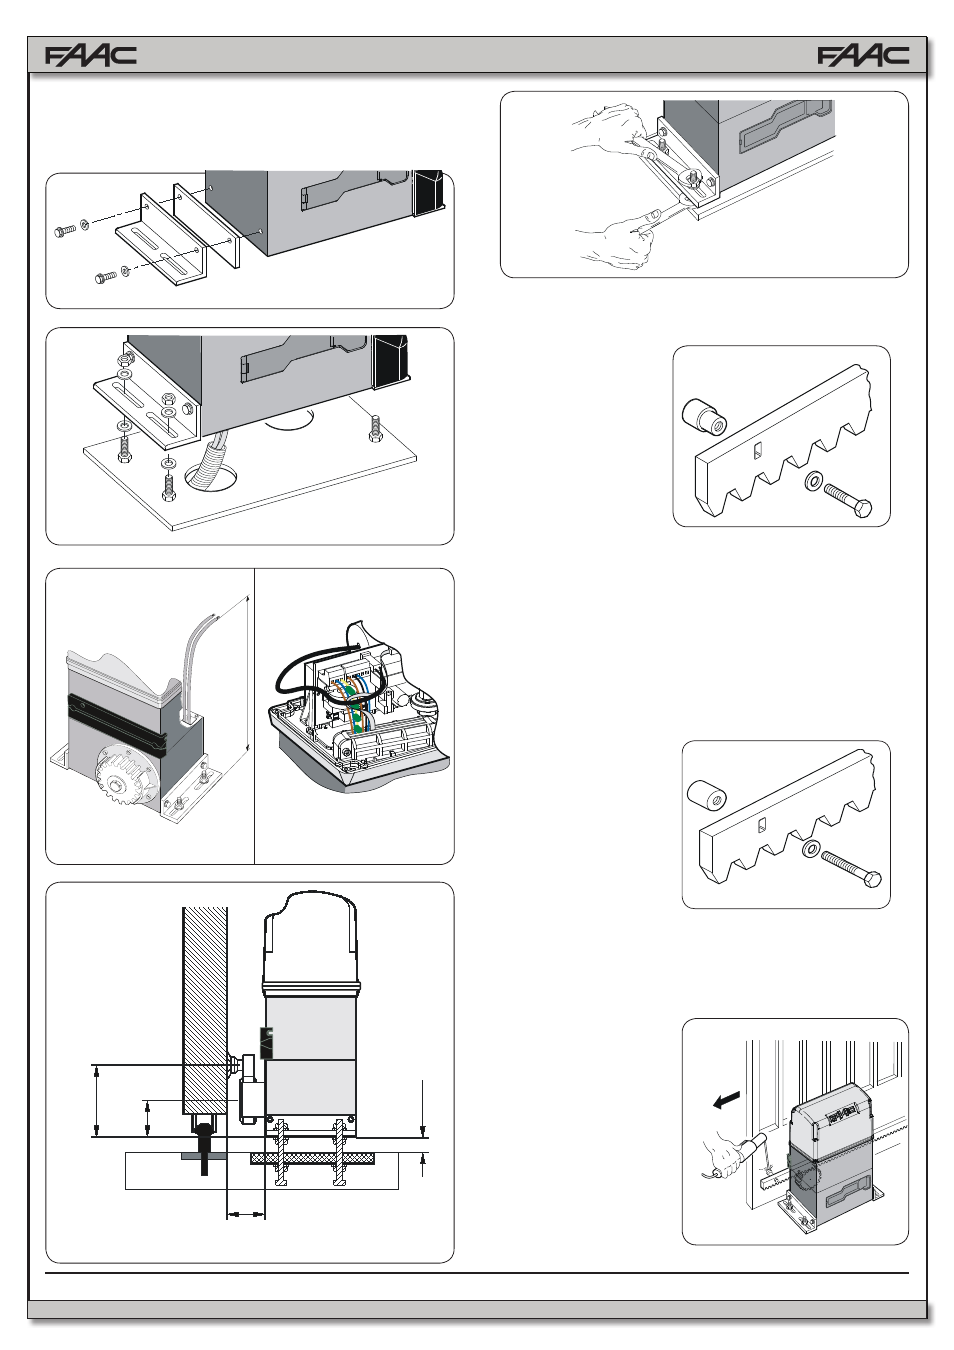
1. Manually move the
leaf to its closing
position.
2. Lay the first piece
of rack level on
the pinion and
place the spacer
between the rack
and the gate,
positioning it at the
top of the slot.
Fig. 8
Fig. 12
Fig. 10B
Fig. 10A
Fig. 11
Fig. 9
Fig. 13
5. Secure the operator to the foundation plate, tighten nuts as
shown in Fig. 12.
6. Prepare the operator for manual operating mode as described in
Section 8.
1. Place the three
threaded dowel nuts
on the rack element,
positioning them at
the top of the slot.
In this way, the slot
play will allow any
adjustments to be
made.
2. Manually move the
leaf to its closed
position.
Fig. 15
4.4.
INSTALLING THE RACK
3. Lay the first piece of rack level on the pinion and weld the
threaded dowel nut to the gate as shown in Fig. 15.
4. Move the gate manually, checking that the rack is resting on the
pinion, then weld the second and third dowel nut.
5. Place another rack element next to the previous one, use a
third piece of rack (as shown in Fig. 16) to synchronize the
teeth of the first two elements.
6. Move the gate manually and weld the three threaded dowel
nuts. Proceed as described until the gate is fully covered.
4.4.1.
STEEL RACK TO WELD (Fig. 13)
4.4.2.
STEEL RACK TO SCREW (Fig. 14)
5. Place another rack
element next to the
previous one, use
a third piece of rack
(as shown in Fig. 16)
to synchronize the
teeth of the first two
elements.
6. Move the gate
manually and
secure the first
element. Proceed as
previously described
until the gate is fully
covered.
Fig. 14
3. Mark the drilling point on the gate. Drill a Ø ¼ inch hole and ap-
ply thread with a Ø 5/16 inch male tap. Screw in the bolt.
4. Move the gate manually, checking that the rack is resting on the
pinion. Repeat step 3.