Mount the operator, Installation step 2 – Controlled Products Systems Group 3950 User Manual
Page 7
7
INSTALLATION STEP 2
Mount the Operator
The operator can be mounted to the wall with the mounting
brackets provided.
An optional guide mounting bracket is available for purchase
(see accessories).
Fasten the operator to the mounting surface using appropriate
method and hardware (not provided).
Anchors must be fastened to structural members only. Use
concrete anchors for masonry construction.
NOTE: Mounting the operator to drywall is not recommended.
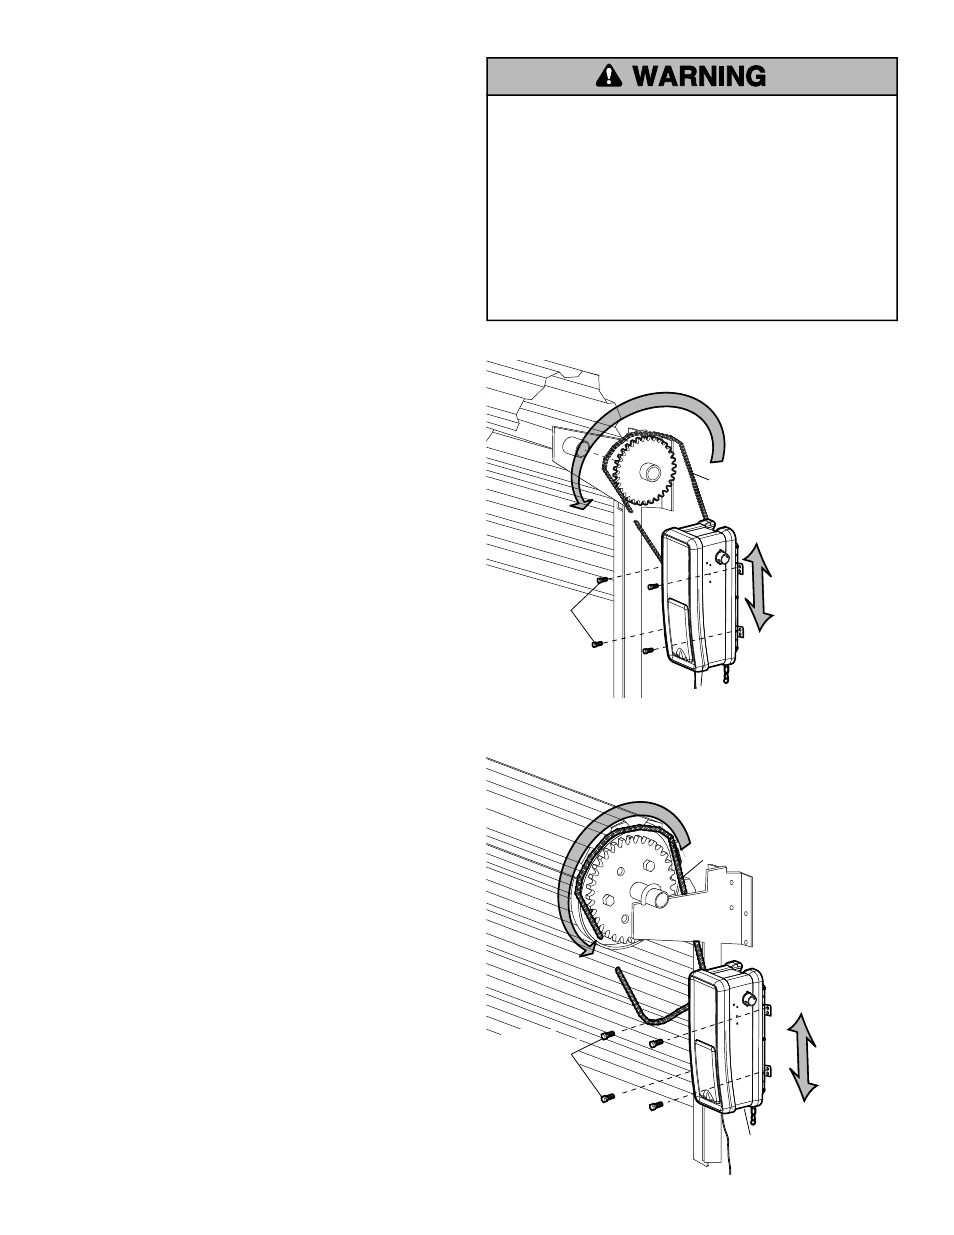
1. Raise the operator to approximate mounting position, make
sure the drive sprocket is aligned with the door sprocket.
NOTE: If the drive and the door sprockets are not aligned, the
drive sprocket can be laterally adjusted by removing the bolt
from the drive sprocket.
2. Wrap the chain around the door and drive sprockets.
3. Connect the ends of the chain using the master link (provided).
4. Raise or lower the operator until the chain is taut (not tight).
Make sure the operator output shaft is parallel to door shaft
and sprockets are aligned.
5. Secure the operator to wall using appropriate method.
6. Tighten the drive sprocket bolts using a 5/32" Allen wrench.
Live Shaft
Dead Shaft
Operator
Chain
Mounting
Hardware
(not provided)
Chain
Operator
To prevent possible SERIOUS INJURY or DEATH:
• Concrete anchors MUST be used if mounting bracket into
masonry.
• NEVER try to loosen, move or adjust door, springs, cables,
pulleys, brackets or their hardware, ALL of which are under
EXTREME tension.
• ALWAYS call a trained door systems technician if door
binds, sticks or is out of balance. An unbalanced door might
not reverse when required.
• Operator MUST be mounted at a right angle to the door
shaft.
Mounting
Hardware
(not provided)