User interface, Switching on and off – Hach-Lange ORBISPHERE 6110 Basic User Manual User Manual
Page 8
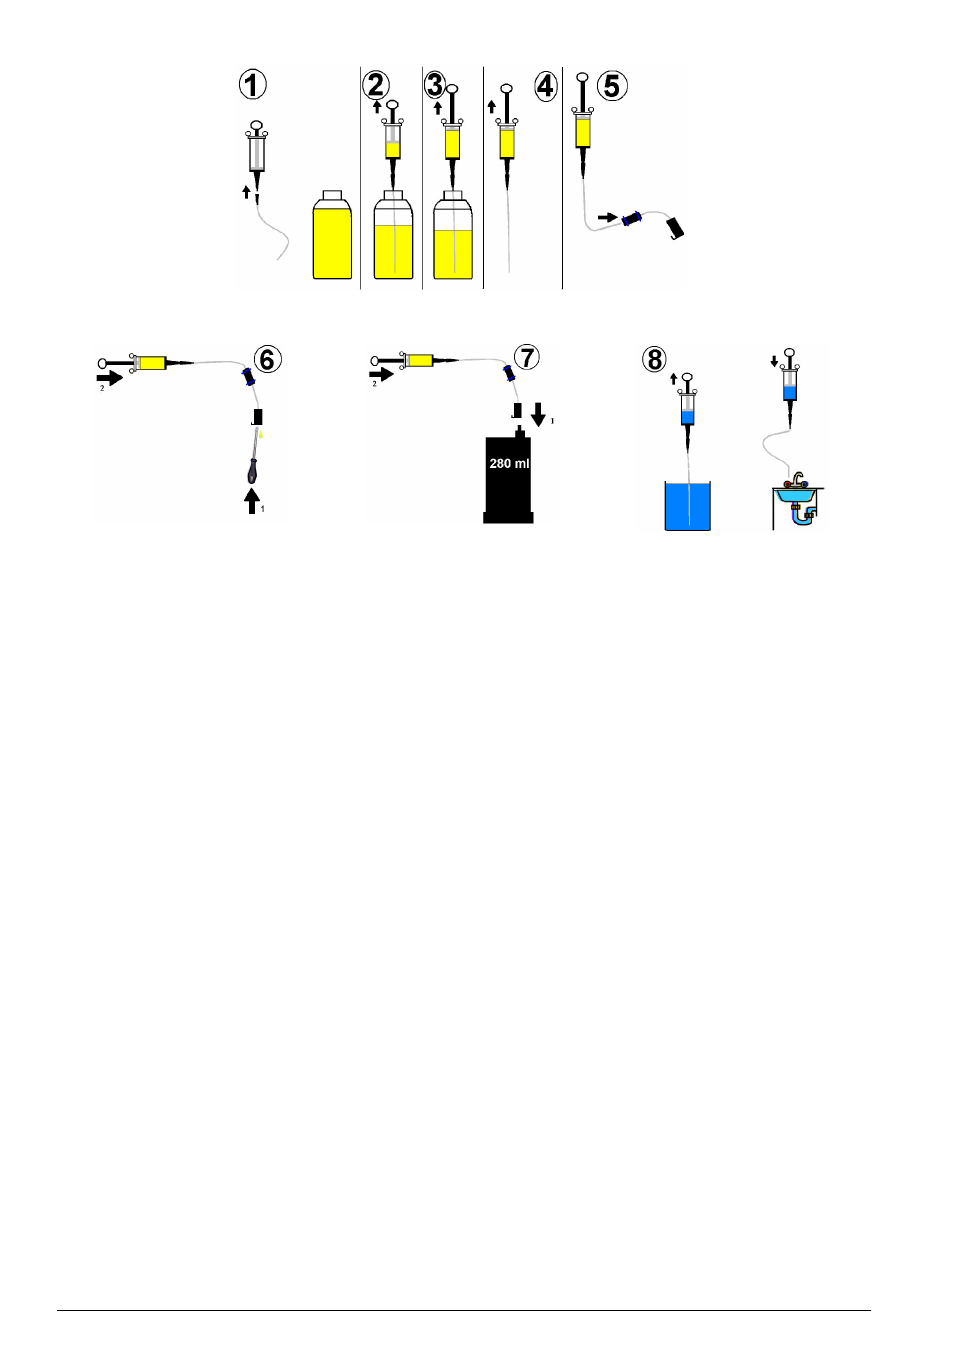
1. Connect the syringe to the tubing with the quick connector.
2. Unscrew the cap from the antifoam recharge bottle and put the tubing in, making sure it goes as
near to the bottom of the liquid as possible.
3. Pull on the syringe to extract the liquid until the syringe is full.
4. Remove the syringe and tubing from the recharge bottle.
5. Attach the end of the tubing from the syringe to the other piece of tubing using the quick fit
connector.
6. Remove any trapped air in the system by applying a small amount of pressure to the end of the
connector with a small screwdriver (or similar) to open the valve. Push slightly on the end of the
syringe until antifoam can be seen dripping out of the end of the connector. Remove the
screwdriver.
7. Attach the end of the second piece of tubing to the antifoam cartridge by pressing until the
connector clicks into place on the inlet valve. Then, push on the end of the syringe to empty the
contents into the cartridge. The syringe has a volume of 100mL and the cartridge a volume of
280mL, so repeat the process until the antifoam cartridge is full.
8. On completion, rinse out the syringe and all tubing with water. Screw the cap back onto the
antifoam container and store the tools and container in a cool dry place.
Note: After installation of the antifoam cartridge in the analyzer, it is critical that any air bubbles be cleared from
the antifoam circuit before taking any measurements. To do this, select the Antifoam system option from the
Actuator verification option in the Maintenance menu and follow the instructions as described in
on page 21. Select 50 injections and stop the process when the system constantly spits a small
stream of antifoam at each stroke denoting the antifoam circuit is free of air bubbles.
User interface
Switching ON and OFF
The instrument has a power switch located at the rear of the left side of the base. The LED on the
instrument measurement start button is illuminated when the instrument is powered ON.
Note: It is recommended to keep the instrument powered ON at all times, unless the instrument is to be moved to
another location, if it will not be used for a long period of time, or if maintenance procedures need to be carried out
inside the instrument.
8 English