Intercom and relay connections, Intercom headset connection, Wire intercom connection – Clear-Com HME DX121 User Manual
Page 26: Relay operation
22
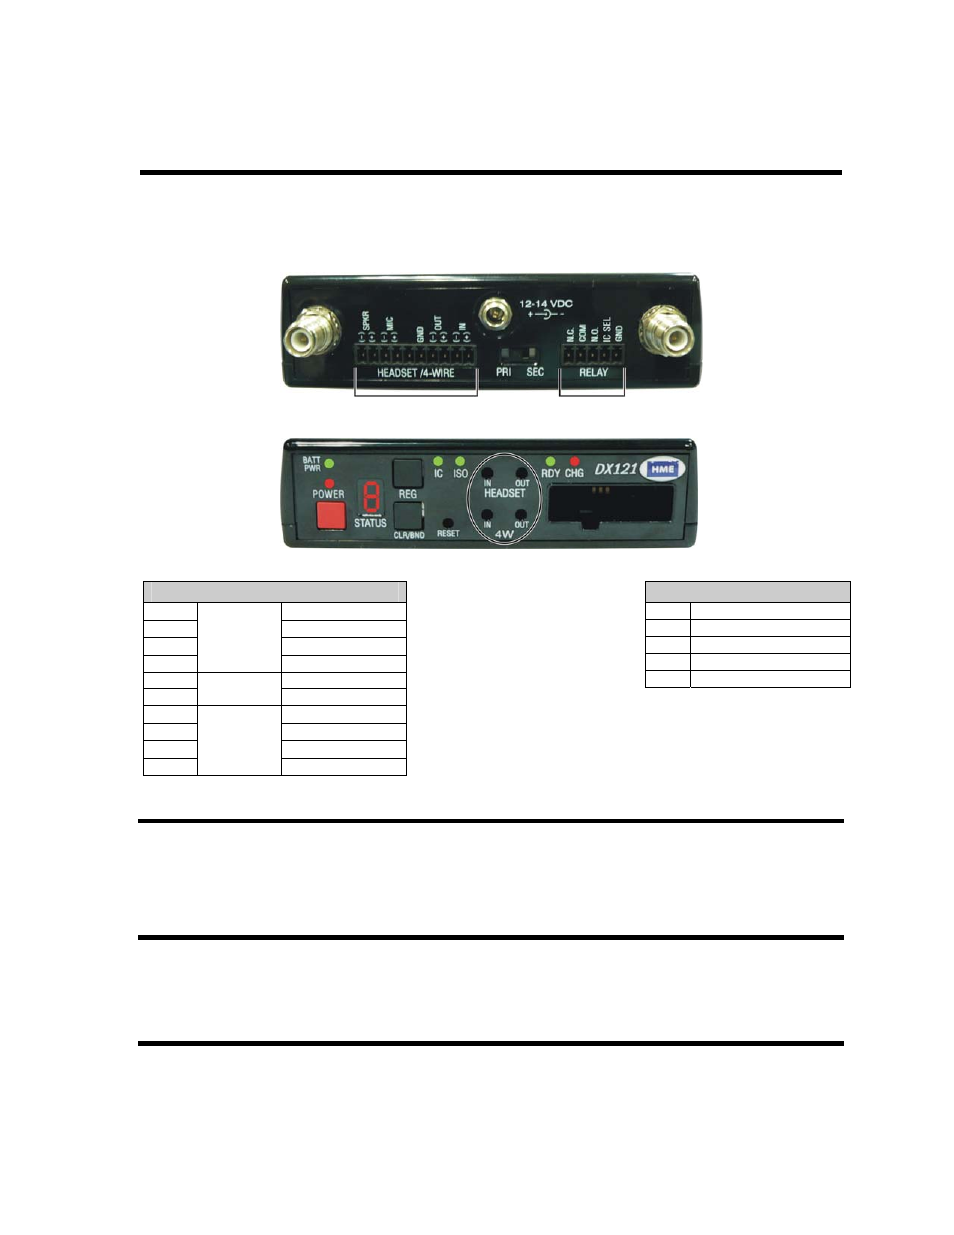
INTERCOM AND RELAY CONNECTIONS
If using your DX121 with a wired intercom system, connect the intercom to the HEADSET/4-WIRE connector
on the rear panel of the Base Station as shown below. Also, the RELAY connector shown below can be used as
a “dry contact” for any outside equipment.
Base Station rear panel showing HEADSET/4-WIRE and RELAY connectors
Base Station front panel showing HEADSET and 4W (4-Wire) input and output level adjustments
HEADSET/4-WIRE Connector
Pin 1
SPKR
− Input
Pin 2
SPKR + Input
Pin 3
MIC
− Output
Pin 4
Headset
connections
MIC + Output
Pin 5
N/C
Pin 6
GND
Pin 7
4-WIRE
− Output
Pin 8
4-WIRE + Output
Pin 9
4-WIRE
− Input
Pin 10
4-Wire
connections
4-WIRE + Input
Intercom Headset Connection
If using the headset connector of an intercom, connect the wires from a headset connector (not provided) to
pins 1 through 4 of the HEADSET/4-WIRE connector on the rear panel of the Base Station. Be sure the
headset jack of the intercom system is turned on. For intercom headset wiring diagram, see page 34.
4-Wire Intercom Connection
If using a 4-Wire intercom, connect the wires from a 4-Wire connector into the HEADSET/4-WIRE connector
on the rear panel of the Base Station. For 4-Wire wiring diagram, see page 34.
Relay Operation
In the default mode, the relay will operate only when the ISO button is pressed. In the IC SEL mode, the relay
will operate only when the IC button is pressed. With either mode, the IC button activates audio to the
HEADSET/4-Wire IN/OUT connector. The IC SEL mode is selected by placing a jumper across pins 4 and 5 of
the RELAY connector.
RELAY Connector
Pin 1 N.C. (Normally Closed)
Pin 2 COM
Pin 3 N.O. (Normally Open)
Pin 4 IC SEL
Pin 5 GND
NOTE: Indicated
PinOut connections
should be matched
to the corresponding
PinOut connections
of the intercom
which will be used.