Cashco DA6 User Manual
Page 6
IOM-DA6
6
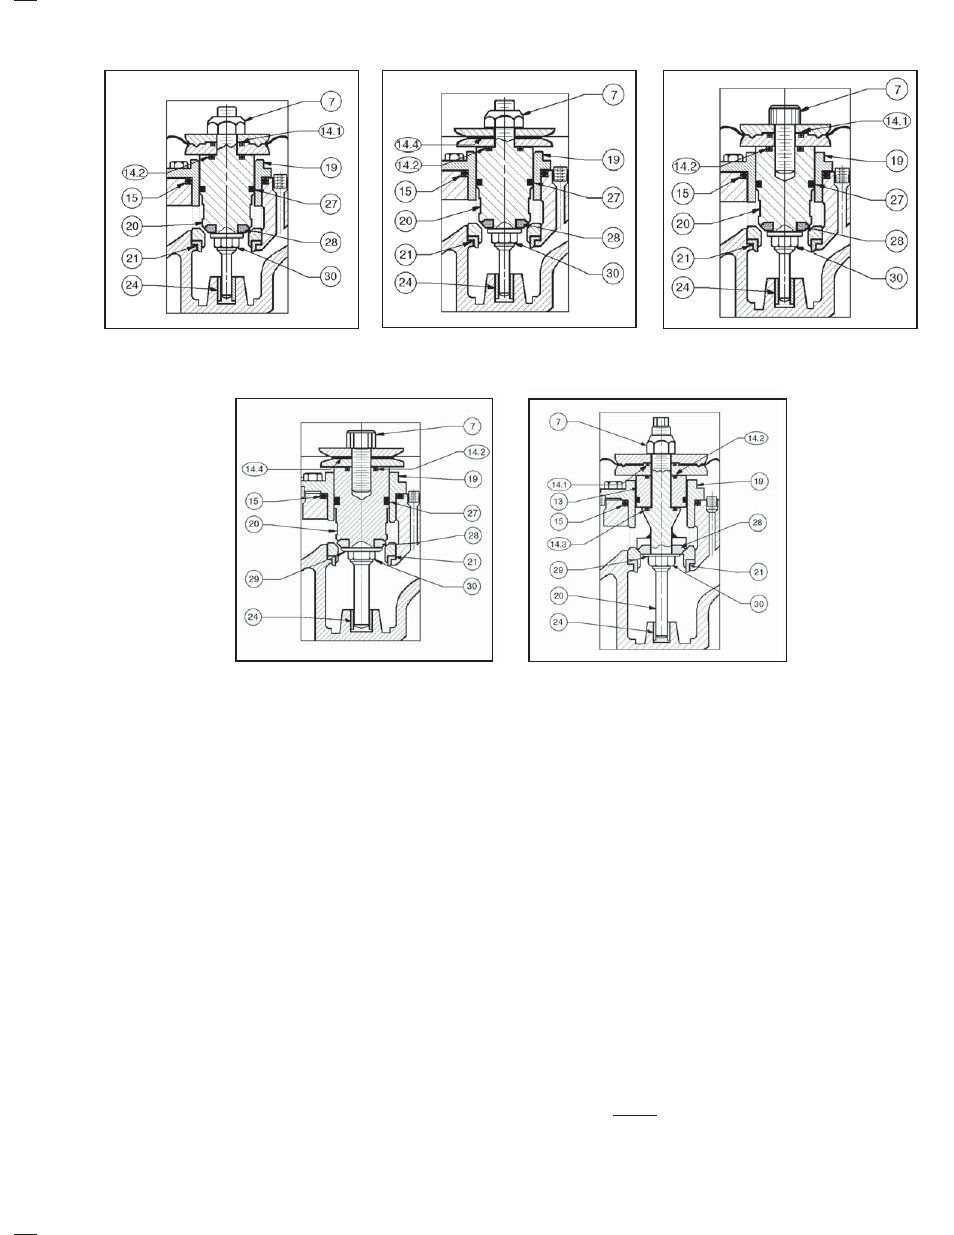
Figure 2: Body Sizes
1/2" – 1", Composition Di a phragm
Figure 3: Body Sizes
1/2" – 1", Metal Diaphragm
Figure 4: Body Sizes
1-1/4" – 2", Composition Diaphragm
Figure 5: Body Sizes
1-1/4" – 2", Metal Diaphragm
con di tions are ex ceed ing pressure drop
or temperature limits.
e. Remove
up
per stem seal (14.1).
f. Remove lower diaphragm push er plate
(10).
g. Remove middle stem seal (14.2).
h. Remove piston/guide bearing (13) with
dynamic side seal (27) in place.
i. Remove lower stem seal (14.3).
j. Place socket wrench on upper end of plug
(20) as in Step b. above. Ro tate plug (20)
CCW (viewed from above) to loosen seat
disc nut (30). Once nut (30) is loos ened,
re move partial as sem bly (20, 27, 28, 29,
30) from vise. Complete re mov al of seat
disc nut (30), seat disc washer (29) and
seat disc (28).
3. Examine the components (27.1, 27.2, 27.3,
27.4, 27.5, 27.6) of the dynamic side seal
(27) to determine if sig nifi cant leak age was
oc cur ring. If the dynamic side seal (27) shows
signs of signifi cant leakage, de ter mine if op-
er at ing conditions are ex ceed ing pres sure,
pres sure drop, or temperature lim its.
Remove dynamic side seal (27) components
from plug (20) for sizes 1/2" – 2", or from pis-
ton/guide bearing (13) for sizes 2-1/2" – 4".
Special care should be tak en when using
“tools” to remove the com po nents to ensure
that no scratches are im part ed to any portion
of the plug (20) or piston/guide bearing (13)
groove.
4. Solvent clean all metal parts to be reused.
D. Inspection of Parts:
1. After inspection, remove from the work area
and dis card the old “soft goods” parts (i.e.
o-rings, di a phragms, seals, etc.). Metal di-
a phragms should be replaced. These parts
MUST be re placed with fac to ry supplied new
parts.
Figure 6: Body Sizes
2-1/2" – 4", Composition Di a phragm