Burkert Type 2036 User Manual
Page 29
29
Repairs
Type 2036
12.2.2. assembly of actuator and
diaphragm
Warning!
risk of injury from moving parts in the device.
• When applying or removing the pilot pressure on the actuator,
keep limbs and objects away from the openings of the actuator.
→
Move the actuator to the lower actuator position (CFA, NC: by
removing pilot pressure; CFB, NO: by applying the pilot pressure).
→
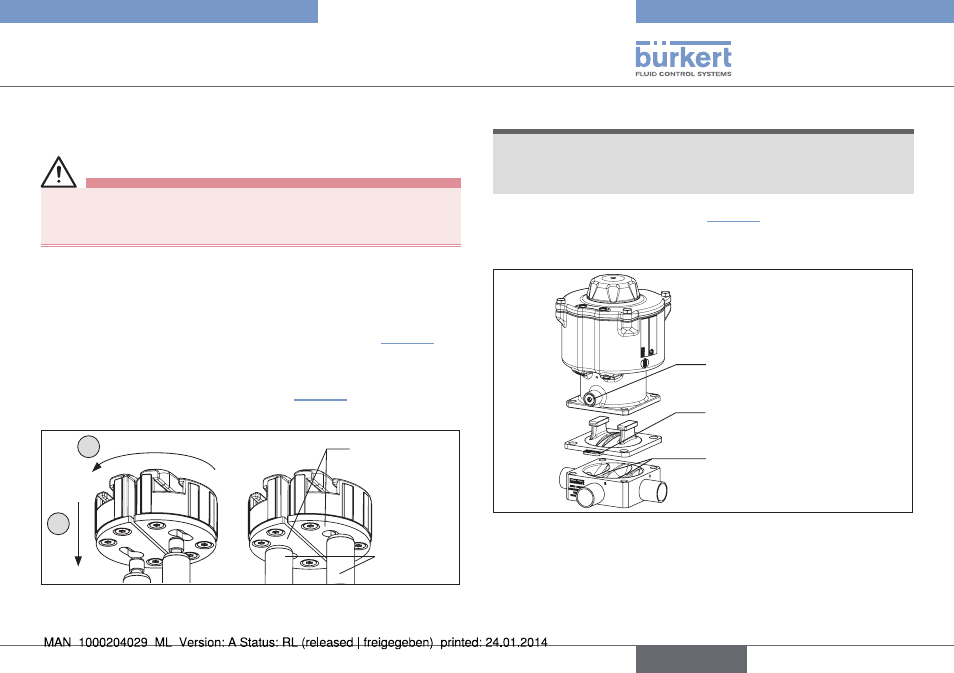
Insert the diaphragm into the guide of the pressure pieces. Make
sure that the four spacing sleeves are installed (see "Fig. 20").
→
Insert the pressure pieces into the actuator. Make sure that
the actuator spindles are fully inserted into the corresponding
recesses of the pressure pieces (see "Fig. 21").
→
Turn the diaphragm and pressure pieces through approx. 30°.
approx. 30°
2
1
Pressure
pieces
Actuator
spindle
Fig. 21: Assembly pressure pieces
note!
damage to the diaphragm.
• Turn diaphragm and pressure pieces only as far as is required
until the actuator and diaphragm screw holes are in alignment.
→
Screw guide pin all the way in ("Fig. 19").
→
Move the actuator to the upper actuator position (CFA, NC: by
applying pilot pressure; CFB, NO: by removing the pilot pressure).
Body seat
Identification plate
diaphragm
Guide pin
Fig. 22: Assembly of the actuator
→
Put the actuator / diaphragm on the body with correct alignment
(so that the markings made previously align, or guide pin, identifi-
cation plate and body seats have been aligned in parallel). In the
case of RV110 the four spacer sleeves must be inserted in the
designated body holes.
english