FlexLink Направляющие и опорные салазки (пластик) Монтаж User Manual
Page 5
A. Installation of plastic slide rail and support rail
463
PO
X45
XS
XL
XLP
X85
X85P
XH
XK
XKP
X180
X300
GR
CS
XT
XC
XF
XD
FST
XLX
X85X
X180X
X300X
GRX
CSX
ELV
CTL
TR
APX
IDX
A. Installation of plastic slide rail and support rail (continued)
Mounting support rail in plain bends
The friction in plain bends can be significantly reduced by
using support rails in the inner beam profile.
Tools required
Procedure
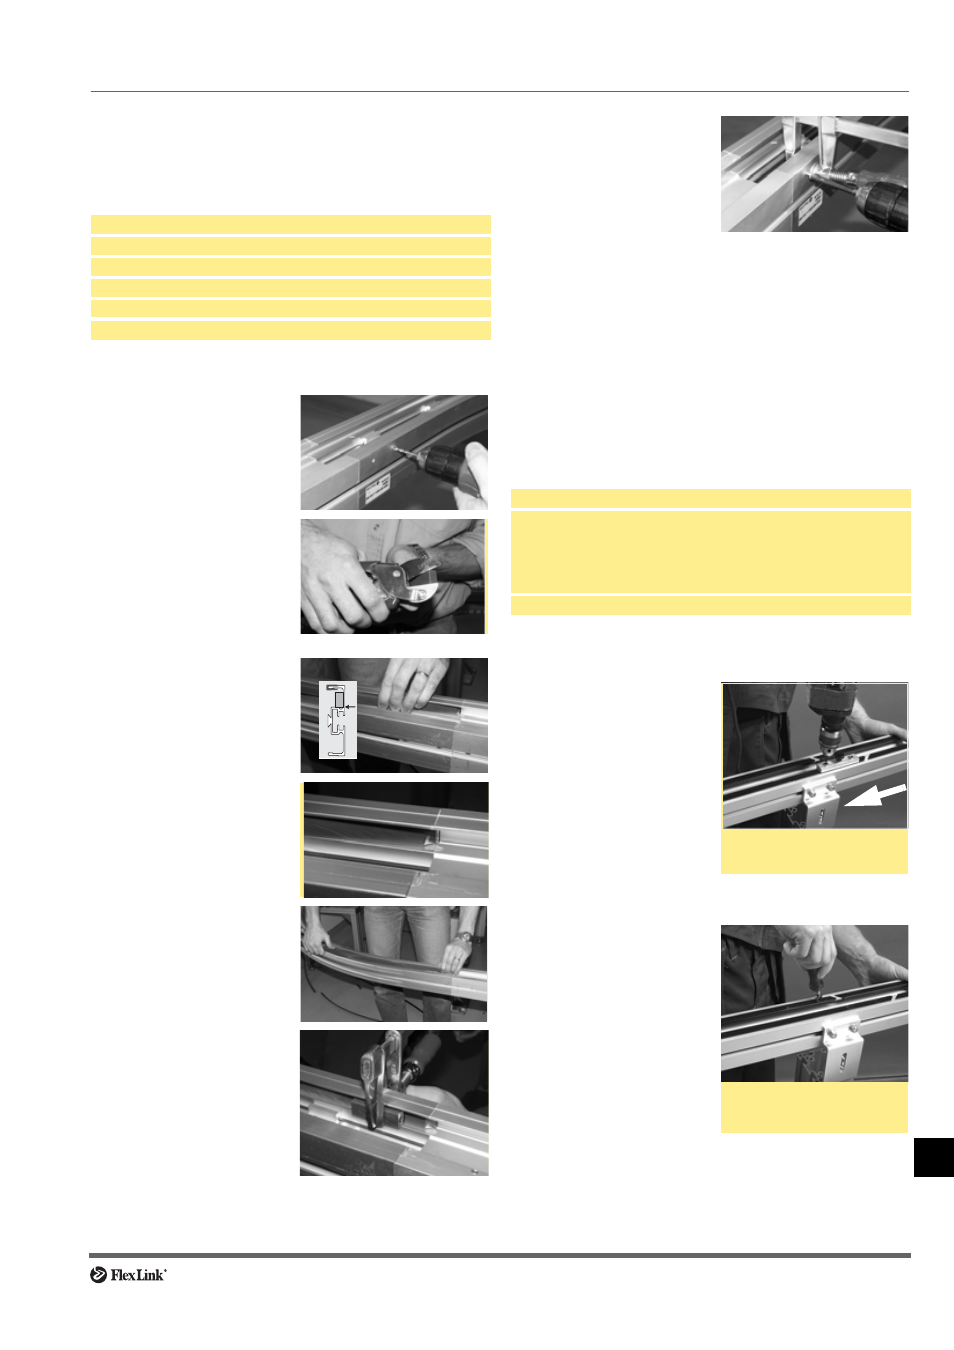
Anchoring the slide rail
The beginning of each slide rail section must be fixed to
the beam, since the chain will cause the slide rail to be
pushed forward. Slide rail which moves into a wheel bend
or a drive unit can block the chain completely.
There are two different methods for fixing slide rail to
the conveyor beam, using aluminium rivets or plastic
screws. Either method can be used, but the riveting
method is more secure if the conveyor will run with high
operational speed or be heavily loaded.
Tools required
Procedure – drilling
Soft hammer
Knife
Drill 4,2 mm
Clamp
Screwdriver
Sheet metal screws ISO 7049 4,2×9,5
1 Drill two holes (4,2 mm) in
the beam at the entry and
exit of the bend. Drill
additional holes every
200–300 mm.
2 Cut both ends of the rail
at a 45° angle.
3 Press the support rail into
place at one end of the
bend. It is important that it
is mounted against the
bottom flange of the
beam.
4 Make sure that the rail
starts exactly at the joint
between the bend and
the straight conveyor
beam.
5 Press the rest of the sup-
port rail in place.
6 Clamp the rail.
7 Fix with BSS ST 4,2×9,5
sheet metal screws
(never use screws longer
than 9,5 mm).
Hand drill
Drill fixture for slide rail:
Part #3924774 (drill diameter 3,2 mm): XS*
Part #3920500 (drill diameter 4,2 mm): XS**-XL-X85/XM-XH-XK-
X180/X300
* Rivet method only
**Plastic screw method only
Countersink
1 Drill two holes near the
beginning of each slide
rail section. Use the drill
fixture to ensure clean-
cut holes and the correct
location of the holes.
The holes must be at the
leading edge of the joint
piece, in the direction of
travel, to hold the slide rail
in place when the con-
veyor is in use. Use a well
sharpened drill bit.
2 Use a countersink to
deburr and countersink
the holes. Also make sure
that there are no metal fil-
ings left underneath the
slide rail.
Arrow indicates direction
of travel