Part 2 - transducer installation – Dynasonics 901 Series Enhanced Ultrasonic Flow Meter User Manual
Page 15
Rev.
04/02
-14-
D901/M
2. Wrap the strap around the pipe in the area where the
transducers are to be mounted. Leave the strap loose
enough to allow the transducers to be placed
underneath. If multiple straps are being used, it can be
beneficial to wrap electrical tape around all but one
strap connection to secure the strap worm screws in
place.
3. Spread an even layer of coupling compound,
approximately 1/8 inch [3mm] thick, to the prepared
transducer mounting areas of the pipe. Utilize Dow
732 for permanent mounting or Dow 111 for temporary
mounting,
4. Spread an even layer of coupling compound,
approximately 1/8 inch [ 3mm ] thick, to the flat face of
the two transducers.
5. Place each transducer under the strap with the flat
face positioned towards the pipe. The notch on the
back of the transducer will provide a mounting surface
for the strap. The transducer cables must be facing in
PART 2 - TRANSDUCER INSTALLATION
PROCEDURE:
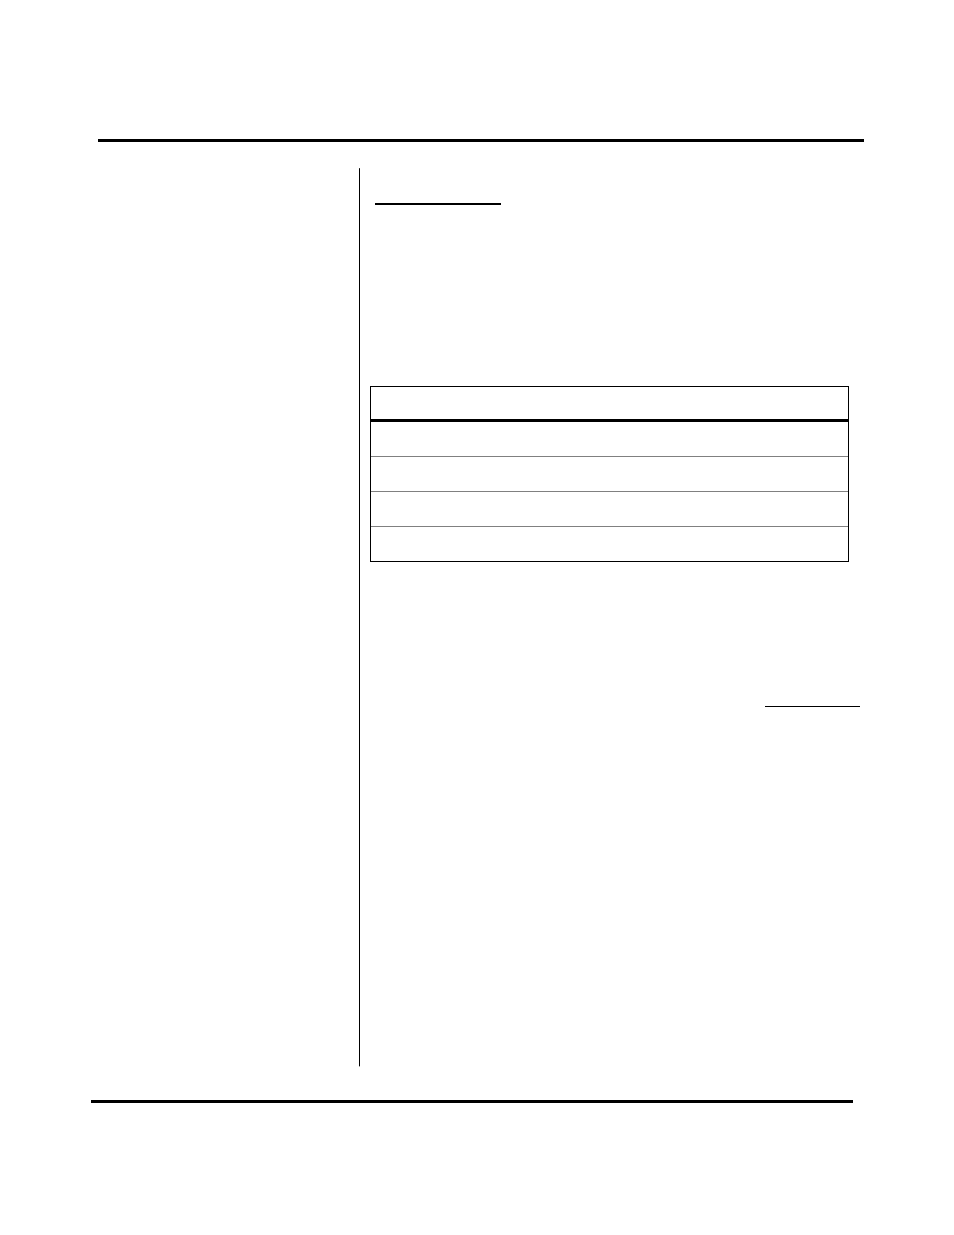
1. Select the proper number of transducer straps to allow
a complete strap to go around the circumference of the
pipe. See Table 2 - The straps can be connected
together to make a continuous length.
Pipe Sizes
Straps Required
1” to 9”
25 to 225 mm
1
10” to 19”
250 to 480 mm
2
20” to 29”
500 to 740 mm
3
30” to 39”
760 to 1000 mm
4
Table 2