Figure 10 — captive screw audio connector wiring, Figure 11 — power connector wiring – Extron Electronics MTP T 15HD A AAP User Guide User Manual
Page 14
MTP T 15HD A Architectural Plates • Installation
10
b
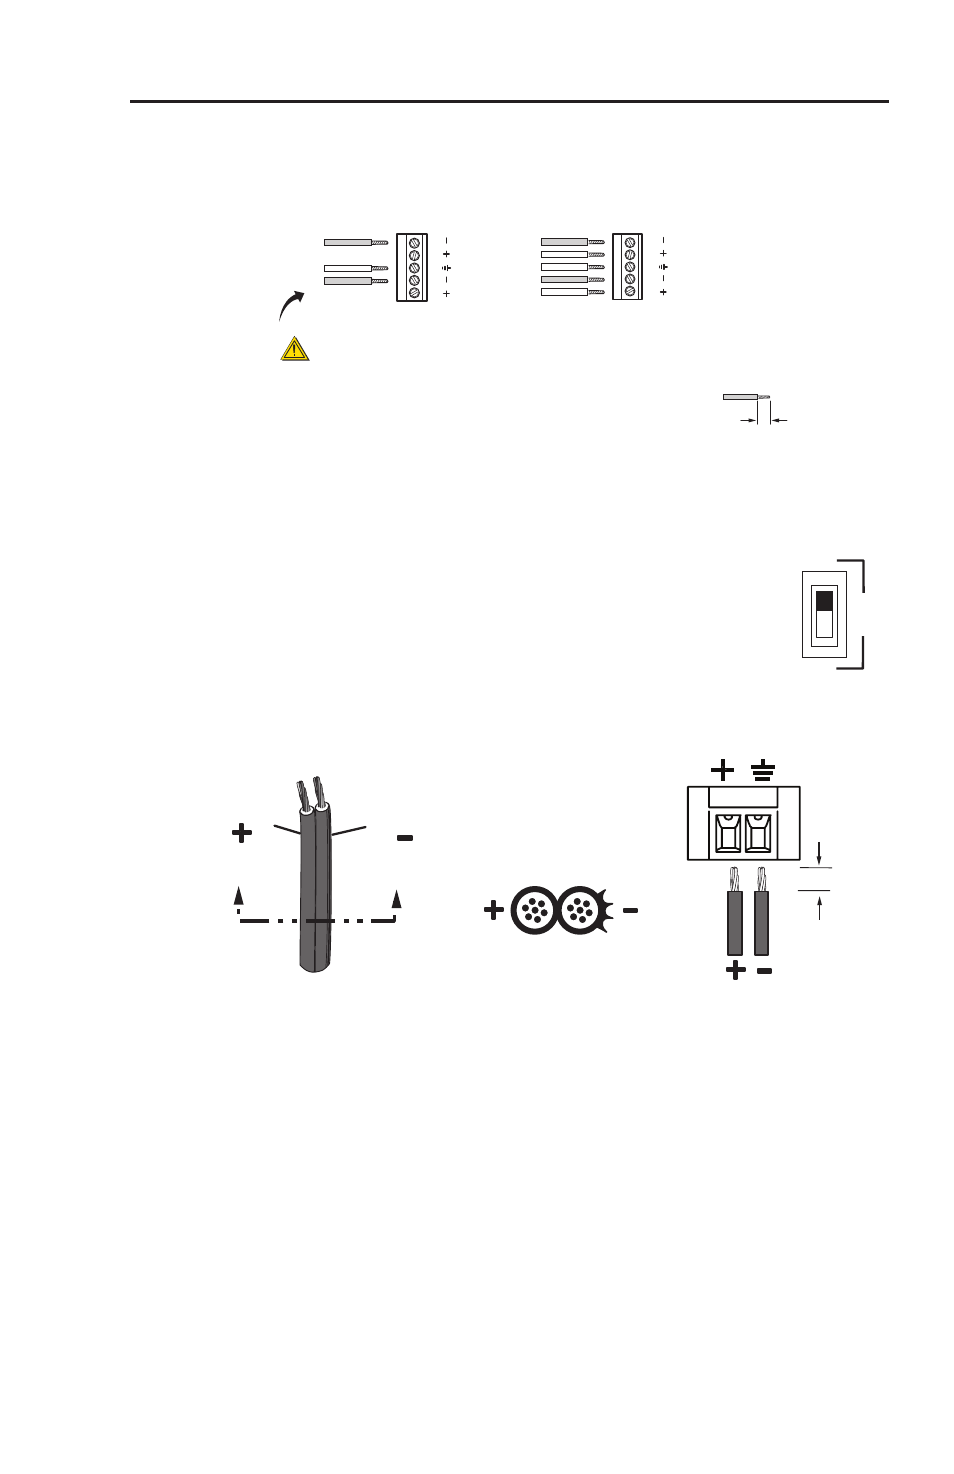
Stereo Audio output connector — Insert bare wires into this
direct insertion 3.5mm, 5-pole captive screw audio connector for
stereo audio outputs. Wire the connector as shown in figure 10.
Unbalanced Stereo Output
Balanced Stereo Output
CAUTION
For unbalanced audio, connect the sleeve(s) to the center contact ground.
DO NOT
connect the sleeve(s) to the negative (-) contacts.
Tip
See Caution
Sleeve (s)
Tip
See Caution
Tip
Ring
Sleeve (s)
Tip
Ring
L
R
A
UDIO
L
R
A
UDIO
3/16” (5 mm) max.
The length of exposed wires is critical.
The ideal length is
3/16" (5 mm).
• If the stripped section of wire is
longer than 3/16", the exposed
wires may touch, causing a
short circuit between them.
• If the stripped section of wire is
shorter than 3/16", wires can
be easily pulled out even if
tightly fastened by the captive
screws.
Figure 10 — Captive screw audio connector wiring
c
Pre-Peak switch — The Pre-Peak switch boosts the video signal
output to correct for long cable runs. See the
on page 2 for suggested switch settings based on the
transmitted video format and transmission distance.
d
Power connector — Plug the external 12 VDC power
supply (included) into this direct insertion, 3.5 mm,
2-pole captive screw connector. Wire the connector as shown in
figure 11.
Power Supply
Output Cord
Captive Screw
Connector
3/16” (5 mm)
MAX
SECTION A–A
Ridges
Smooth
A
A
Figure 11 — Power connector wiring
C
Power supply voltage polarity is critical. Incorrect
voltage polarity can damage the power supply and
the MTP. Identify the power cord negative lead by
the ridges on the side of the cord (figure 11).
To verify the polarity before connection, plug in the power
supply with no load and check the output with a voltmeter.
W
The two power cord wires must be kept separate
while the power supply is plugged in. Remove
power before wiring.
ON
OFF
PRE-
PEAK