Frame mounting (aap models), Step 3, Oceed to – Extron Electronics MTP Series User Guide User Manual
Page 15: Step 4
MTP Series • Installation
9
3.
For furniture mounting —
a.
Hold the MTP with the attached brackets against the underside of the mounting
surface. Mark the bracket screw hole locations on the mounting surface.
b.
Drill 3/32 inches (2 mm) diameter pilot holes, 1/4 inch (6.3 mm) deep in the
mounting surface at the marked screw locations.
c.
Insert #8 wood screws into the four pilot holes. Tighten each screw into the
mounting surface until just less than 1/4 inch of the screw head protrudes.
d.
Align the mounting screws with the slots in the brackets and place the MTP against
the surface.
e.
Slide the MTP slightly forward or back, then tighten all four screws to secure the
MTP in place.
4.
For projector mounting — secure the MTP to a projector mount by inserting the
mounting bolt through the slotted hole in the bracket.
Frame Mounting (AAP Models)
The AAP-mountable transmitters (MTP T SVA AAP and MTP T AV AAP) can be mounted to
any Extron AAP mounting frame that accepts a double space (double height) AAP module
(see “
” for a partial list of AAP devices).
NOTE: The rear panel MTP connections will be inaccessible after installation. Make all
Transmitter and Receiver Throughput Connections
test the twisted pair system (apply a video source and observe that transmitted
video is displayed satisfactorily) before installing the panel-mounted transmitter.
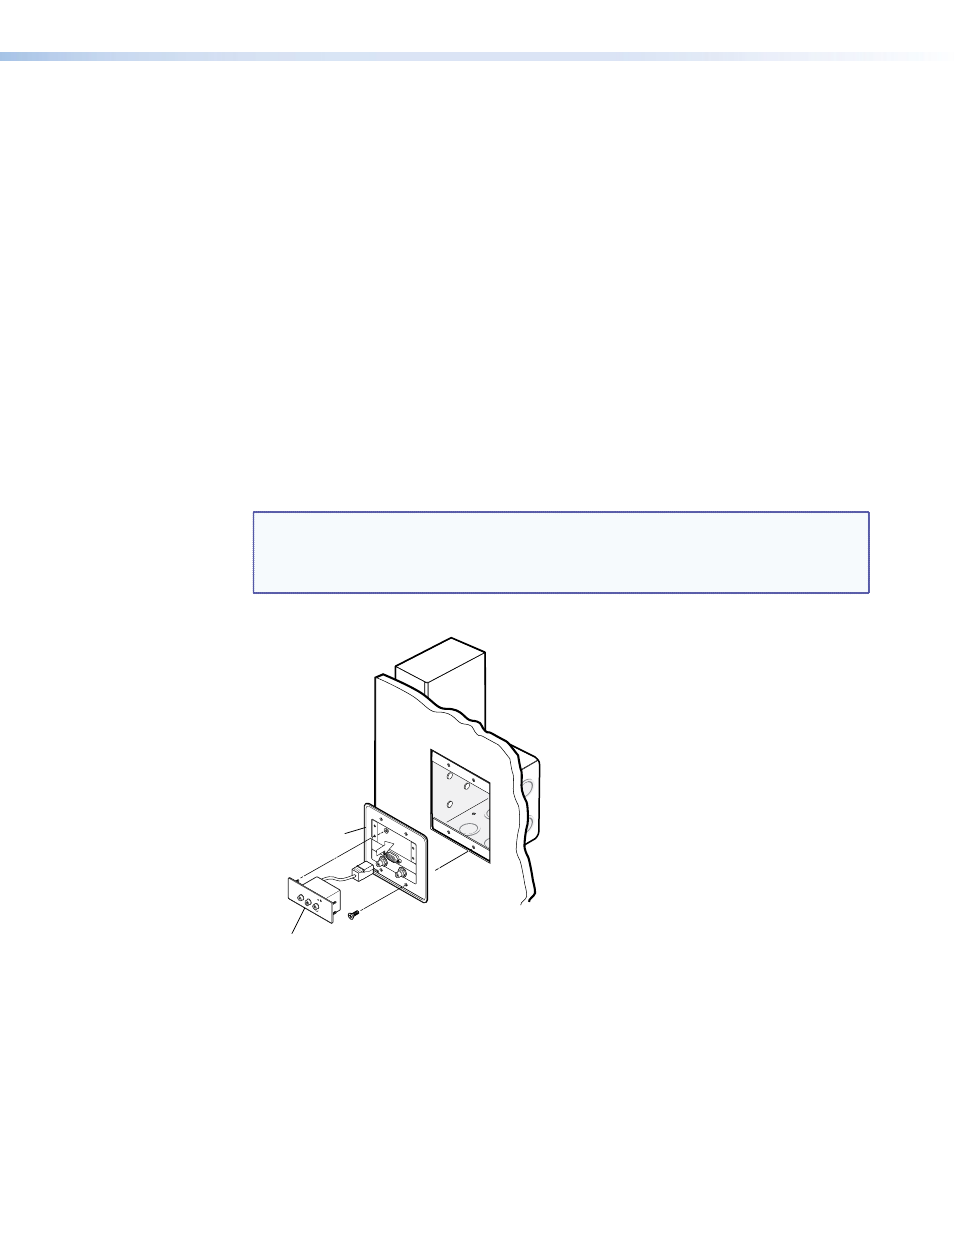
Install an MTP transmitter in an AAP frame as follows (see
):
MTP T AV AAP
AAP 102
AAP 102
AUD
IO IN
VIDEO
IN
L
R
MTP
T AV
AAP
Figure 11.
AAP Mounting an MTP Transmitter
1.
If necessary, remove the AAP frame from the device.
2.
Cable the rear of the transmitter before fastening the AAP module to the AAP frame.
3.
Insert each of the AAP module screws through the holes in the AAP frame. Secure the
transmitter to the frame with the provided captive washers and #4-40 nuts.
4.
Install the AAP frame as appropriate to the type of frame.
transmitter module being installed in an AAP 102 wall mounting frame and the frame
being installed in a wall box.