Front panel test mode (mode), Matrix / direct mode selection (save), Direct mode setup (output 1) – Extron Electronics IN31608 User Manual
Page 12: Rgb delay (input)
9
2001 - INLINE, Inc.
IN31608 OPERATION MANUAL - REV 1.6 1/4/01
FRONT PANEL TEST MODE (MODE)
Hold down the Switching Mode Button while turning on the unit. The Front Panel Test Mode continually polls
the front panel switches. When a button closure is detected, the associated LED is turned on. If the button
remains closed the LED begins to flash. The Volume Down Button controls all output LEDs simultaneously.
The Switching Mode Button controls the five associated LEDs in sequence. To exit the Front Panel Test Mode
turn the power off and then back on.
MATRIX / DIRECT MODE SELECTION (SAVE)
To toggle between the Matrix Mode and the Direct Mode, hold down the Save Button while turning on the unit.
When you enter the Direct Mode, the unit will automatically enter the Direct Mode Setup. The direct LED and
all output LEDs flash to indicate Direct Mode Setup.
DIRECT MODE SETUP (OUTPUT 1)
While in the Direct Mode, you can enter the Direct Mode Setup by holding down the Output 1 Button while
turning on the unit. The direct LED and all output LEDs flash to indicate Direct Mode Setup.
PROJECTOR MEMORY TEST MODE (OUTPUT 2)
Holding down the Output 2 Button while turning on the unit is a quick, convenient way of loading the projector
memories with descriptive text (for test) without using the Serial Mode to load the memories one by one. Note
that if the unit has already been loaded with a customized code for the projector memories, this code will
be overwritten.
CLEAR PROJECTOR MEMORIES (OUTPUT 3)
Hold down the Output 3 Button while turning on the unit. This is a quick, convenient way of clearing the
projector memories.
GENLOCK OPERATION / VERTICAL INTERVAL SWITCHING (OUTPUT 4)
Hold down the Output 4 Button while turning on the unit. This enables genlock operation / vertical interval
switching on subsequent power ups until either factory default or the serial command [VIS0] disables it.
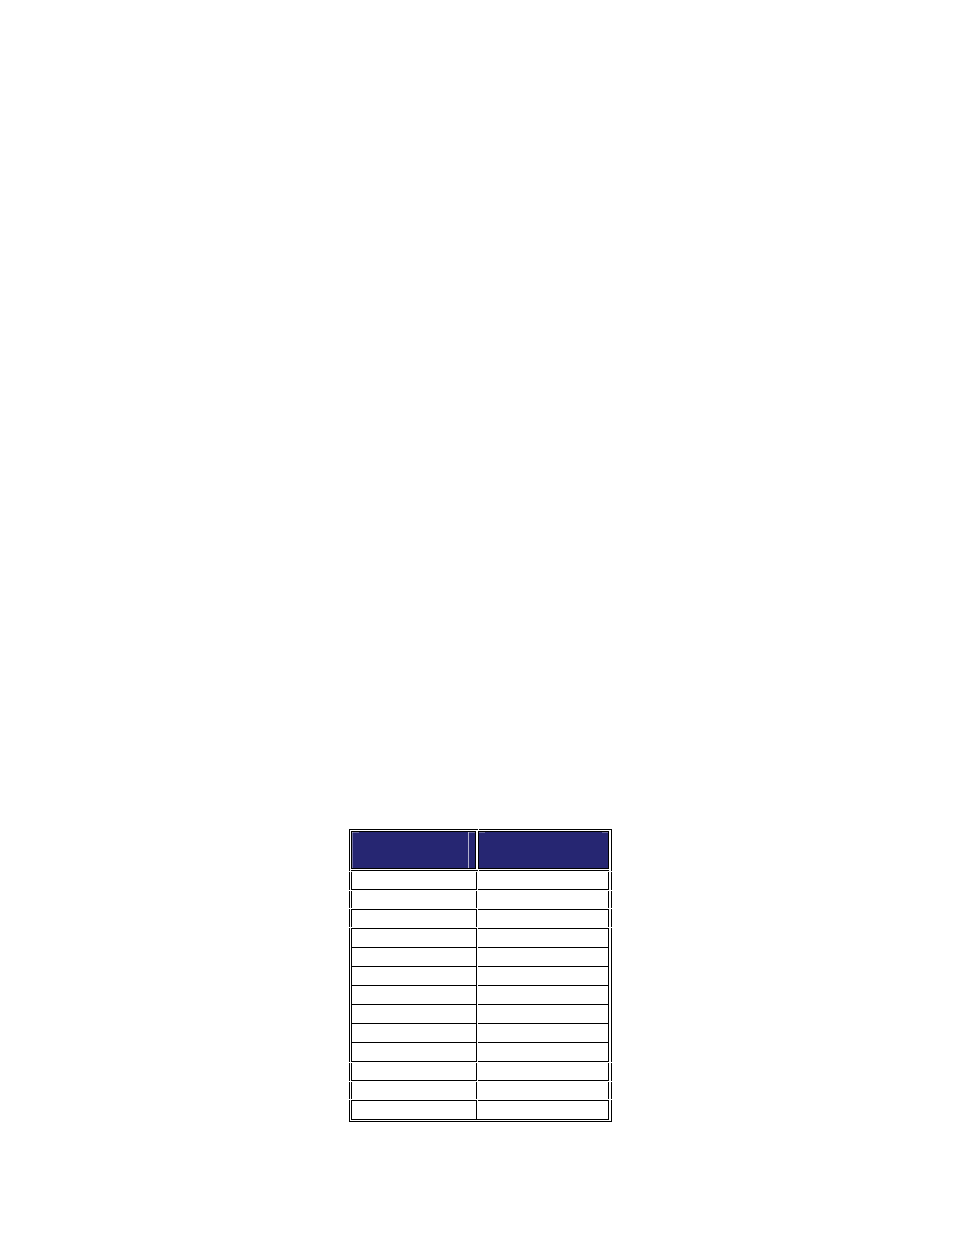
RGB DELAY (INPUT)
Hold down the appropriate button while turning on the unit (see table below):
DELAY TIME
(SECONDS)
BUTTON
0.0
INPUT 1
0.5
INPUT 2
1.0
INPUT 3
1.5
INPUT 4
2.0
INPUT 5
2.5
INPUT 6
3.0
INPUT 7
3.5
INPUT 8
4.0
INPUT 9
4.5
INPUT 10
5.0
INPUT 11
5.5
INPUT 12
6.0
INPUT 13