9 installing the ir850 – Armasight NSCCOMR00133DB1 CO-MR GEN 3 Bravo Day/night vision Clip-On system User Manual
Page 23
23
2. Place the ring’s clamps (D, E) onto the scope’s mounting tube with/ without the pair of inserts (A), de-
pending on the mounting tube size (25.4/ 30 mm respectively). Screw the clamps together without
tightening the screws (C).
3. Adjust position of the platform ring until its Weaver rail (B) is level. Apply a small amount of thread
lock to the threads and tighten the screws (C).
3.1.7 INSTALLING THE MOUNT FOR IR ILLUMINATOR ON THE CO-MR
The CO-MR with the mount for IR illuminator (Weaver rail) is shown in Figure 3-6.
Install the Weaver rail on the CO-MR as follows:
1. Using a 2.5 mm Allen key, unscrew the both М4×8 screws fixing the CO-MR mount. Remove the
mount from its seating rail and put it into the storage case.
2. Install the Weaver rail in place of the removed mount, and after applying a small amount of thread
lock to the threads, affix the rail with the two M4×8 screws.
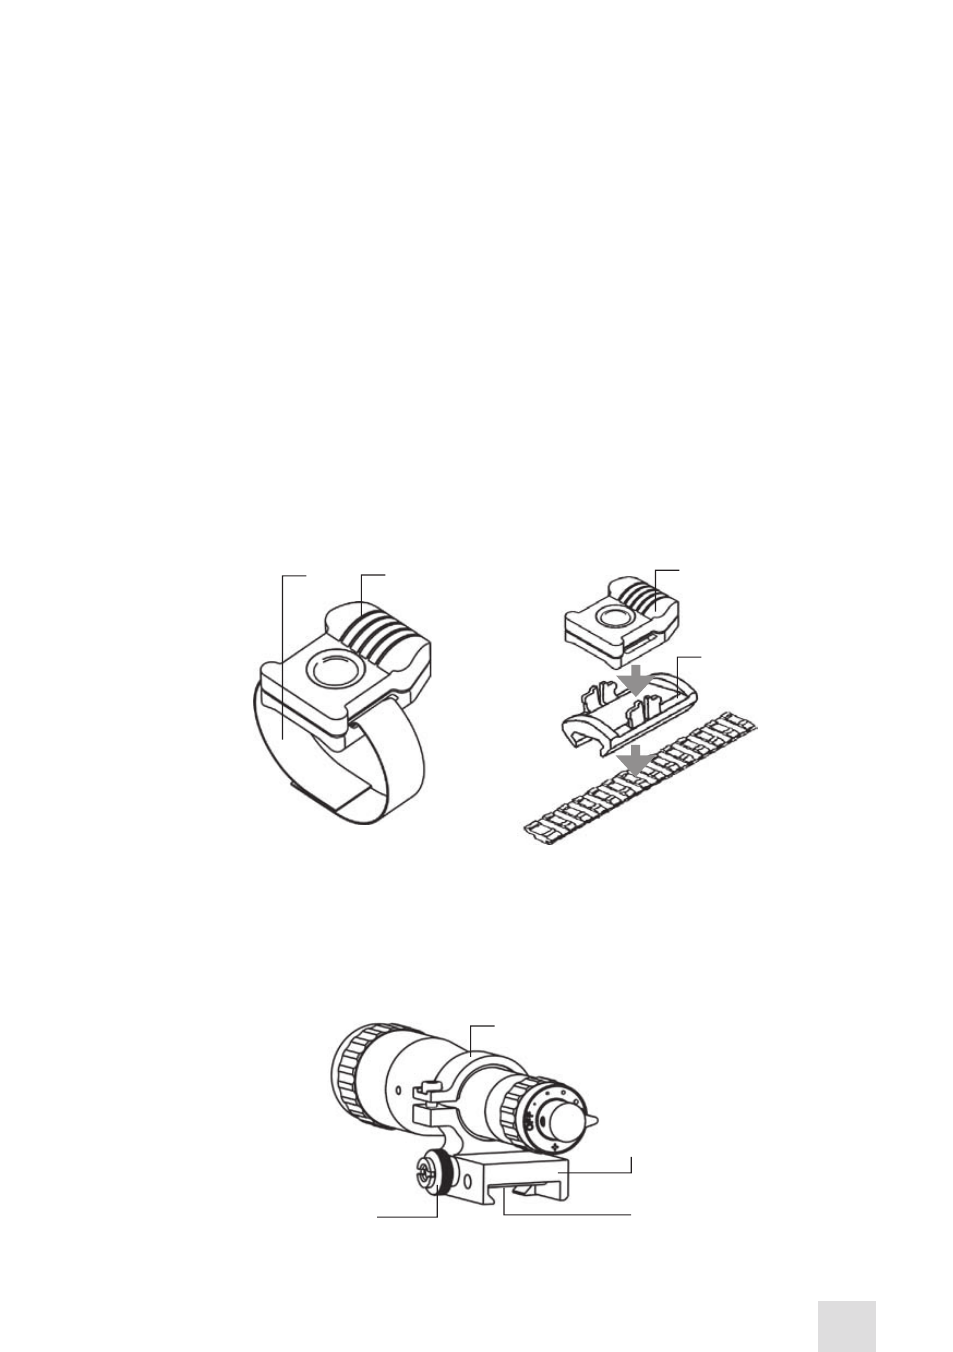
3.1.8 FASTENING A ADVANCED WIRELESS REMOTE CONTROL TO WEAPON
Using Velcro tape (A), fasten the Advanced Wireless Remote Control (B) (Figure 3-10) to your weapon in
an easily accessible place (e.g., on the front of the rifle stock) on the side of the CO-LR’s control compart-
ment preferably.
If your rifle has a Picatinny or Weaver rail on the forend you can use the Picatinny adaptor for Advanced
Wireless Remote (C). Install adaptor on the rail. Insert the remote control unit in the adapter.
FIGURE 3-10. ADVANCED WIRELESS REMOTE CONTROL
B
A
C
B
3.1.9 INSTALLING THE IR850
The IR850 (Figure 3-11) is delivered ready-assembled with a dedicated mount, to be installed on the
Weaver rail of the CO-MR. The mount clamp (A) has a spherical hinge that allows to tilt the IR850.
Mount the IR850 on the Weaver rail as follows:
d
FIGURE 3-11. IR-850 ILLUMINATOR
B
A
C
- NSCCOMR00133DA1 CO-MR GEN 3 Alpha Day/night vision Clip-On system NSCCOMR001P3DA1 CO-MR GEN 3P Day/night vision Clip-On system NSCCOMR001GMDA1 CO-MR GEN 3 Ghost MG Day/night vision Clip-On system NSCCOMR0012MDS1 CO-MR GEN 2+ SD MG Day/night vision Clip-On system NSCCOMR0012MDI1 CO-MR GEN 2+ ID MG Night Vision Medium Range Clip-On System NSCCOMR00123DH1 CO-MR GEN 2+ HD Day/night vision Clip-On system NSCCOMR001QMDI1 CO-MR GEN 2+ QS MG Day/night vision Clip-On system