2 ir850 battery installation, 3 installing the co-mr on a picatinny/ weaver rail – Armasight NSCCOMR00133DB1 CO-MR GEN 3 Bravo Day/night vision Clip-On system User Manual
Page 19
19
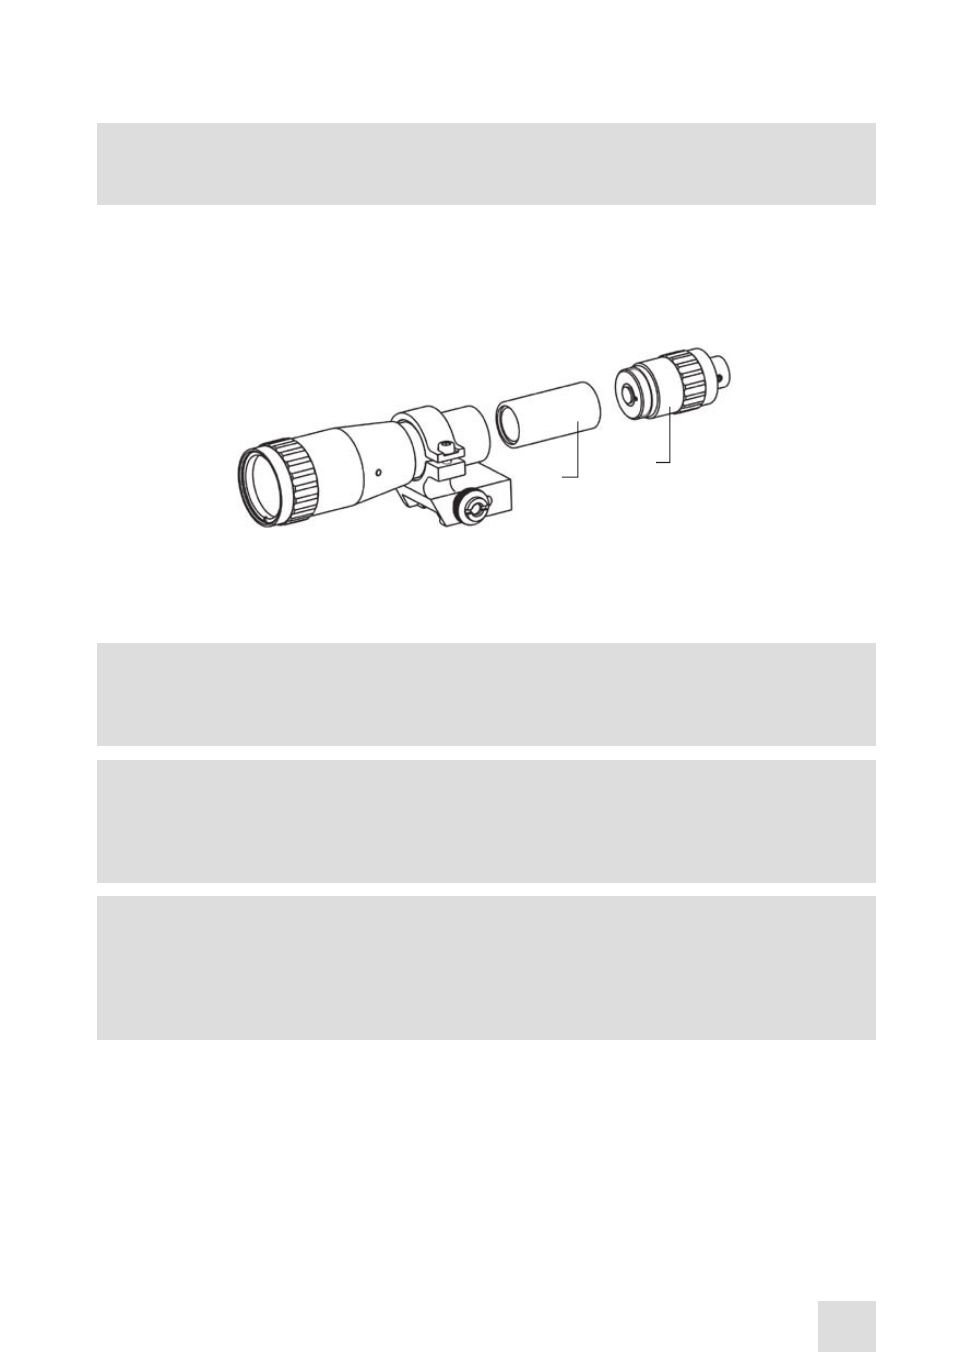
3.1.2 IR850 BATTERY INSTALLATION
CAUTION
:
Ensure that the IR850 is off before installing the battery.
Install the CR123A battery as follows (refer to Figure 3-2):
1. Unscrew the battery cap (A).
3. Install the battery (B) into the battery compartment. Align the plus sign on the battery with the plus
sign on the cap face.
4. Replace the battery cap (A).
3.1.3 INSTALLING THE CO-MR ON A PICATINNY/ WEAVER RAIL
WARNING
:
When installing the equipment on a weapon, verify that the weapon is clear and that the safety
is on before proceeding.
WARNING
:
It is recommended that you use an eyecup on the eyepiece of the day scope, allowing for
the eyepiece diameter and eye relief and having side paddle preferably in order to escape
detection.
NOTE
:
Optical axes of the CO-MR and day scope should align. It is not recommended for the distance
between the axes to exceed 3 mm. If the difference in the axis heights of the CO-MR and day
scope above the weapon rail exceeds 3 mm, you will need to replace the day scope mounting
rings or monoblock.
Install the CO-MR on a Picatinny/ Weaver rail in front of a day scope as follows:
1. Unscrew the output lens cap and place it in the storage case.
2. Remove the light suppressor from the storage case. Screw it into the output lens’ thread in place of
the cap.
3. Unlock the clamping device of the CO-MR mount by pushing down on the lever holder (A, see Figure
3-4) and unlocking the cam lever (B).
4. Install the CO-MR on the Picatinny/ Weaver rail in front of the day scope so that the stop (B, see Figure
3-5) slides into one of the rail’s transverse slots. The light suppressor should cover the day scope’s
objective lens.
B
A
FIGURE 3-2. IR850. BATTERY INSTALLATION
- NSCCOMR00133DA1 CO-MR GEN 3 Alpha Day/night vision Clip-On system NSCCOMR001P3DA1 CO-MR GEN 3P Day/night vision Clip-On system NSCCOMR001GMDA1 CO-MR GEN 3 Ghost MG Day/night vision Clip-On system NSCCOMR0012MDS1 CO-MR GEN 2+ SD MG Day/night vision Clip-On system NSCCOMR0012MDI1 CO-MR GEN 2+ ID MG Night Vision Medium Range Clip-On System NSCCOMR00123DH1 CO-MR GEN 2+ HD Day/night vision Clip-On system NSCCOMR001QMDI1 CO-MR GEN 2+ QS MG Day/night vision Clip-On system