Operating instructions, 1 installation and mounting – Armasight NSCCOMR00133DB1 CO-MR GEN 3 Bravo Day/night vision Clip-On system User Manual
Page 18
18
3
OPERATING INSTRUCTIONS
3.1 INSTALLATION AND MOUNTING
CAUTION
:
To protect the image intensifier tube when the device is not in use or when it is being operated
in daylight, keep the protective objective lens cap securely fitted over the lens.
3.1.1 CO-MR BATTERY INSTALLATION
NOTE
:
At operating temperatures below -20 °C (-4 °F), alkaline battery life will be severely reduced.
Under said conditions, the use of lithium battery is recommended.
CAUTION
:
Ensure that the device is off before installing a battery.
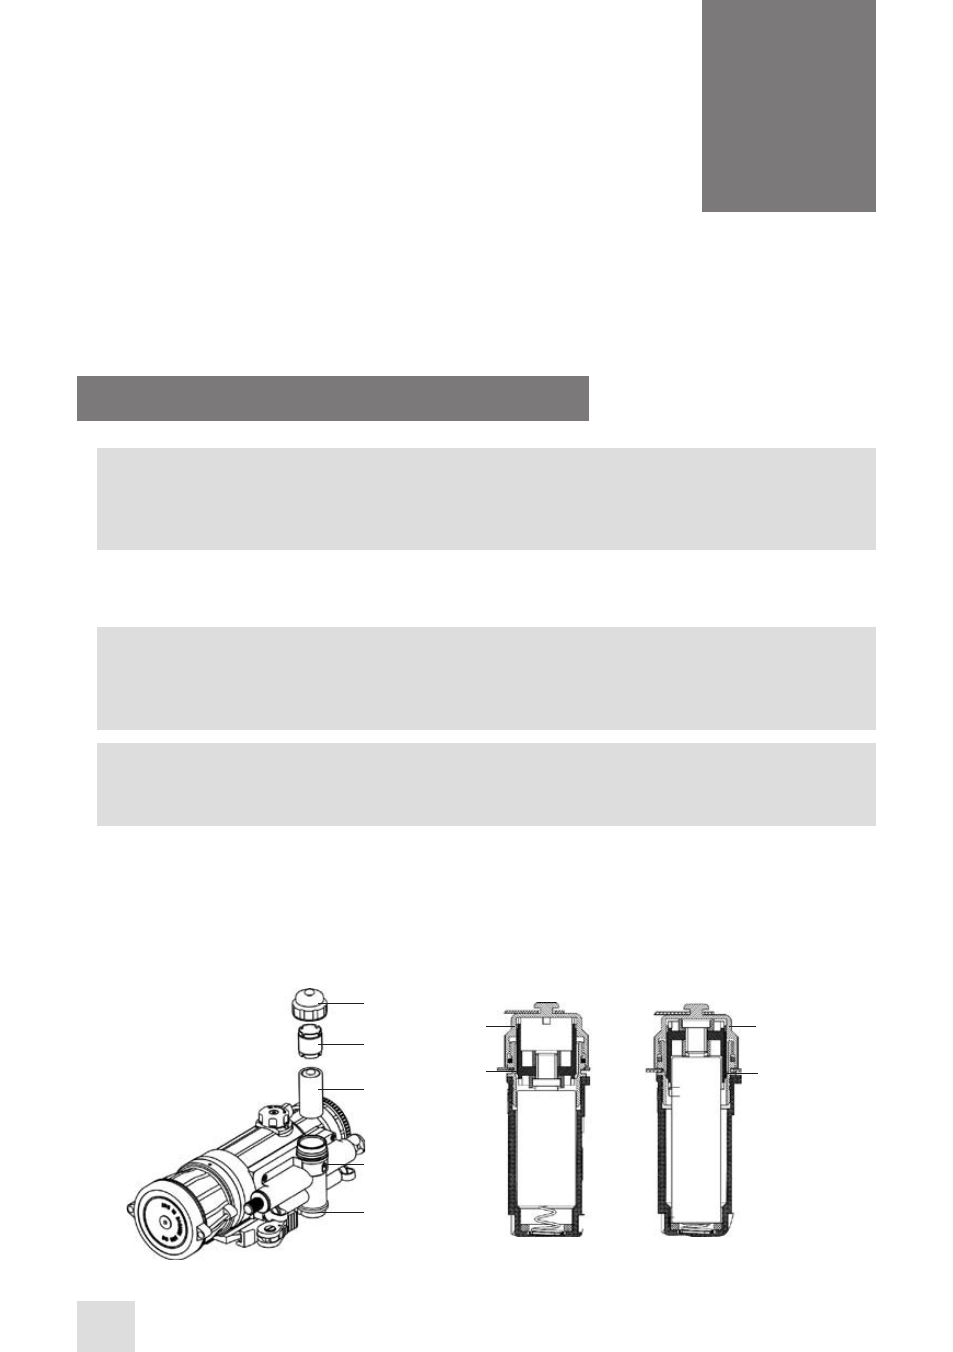
Install the battery as follows (refer to Figure 3-1):
1. Unscrew the battery cap (A) and check the position of the adapter (B). See Figure 3-1 for the correct
positioning of the threaded adapter, which changes depending on the battery being installed.
2. If necessary, change the adapter position in the cap.
3. Install the battery (C) into the battery compartment (E). Follow the battery symbol (D).
4. Replace the battery cap (A).
FIGURE 3-1. THE CO-MR. BATTERY INSTALLATION
C
d
E
B
A
CR123A
AA
AdAPTER
AdAPTER
BATTERy
CAP
BATTERy
CAP
- NSCCOMR00133DA1 CO-MR GEN 3 Alpha Day/night vision Clip-On system NSCCOMR001P3DA1 CO-MR GEN 3P Day/night vision Clip-On system NSCCOMR001GMDA1 CO-MR GEN 3 Ghost MG Day/night vision Clip-On system NSCCOMR0012MDS1 CO-MR GEN 2+ SD MG Day/night vision Clip-On system NSCCOMR0012MDI1 CO-MR GEN 2+ ID MG Night Vision Medium Range Clip-On System NSCCOMR00123DH1 CO-MR GEN 2+ HD Day/night vision Clip-On system NSCCOMR001QMDI1 CO-MR GEN 2+ QS MG Day/night vision Clip-On system