6 installing the platform ring on a day scope – Armasight NSCCOMR00133DB1 CO-MR GEN 3 Bravo Day/night vision Clip-On system User Manual
Page 22
22
4. Screw the SMS into the CO-MR’s output lens thread.
5. With the nut (B) loosened, slide the CO-MR with the SMS onto the lens of the day scope as far as it
goes.
6. Tighten the nut (B) using a screwdriver.
If the position of the SMS’s clamping nut is unhandy, it is possible to change it as follows:
1. Decide on desirable position of the nut and estimate the angle through which the SMS should be
turned CW (see Figure 3-8).
2. Remove the SMS from the CO-MR.
3. Using a screwdriver, remove the both M2×2.5 screws (F, see Figure 3-7) and then unscrew the ring
(E).
CAUTION
:
To loosen the ring (E), only use its two auxiliary non-threaded holes (D), avoiding the use of the
threaded ones.
4. Using a turning machine, cut the inside face of the ring (E). The value of cutting (in millimeters) is
equal to the value of turning angle (in angular degrees) divided by 360°.
5. Screw the ring (E) into the SMS’s body with its cut end directed inwards and tighten it.
6. After applying a small amount of thread lock to the threads, affix the ring (E) with the two M2×2.5
screws (F).
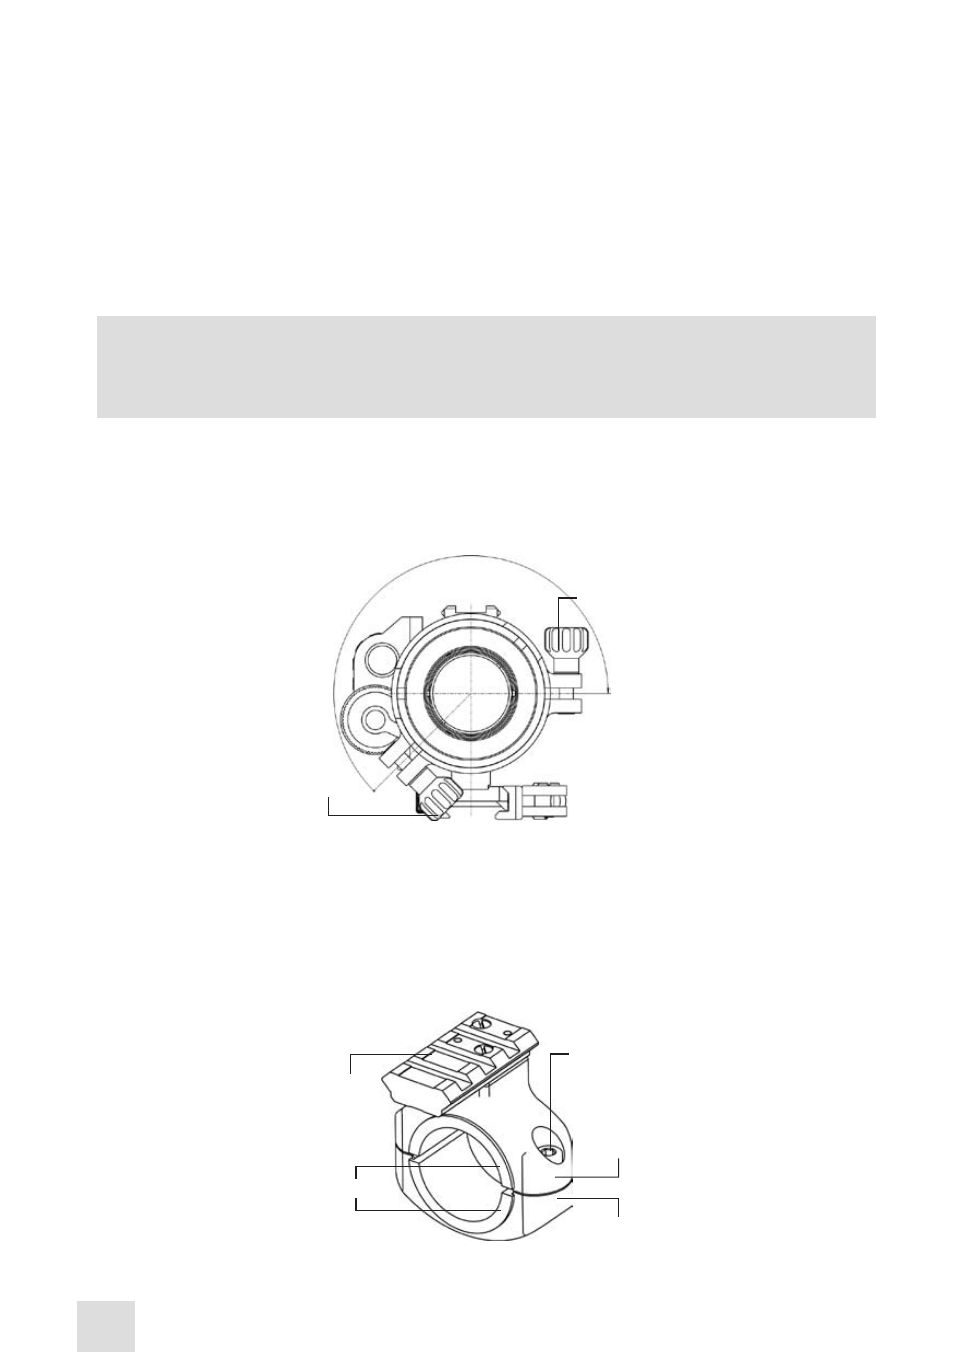
3.1.6 INSTALLING THE PLATFORM RING ON A DAY SCOPE
The platform ring installed on a day scope is shown in Figure 3-3.
Install the platform ring on the mounting tube of the day scope as follows (refer to Figure 3-9):
1. Using a 3 mm hex key, unscrew the both clamp screws (C).
FIGURE 3-9. PLATFORM RING
A
B
C
d
E
FIGURE 3-8. ESTIMATION OF THE SMS TURNING ANGLE
NUT
dESIRABLE POSITION
OF ThE NUT
- NSCCOMR00133DA1 CO-MR GEN 3 Alpha Day/night vision Clip-On system NSCCOMR001P3DA1 CO-MR GEN 3P Day/night vision Clip-On system NSCCOMR001GMDA1 CO-MR GEN 3 Ghost MG Day/night vision Clip-On system NSCCOMR0012MDS1 CO-MR GEN 2+ SD MG Day/night vision Clip-On system NSCCOMR0012MDI1 CO-MR GEN 2+ ID MG Night Vision Medium Range Clip-On System NSCCOMR00123DH1 CO-MR GEN 2+ HD Day/night vision Clip-On system NSCCOMR001QMDI1 CO-MR GEN 2+ QS MG Day/night vision Clip-On system