Warning, Installing adapter brackets – Peerless-AV PLP-UNM-S - Installation User Manual
Page 3
3 of 5
ISSUED: 06-01-06 SHEET #: 202-9145-4 08-08-12
• Tighten screws so adapter brackets are firmly attached. Do not tighten with excessive force. Overtightening can cause
stress damage to screws, greatly reducing their holding power and possibly causing screw heads to become
detached. Tighten to 40 in. • lb (4.5 N.M.) maximum torque.
• If screws don't get three complete turns in the screen inserts or if screws bottom out and bracket is still not tightly
secured, damage may occur to screen or product may fail.
• This product is intended for indoor use only. Use of this product outdoors could lead to product failure and personal
injury.
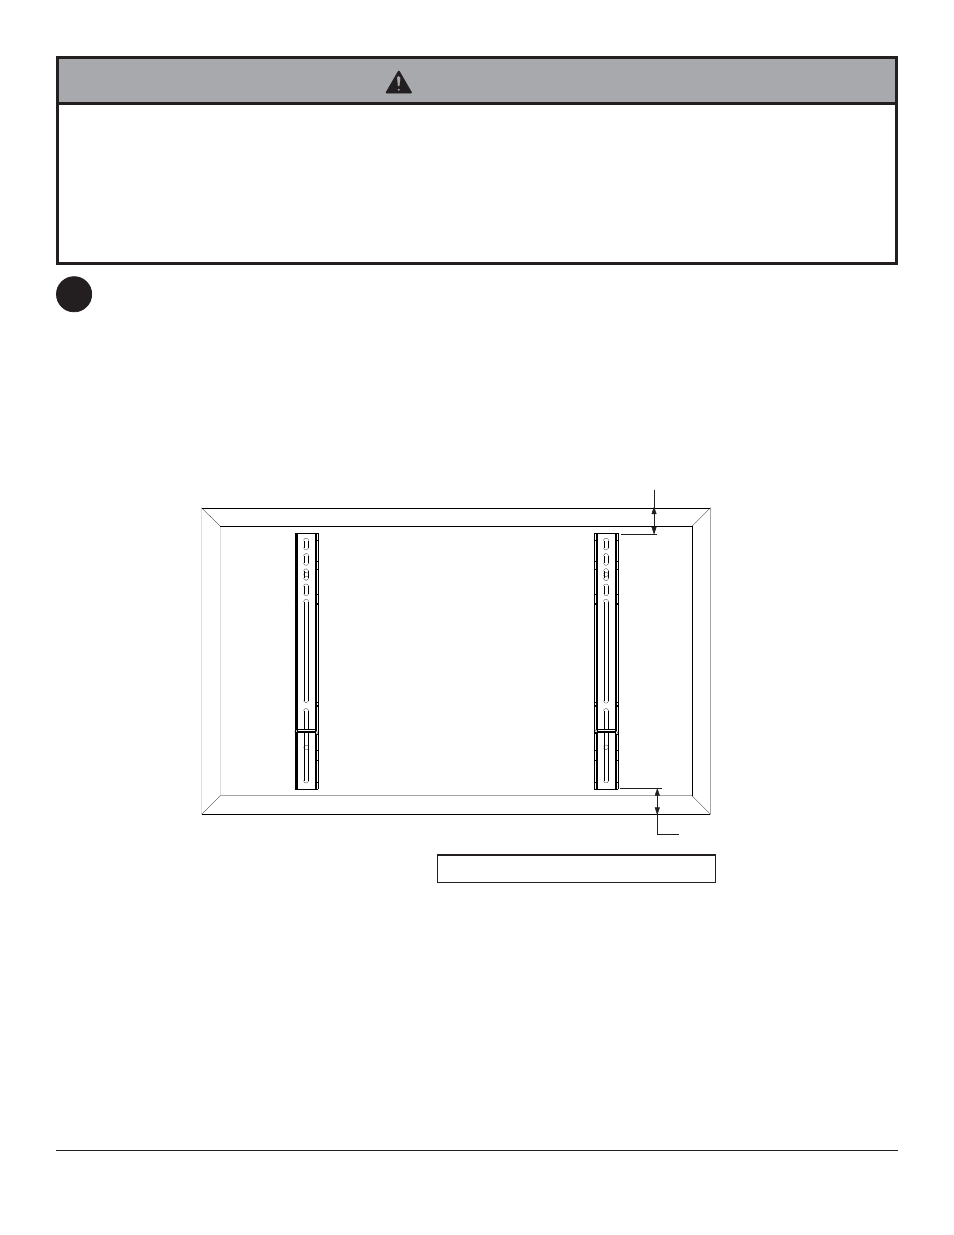
Installing Adapter Brackets
BB
CENTER BRACKETS VERTICALLY
ON BACK OF SCREEN
X
X
Notes:
• The number of fasteners used will vary, depending upon the type of screen.
• Washers and spacers may not be used, depending upon the type of screen.
1
WARNING
NOTE: For flat back screens proceed to step 1-1. For bump-out or recessed back screen skip to step 1-2.
To prevent scratching the screen, set a cloth on a flat, level surface that will support the weight of the screen. Place
screen face side down. If screen has knobs on the back, remove them to allow the adapter brackets to be attached.
Place adapter brackets (BB) on back of screen, align to holes, and center on back of screen as shown below. Attach
the adapter brackets to the back of the screen using the appropriate combination of screws, washers and spacers as
shown in figure 1.1 and figure 1.2.
NOTE: Top and bottom holes must always be used.
Verify that all holes are properly aligned, and then tighten screws using a phillips screwdriver.
NOTE: If using security screws, tighten using security allen wrench (CC).
NOTE: "X" dimensions should be equal.