Warning, Arm tension adjustment – Peerless-AV WL-SA761PU-200 - Installation User Manual
Page 22
22 of 23
ISSUED: 08-24-12 SHEET #: 180-9036-3 10-31-12
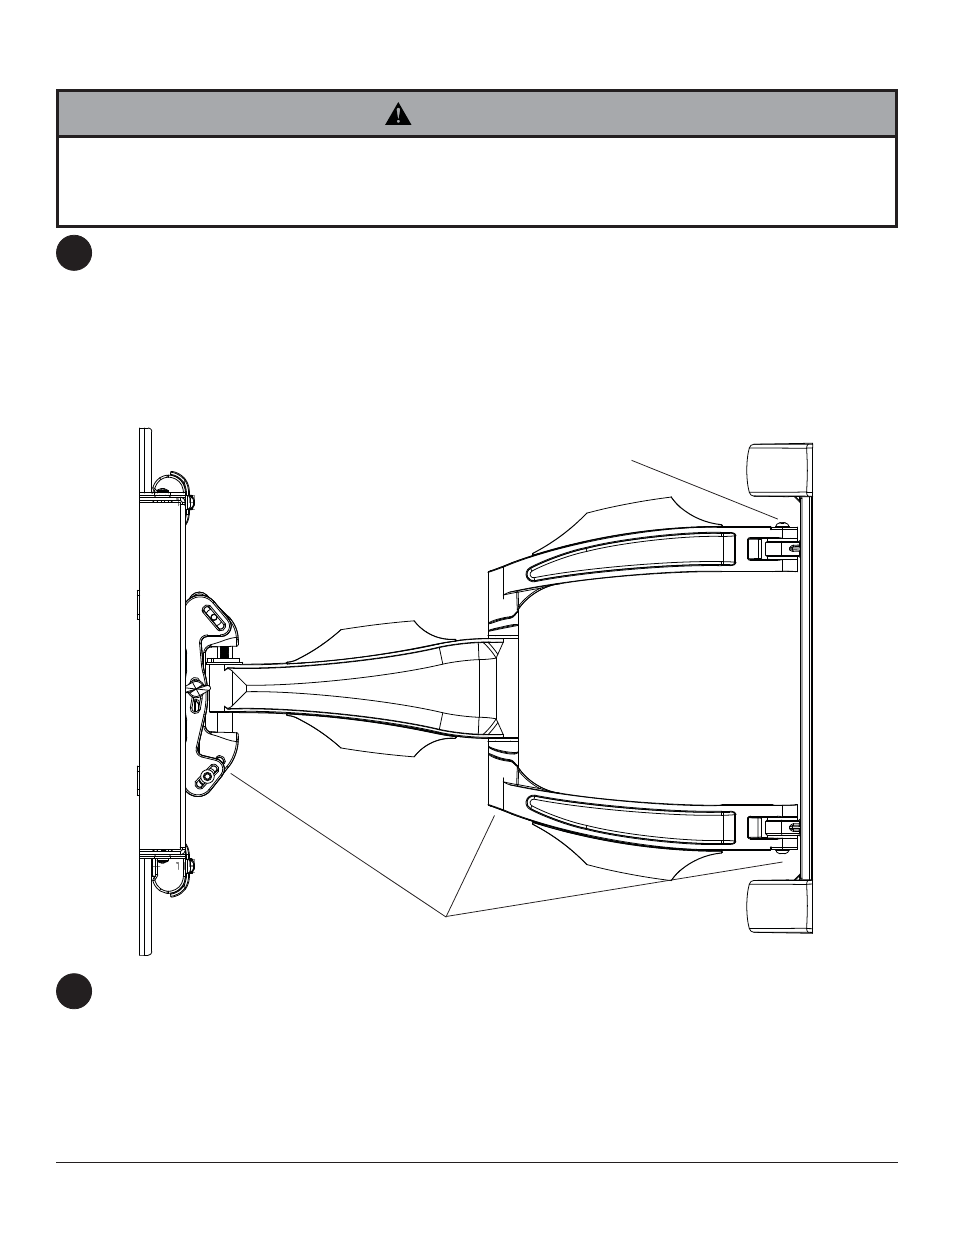
If more or less tension is desired in the arm pivot points, do the following:
• To increase tension, turn socket screw clockwise with 5mm allen wrench (I). NOTE: Tighten screws to
50 in • lbs (5.6 N.m.) maximum torque.
• To reduce tension, turn socket screw counter-clockwise with 5mm allen wrench (I). NOTE: Do not turn more
than half a turn.
24
• Do not remove screw or loosen screw until it is no longer engaged with the mount. Doing so may cause the display
to fall.
• If screws become loose over time, tighten screws as necessary. Tighten screws to 50 in • lbs (5.6 N.m.) maximum
torque.
WARNING
TENSION SCREWS
TENSION SCREW
Arm Tension Adjustment
© 2012 Peerless Industries, Inc.
Peerless-AV® is a registered trademark of Peerless Industries, Inc. All rights reserved.
All other brand and product names are trademarks or registered trademarks of their respective owners.
Plug extension cord into power source.
To complete the installation of your wireless mount, please refer to the HD Flow™ User's Manual and the HD
Flow™ Install Guide included.
25