Rf-tvmp40 tv wall mount, You’ll need, Step 7 - attach the arm assembly to the wall plate – RocketFish RF-TVMP40 - User Manual User Manual
Page 15
15
Need help? Call 800-620-2790
RF-TVMP40 TV Wall Mount
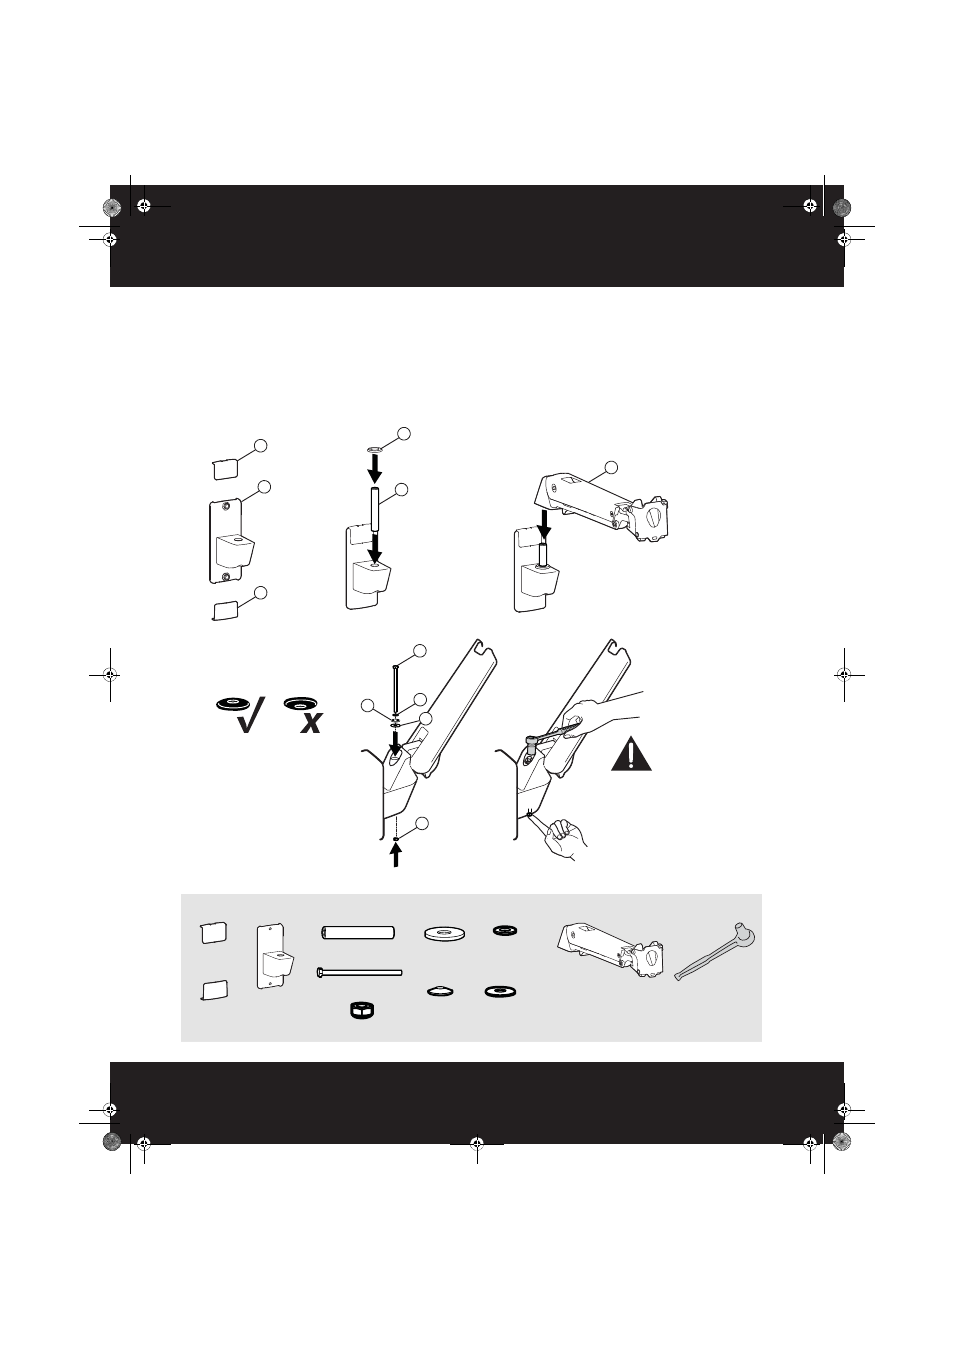
STEP 7 - Attach the arm assembly to the wall plate
1
Install the top and bottom covers (E) onto the wall plate (D).
2
Place the tubing (P-M) into the hole in the top of the wall plate (D), then place the 65mm washer (P-F) over
the tubing (P-M).
3
Place the arm assembly (A) onto the tubing (P-M) on the wall plate (D), then install the M8 HEX screw (P-K),
with the 16mm bearing (P-I), spring disk (P-H), and 25 mm washer (P-G)) through the tubing (P-M).
4
Install the M8 HEX nut (P-J) on the end of the M8 hex screw (P-K), then tighten with a socket wrench with a
13 mm deep socket. You can adjust the tension on this bolt to make the TV pivot more or less easily.
You’ll need
E
E
D
P-F
P-M
A
P-K
P-I
P-J
P-H
P-G
CAUTION! The
bottom nut will turn
when you adjust of
the top nut. DO NOT
apply any tool to the
bottom nut. Serious
damage to the arm
may occur if these
instructions are not
followed.
NOTE: The spring disk (P-H)
must be concave face down for
proper assembly.
D Wall plate (1)
P-K M8 HEX screw (1)
A Arm assembly (1)
E Wall plate
covers (2)
P-M Tubing (1)
Socket wrench
P-F 65 mm
washer(1)
P-I 16 mm
bearing (1)
P-H Spring
disk (1)
P-G 25 mm
washer (1)
P-J M8 HEX nut (1)
RF-TVMP40_13-0238_MAN_V1_ENG.fm Page 15 Monday, April 15, 2013 1:26 PM