Installation, Installation guide current monitoring h40 series – Veris Industries H40 SERIES Install User Manual
Page 3
Z205741-0D
Page 3 of 3
©2013 Veris Industries USA 800.354.8556 or +1.503.598.4564 / [email protected] 09131
Alta Labs, Enercept, Enspector, Hawkeye, Trustat, Aerospond, Veris, and the Veris ‘V’ logo are trademarks or registered trademarks of Veris Industries, L.L.C. in the USA and/or other countries.
Other companies’ trademarks are hereby acknowledged to belong to their respective owners.
Installation Guide
Current Monitoring
H40 Series
TM
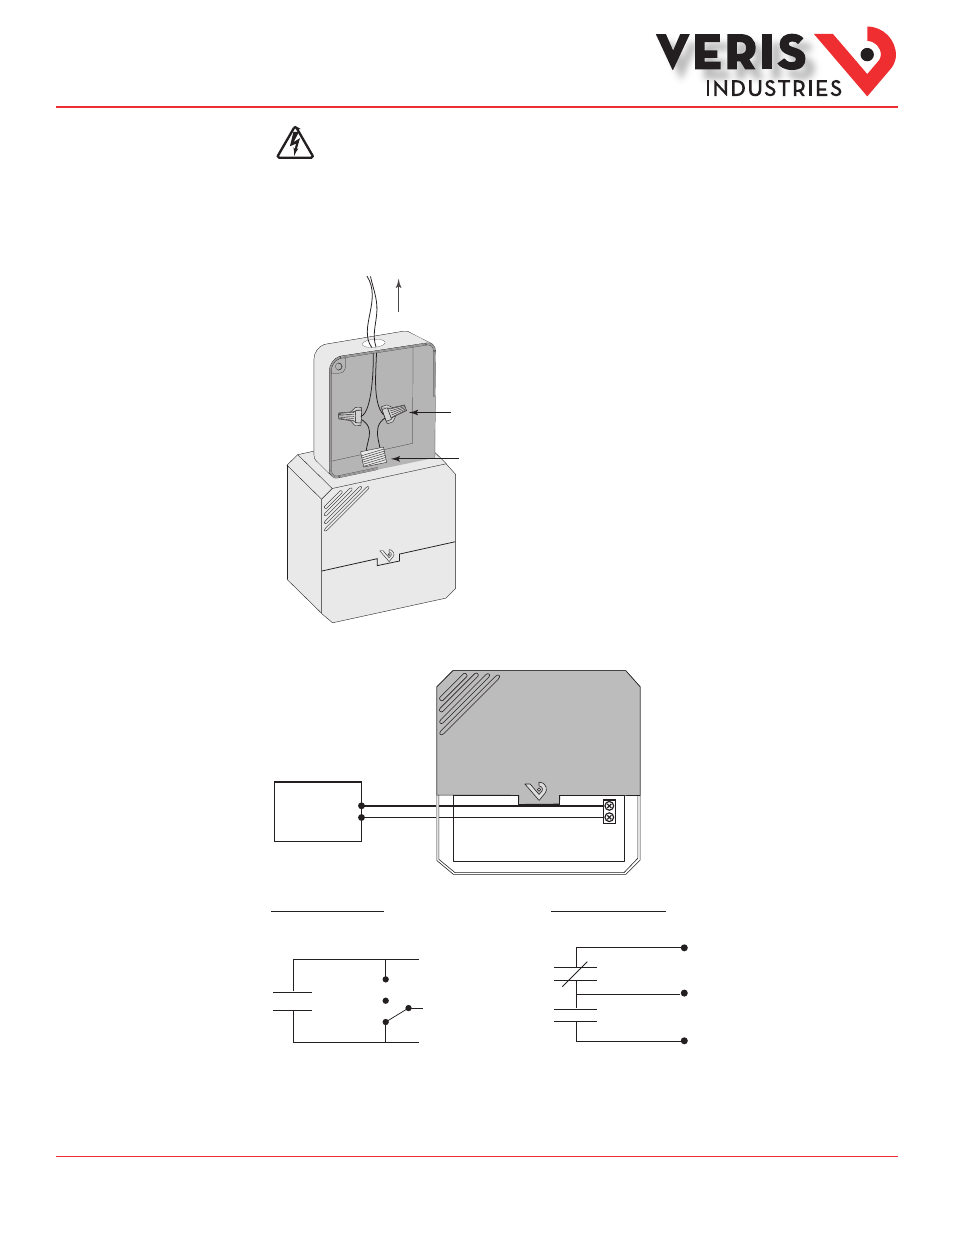
Disconnect and lock out all power sources.
1. Insert the ½” nipple into a knockout hole on a standard junction box. Use the nut (included) to ensure a secure fit.
2. Use a wire nut to connect the line side wires on the H40. The H40NEXA and H40BAXA have two high voltage wires (orange =
normally open, yellow = common), while the H40MEXX and H40AAXX have three (blue = normally closed, orange = normally
open, yellow = common).
To Motor
Wire Nuts
1/2” NPT
3. Use a flat screwdriver to open the low voltage compartment. Connect relay coil terminals to control wiring.
Controller
H40NEXA, H40BAXA H40MEXX, H40AAXX
Orange
Yellow
Hand
Off
Auto
Blue
Yellow
Orange
N.C.
Common
N.O.
4. Reconnect power.
5. Close low voltage lid.
Installation